Rules to Better Command Lines - 5 Rules
Enhance your command line utilities with effective design and organization principles. This collection of rules provides guidance on creating user-friendly interfaces, managing terminal sessions, and optimizing argument lists for improved functionality.
There should never be a command line utility without a UI. Take an example of Visual Studio 2008:
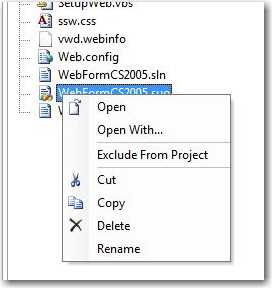
Figure: Bad example - In website project, Visual Studio does not have a UI for its command line 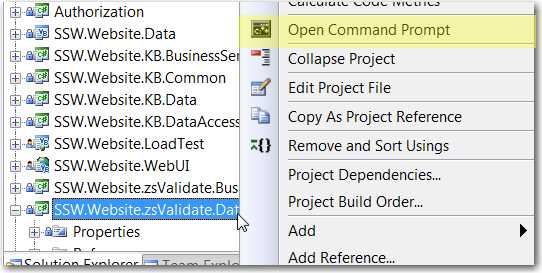
Figure: Good example - In web application project, Visual Studio provides a UI for its command line It is always a good practice to have UI opened when specifying
\[ApplicationName].exefrom command line. If the GUI is not done, show a messagebox "GUI coming...".Note: If you prefer for not putting UI as the default, it should have be at least "/GUI" as the argument. Do not use "/i", because too many command lines are using “/i” already.
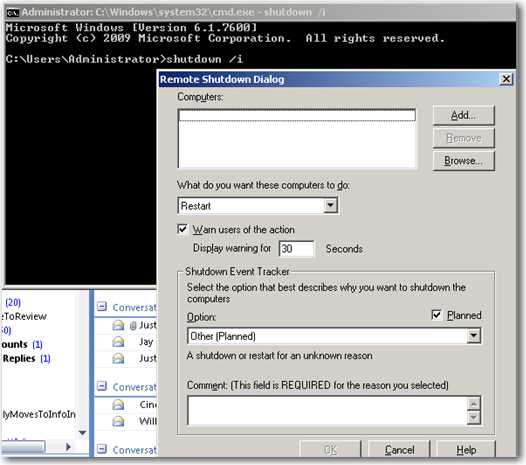
Figure: Bad example - /i should not be needed to get to the GUI – it should be by default 
Figure: Good example - UI is opened by default When you develop an application that supports command line, you must provide a list of arguments / help on how to use the application through command line.
It can be as easy as typing:
\[ApplicationName].exe /?for listing the arguments.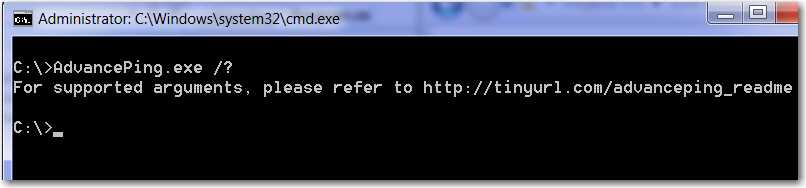
Figure: Bad example - Do no provide supported argument through /? 
Figure: Good example - Provide supported argument through /? When building command line applications in .NET, you need a framework that makes argument parsing, validation, and help generation simple and intuitive. Cocona is a lightweight and powerful framework that turns your C# methods into fully-featured CLI commands with minimal boilerplate code.
Cocona has many built-in features that make it feel familiar to .NET developers.
Why use Cocona?
Cocona offers several advantages over manual argument parsing or other CLI frameworks:
- Simple and intuitive: Transform regular C# methods into CLI commands
- Automatic help generation: Built-in help text and usage information
- Type safety: Strong typing for command parameters and options
- Dependency injection: Built-in DI container support
- Validation support: Integration with data annotations for parameter validation
- Async support: First-class support for async/await patterns
- Multiple commands: Easy support for sub-commands and complex CLI structures
Basic Example
Here's how to create a simple CLI tool with Cocona:
// Manual argument parsing - error-prone and verbose
class Program
{
    static void Main(string[] args)
    {
        if (args.Length == 0)
        {
            Console.WriteLine("Usage: myapp <name> [--greeting <greeting>]");
            return;
        }

        string name = args[0];
        string greeting = "Hello";

        for (int i = 1; i < args.Length; i++)
        {
            if (args[i] == "--greeting" && i + 1 < args.Length)
            {
                greeting = args[i + 1];
                i++;
            }
        }

        Console.WriteLine($"{greeting}, {name}!");
    }
}
Figure: Bad example - Manual argument parsing is error-prone and verbose.
using Cocona;

var app = CoconaApp.Create();
app.AddCommand("greet", (string name, string greeting = "Hello") =>
{
    Console.WriteLine($"{greeting}, {name}!");
});
app.Run();
Figure: Good example - Cocona simplifies command line argument parsing and usage. 😌
Validation
Cocona integrates seamlessly with data annotations for parameter validation.
using Cocona;
using System.ComponentModel.DataAnnotations;

public class FileProcessor
{
    public void ProcessFiles(
        [Argument] string inputPath,
        [Argument, StringLength(50)] string fileName,
        [Argument] string? optionalMetadata,
        [Option('o', Description = "Output directory")] string outputPath = "./output",
        [Option, Range(1, 10)] int threads = 1,
        [Option] bool verbose = false)
    {
        if (verbose)
            Console.WriteLine($"Processing {inputPath} with {threads} threads...");

        // Your file processing logic here
        Console.WriteLine($"Files processed and saved to {outputPath}");
    }
}

var app = CoconaApp.Create();
app.AddCommands<FileProcessor>();
app.Run();
Multiple Commands Example
For more complex CLI tools with multiple commands:
using Cocona;

public class DatabaseCommands
{
    [Command("migrate")]
    public async Task MigrateDatabase(
        [Option] string connectionString,
        [Option] bool dryRun = false)
    {
        Console.WriteLine($"Migrating database (dry run: {dryRun})...");
        // Migration logic
    }

    [Command("seed")]
    public async Task SeedDatabase(
        [Option] string connectionString,
        [Option] string dataFile = "seed.json")
    {
        Console.WriteLine($"Seeding database from {dataFile}...");
        // Seeding logic
    }
}

var app = CoconaApp.Create();
app.AddCommands<DatabaseCommands>();
app.Run();
This creates a CLI with commands like:
myapp migrate --connection-string "..." --dry-runmyapp seed --connection-string "..." --data-file "custom.json"
Integration with Dependency Injection
Cocona works great with .NET's built-in dependency injection:
public class EmailCommands
{
    private readonly EmailService _emailService;

    public EmailCommands(EmailService emailService)
    {
        _emailService = emailService;
    }

    [Command]
    public void Send(string to, string subject, string body)
    {
        _emailService.SendEmail(to, subject, body);
    }
}

var builder = CoconaApp.CreateBuilder();
builder.Services.AddTransient<EmailService>();
builder.Services.AddLogging(b => b.AddConsole());

var app = builder.Build();
app.AddCommands<EmailCommands>();
app.Run();
For more information, visit the Cocona GitHub repository.
Tip: Improve your CLI tool's UI with tools like Colorful.Console for colored output, or Spectre.Console for rich terminal applications.
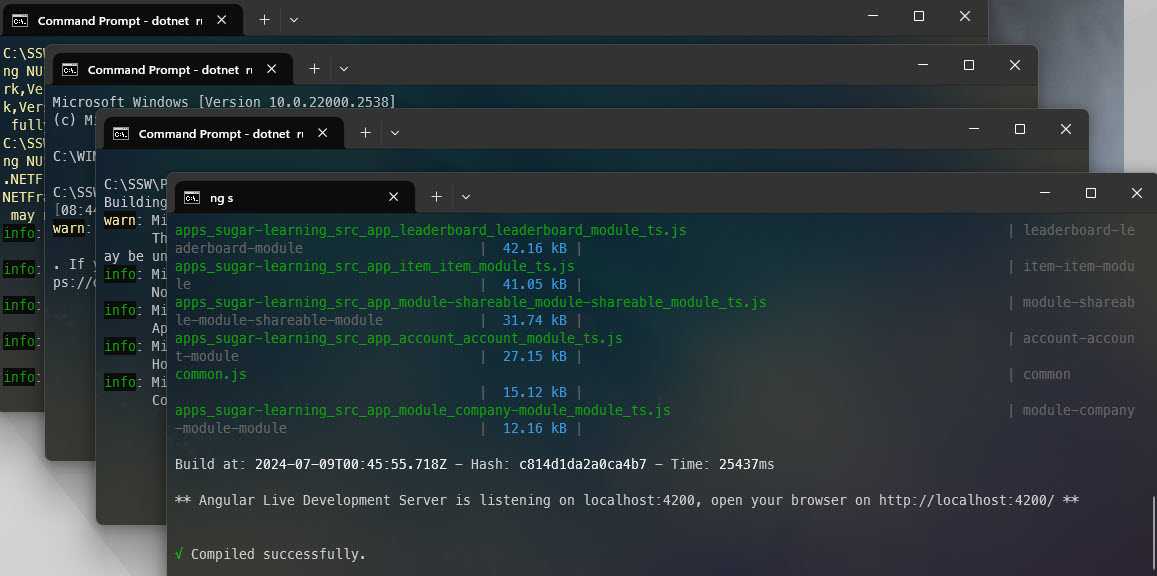
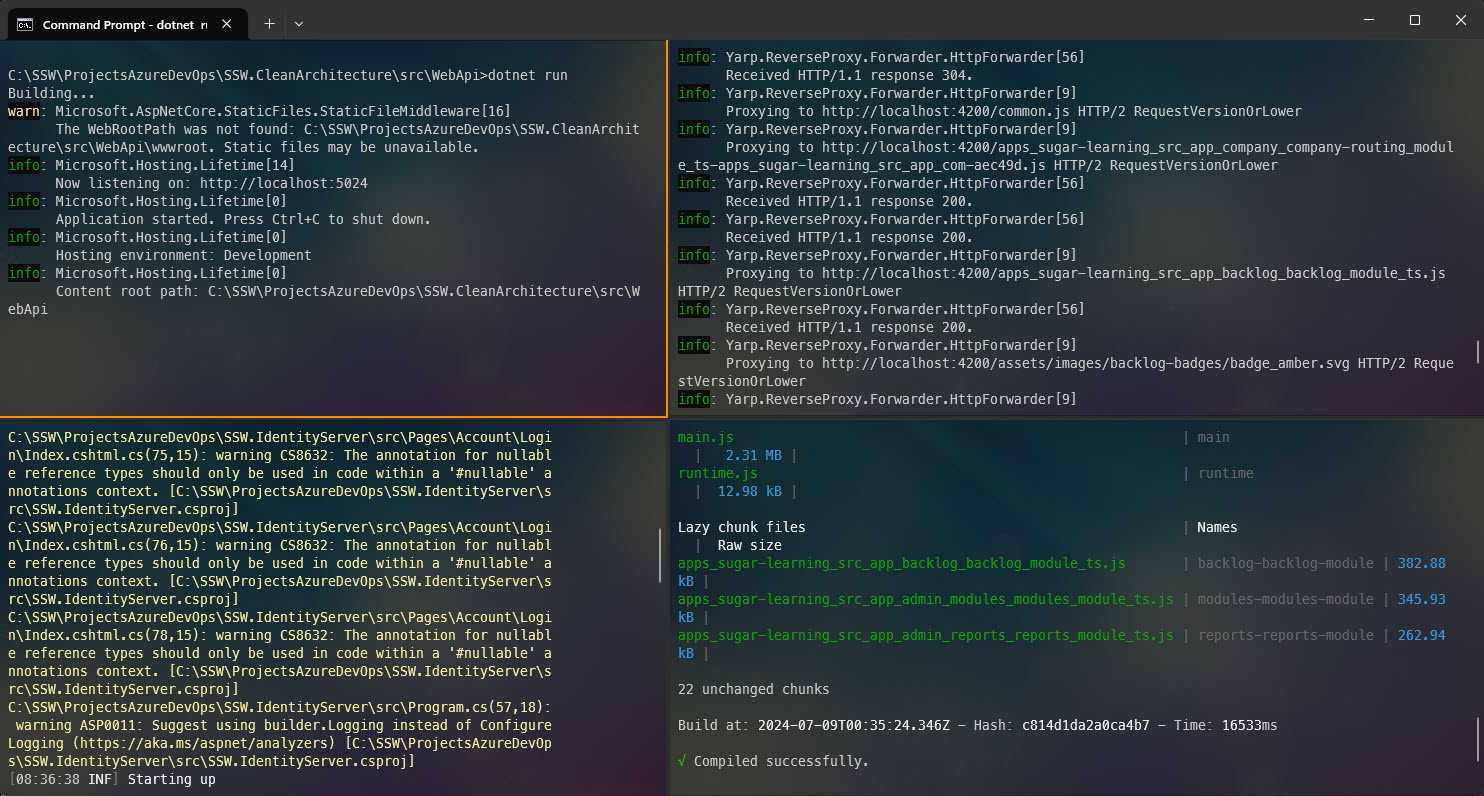
Windows Terminal is a modern terminal application that allows users to manage multiple command-line tools from a single interface. One standout feature is the ability to split the main window into multiple panes, enabling the running and viewing of multiple sessions side by side within a single window.
This feature serves as an alternative to having multiple terminal windows open simultaneously. Panes help keep everything in one place, making it simpler to navigate between different sessions.
Figure: APIs and front-end applications running in different windows 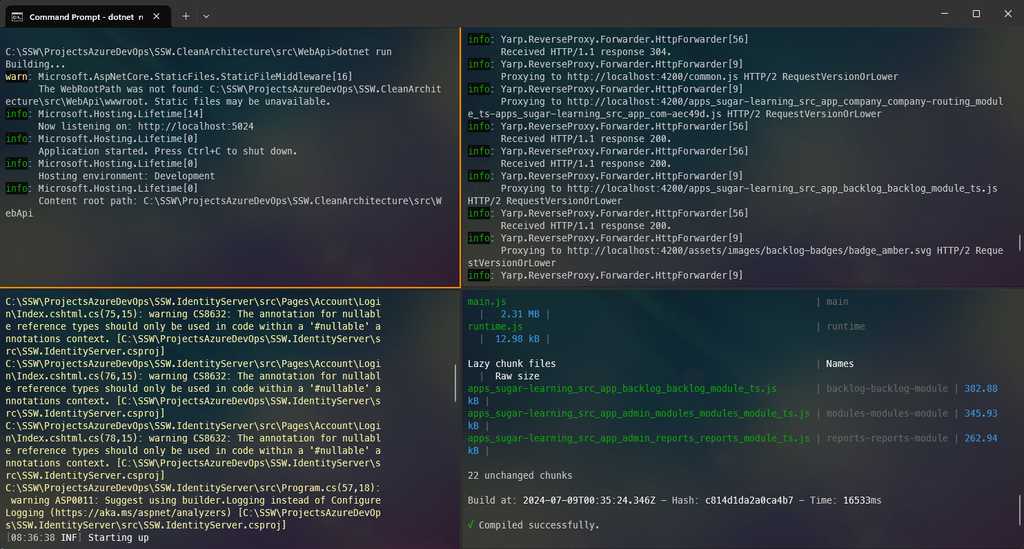
Figure: APIs and front-end applications running in panes Use cases:
- Monitoring different processes simultaneously
- Running multiple projects locally
- Executing commands concurrently
Main shortcuts:
- Alt + Shift + +: to split the pane vertically
- Alt + Shift + -: to split the pane horizontally
- Alt + Shift + W: to close the pane
- Alt + Arrow: to move between panes
- Alt + Shift + Arrow: to resize a pane