Rules to Better SharePoint Migration from 2007 to 2010 - 12 Rules
Since 1990, SSW has supported the developer community by publishing all our best practices and rules for everyone to see.
If you still need help, visit SharePoint Server Consulting and book in a consultant.
Migrating from SharePoint 2007 to SharePoint 2010 can be a daunting task, but if you follow this guide you will be able to migrate with minimum problems.
These rules focus on migrating from a single server configuration of SharePoint 2007 to a single server configuration of SharePoint 2010. We will assume your SharePoint 2007 server has the DNS of sharepoint.northwind.com
Do you agree with them all? Are we missing some? Email us your tips, thoughts or arguments. Let us know what you think.
In SharePoint 2007, it is a good idea to add the path to stsadm.exe into the environment variables on a SharePoint server so you can open a command prompt and run the tool from anywhere.
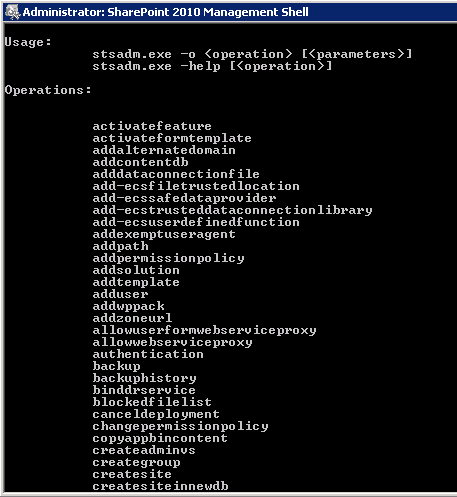 Figure: you should be able to quickly type ‘stsadm’. Believe me you will be typing it enough! In SharePoint 2010, you can skip quite a few steps by using the PowerShell Console.
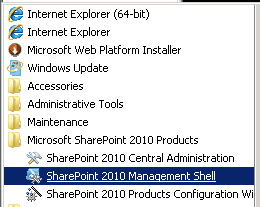 Figure: Using SharePoint 2010 Management Shell
More Information for SharePoint 2007
-
In the start menu type Edit the system environment variables and run the tool
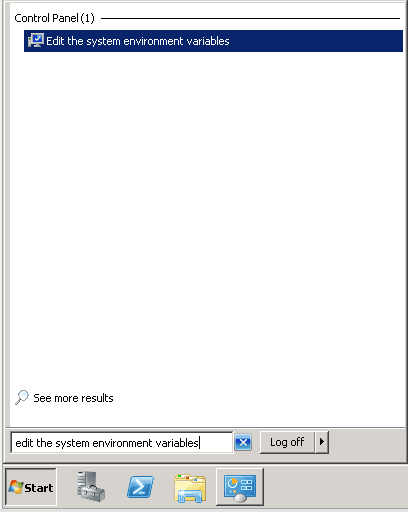
Figure 1 - Search for "Edit the system environment variables” in the Start Menu
-
In the System variables section, select Path and click **Edit **
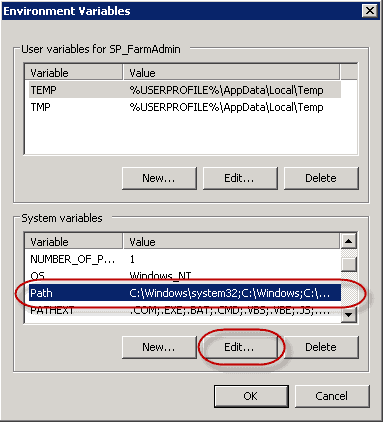
Figure 2 - Under System Variables | Select Path | Click Edit - Add the path at the end of the Variable Value 1. For a SharePoint 2007 Server, enter: ;C:\Program Files\Common Files\Microsoft Shared\Web Server Extensions\12\bin
- You may need to reboot the server
- You can now run stsadm from anywhere in the command prompt
-
You all know about a web master, the central point of contact if the website goes down. You should know about Schema Masters for Database Design. SharePoint should be no different.
The SharePoint master should be your companies SharePoint expert. All major changes to the SharePoint servers should be run by the SharePoint master including:
- Deploying or removing solutions and features
- Creating web applications
- Migrations
It is a good idea to run a pre-migration check on the SharePoint 2007 before starting the migration process.
- Check you have followed Do you add stsadm to the environmental variables?
- Open up cmd with Administrator privileges
- Run the following command: **stsadm –o preupgradecheck
**
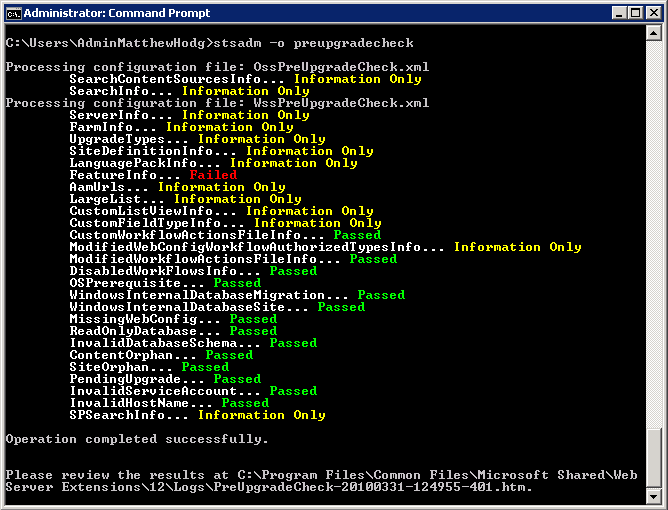 **
Figure 3 - Check the pre-migration report. The only thing that is allowed to fail is “FeatureInfo”. This is because a custom feature won’t migrate and developers need to create a build targeted for SharePoint 2010 ** 4. Save the HTML file that was generated and email it to your companies SharePoint Master. (Don’t print it as its very large) 5. Have the SharePoint Master sign off on the pre-migration check and inform you if there are any site collections or content sources that are no longer needed and can be ignored for migration
**
Figure 3 - Check the pre-migration report. The only thing that is allowed to fail is “FeatureInfo”. This is because a custom feature won’t migrate and developers need to create a build targeted for SharePoint 2010 ** 4. Save the HTML file that was generated and email it to your companies SharePoint Master. (Don’t print it as its very large) 5. Have the SharePoint Master sign off on the pre-migration check and inform you if there are any site collections or content sources that are no longer needed and can be ignored for migrationWhen you move to SharePoint 2010, nothing is to unexpectedly disappear. So prior to the migration, you need to find out which solutions you currently have installed and decide if you will be installing them on the new server.
- On the SharePoint 2007 Server, open Central Administration and go to Operations | Solution Management
- Copy the Solution Name, Status and Deployed To into the following table. This will ensure you deploy all the solutions you had on your old server to the SharePoint 2010 server
- Cross out any solutions that you will not be migrating
- Get the SharePoint master to sign off on the solution list
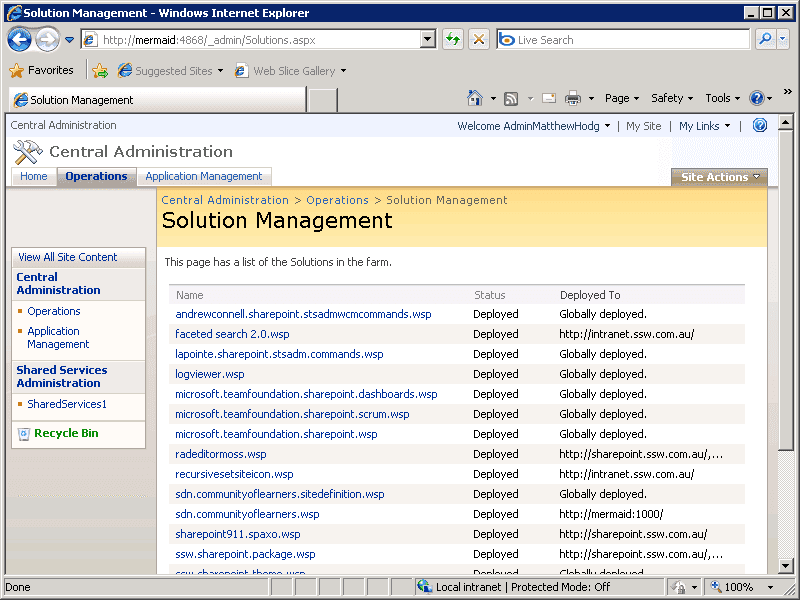 Figure: Have your SharePoint Master confirm if all these solutions are to be migrated
When you move to SharePoint 2010, you will need to know the settings you had on your 2007 server.Therefore document all the settings from the SharePoint 2007 server, that you will need to re-create on the SharePoint 2010 server.
Fill in the following table. You will use this later when creating the new web application in SharePoint 2010.
SharePoint 2010 Web Application Option Where To Find This In SharePoint 2007 Answer Authentication Provider Use classic unless you know you need **claims based authentication ** Note: this is a new feature in SharePoint 2010. New IIS website Name Application Management Web application list Port Application Management Web application list Port number will be listed on end of URL (if nothing its port 80) | || Host Header | Application Management | Web application list | URL Field if a DNS name is used (not just the NetBIOS name). If a DNS name is NOT used, leave this blank. | | | Authentication Provider | Application Management | Authentication Providers | (Click On the default zone if applicable) | IIS Authentication Settings field. | | | Allow Anonymous | Application Management | Authentication Providers | (Click On the default zone if applicable) | Anonymous Access field. | | | Use Secure Sockets Layer | Check whether the SharePoint site URL like “ https ://***” | | | Public URL | Automatically updated from Host Header | | | Application pool name | Leave defaults | | | Security account for this application pool | Leave defaults | | | Database Name | Zz the database name so you know this will be replaced (read zzOldFiles)
| |
You should have at this point, either:
- Installer packages from 3rd Party Vendors for installing their custom solution or,
- WSP packages from 3rd party, or built from your own source code, or extracted using the Export Method (not recommended)
You can add the WSP package solutions to the new server by:
- Open up cmd with Administrator privileges
- Enter your C:\SharePointCustomizations folder\
cd C:\SharePointCustomizations - Use stsadm to import the solution to your new server
Stsadm –o AddSolution –filename NameOfSolution.wsp - Make sure there are no errors when the command runs
We are now ready to make a new web application and site collection which we will need to match closely to the original SharePoint 2007 server. In the SharePoint 2010 server:
- Open SharePoint Central Administration | Manage web applications
- Click on New
- Enter in the details for the web application using the document from the rule Do you document the details of your SharePoint 2007 web application?
- Go back to SharePoint Central Administration | Create site collections
- Fill out the form to create a new site collection – the only option that is important here is to create a site collection that matches the site collection you will be migration. Eg: If the site collection you are migrating is a Team Site, make a site collection that is a Team Site.
Note: The rest do not matter as they will be replaced when you restore the database from SharePoint 2007.
Solutions must be deployed to the new site collection before the content database is resorted to the SharePoint 2010/2013/2016 server:
- Open SharePoint Central Administration | System Settings | Manage Farm Solutions
- Click on Deploy Solution
- Refer to the table you completed in the rule Do you confirm your list of installed Solutions and deploy the solutions to the same site collections they were deployed to on the SharePoint 2007/2010/2013 server.
Even though you have advised staff members a migration is taking place – you can guarantee someone will try to check-in or edit documents. The best way to prevent this is to put your content database into read-only mode, locking the content database.
There are two options to lock the content database.
Option 1 ( Recommended ):
- Open SharePoint Central Administration site, navigate to "Application Management " | "Site Collections " | " Configure quotas and locks ".

- Select the "site collection" which you would like to lock.
- Choose "Read-only (blocks additions, updates, and deletions)", then click "OK".
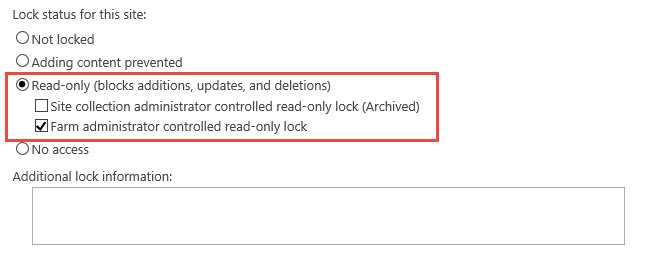 Note: Read more at Manage the lock status for site collections in SharePoint 2013
Option 2 ( not recommended ):
 - On your database server open SQL Server Management Studio
- Right click on the content database associated with the site collection you're migrating | Properties
- Choose Options | Scroll to the bottom of the options list
- For the Database Read-Only choose True
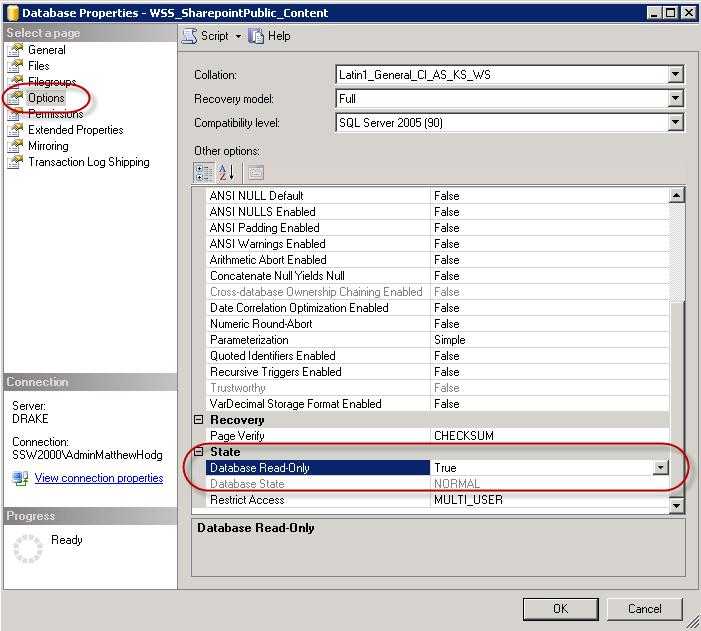
Figure - Database Properties | Options | Database-Read Only - Now it’s safe to take a backup of your content database
NOTE: When some SharePoint timer services are run it may cause the site to display errors when the database is in read-only mode
- Open SharePoint Central Administration site, navigate to "Application Management " | "Site Collections " | " Configure quotas and locks ".
This is the meat of the migration process. First we need to detach the current content database from the Web Application:
- On the SharePoint 2010 server, open SharePoint Central Administration | Application Management | Manage Content Databases
- Set the Database Status to offline | tick Remove content database
- Open SQL Server Management Studio and delete the database you just removed from the web application
Now we need to attach the database backup we took of our SharePoint 2007 server:
- In SQL Server Management Studio right click on Databases | Restore Database...
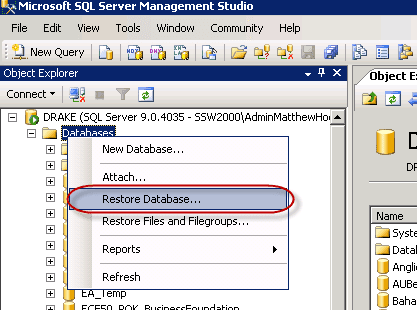
Figure: Select “Restore Database - Follow the prompts to restore your database
- Take the database out of read only mode (it will be in read only mode because we backed it up in read only mode)
Now we need to attach the content database to the web application:
- Open up the SharePoint 2010 Management Shell with administrative permissions.
- Run the following command to attach the database to the web application (replacing the red text to match your environment)
stsadm –o addcontentdb –url http://sp2010rc/ –databaseserver <DatabaseServerName> –databasename <ContentDatabaseName>- After the database has been restored you will get a status message telling you how the upgrade went, with the path to a log file. Send this file to the SharePoint developers to determine if any issues occurred during the migration
After the database has finished being attached to the web application you will get a log file with information about the import process.
-
Open up this log fine and pay special attention to any lines with [ERROR] .
- Note #1: The most common reason for errors is that you have forgotten to activate a feature.
- Note #2: If you have your own custom solutions, show this file to your developers to ensure it isn’t your custom solution causing the errors.
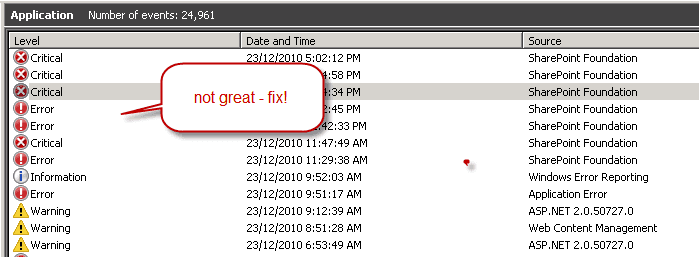
- Check your Application Event log after migration for errors related to your SharePoint Web Application, and fix these accordingly.
-
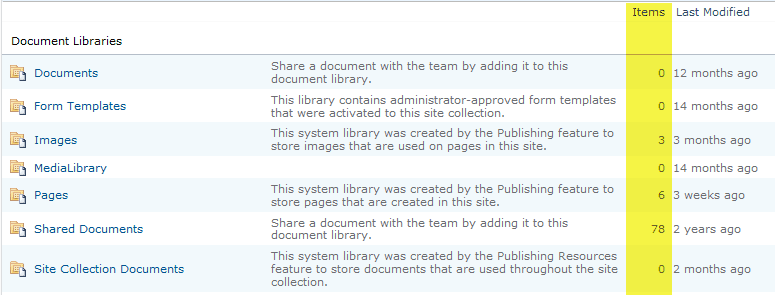
After you have finished migrating the database, it is extremely important to verify that no data has been lost in the move. The quickest way to do this is to compare the SharePoint 2007 and the SharePoint 2010 server All Site Content pages and confirm that the item numbers match:
Figure 7 – In the "All Site Content" pages library, ensure the ‘item’ numbers exactly match between SharePoint 2007 and SharePoint 2010
- Look at your report from the SharePoint 2007 server
- On the SharePoint 2010 server, open the site collection you just migrated to
- Select Site Actions | Site Settings
- Select All Site Content
- Compare item numbers with 2007
Repeat this process for all sub-sites of the site collection you migrated.
