Rules to Better SharePoint Migration from 2016 to Online - 6 Rules
For a successful migration from SharePoint 2016 to Online, it's essential to develop a detailed migration plan and prepare adequately before the migration. Check the audit log for modifications, utilize tools like Sharegate to avoid errors, and know the steps to take after migration to ensure everything runs smoothly.
During the migration the site can't be locked if you are using Sharegate, there is a chance that employees will ignore the instructions in the ribbon and still make changes.
Furthermore, they might also be automated processes that are putting records in your old SharePoint Server.
So to ensure the migration process did not miss any items, ensure nobody modified documents on your old Intranet SharePoint Server. To do that:
- Navigate to "Site Settings" | "Audit log reports" which will take you there:
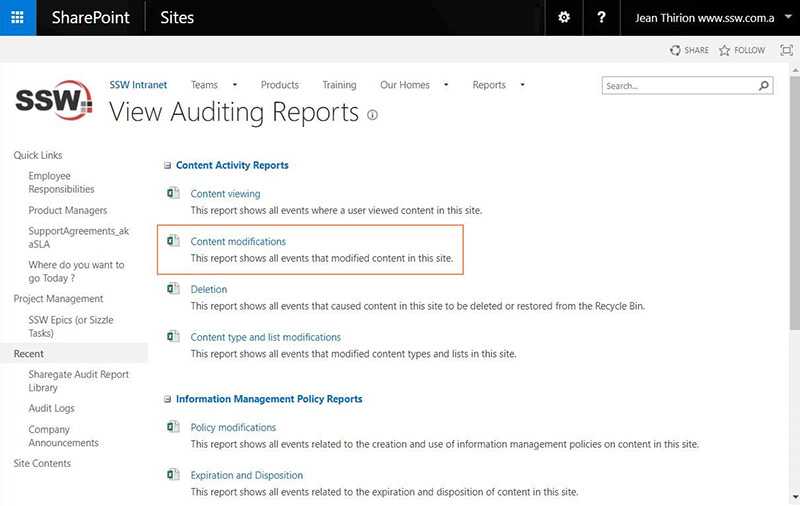
Figure: check nobody was modifying the intranet during the long migration - Click "Content Modifications"
- Order the generated Excel data by modification date ("Occurred" ) and look for modifications done by users.
-
Chase the people who did the modifications and ask them either to:
- Redo their modification in your new Cloud intranet (likely)
- Confirm that the modification is not important and does not require manual migration (less likely)
To: John Cc: YYY Subject: Changes to yyy file Hey John
I have noticed that you changed the file “yyy” [add link to the file].
Could you please:
- Let me know what were the changes?
- Tell me why you did these changes (task, etc...)?
Please note that these changes will be lost as part of the old SharePoint server decommission. If the changes are important, please redo the modifications on the new Online Intranet.
Regards,
- SharePoint Admin Team
After you export to Excel, follow this example:
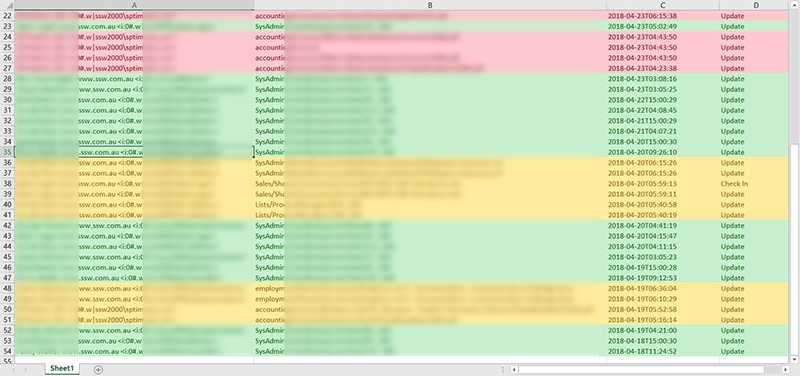
Figure: Modifications are done on the old SharePoint intranet during the migration process (hence not migrated to the cloud) - Green: non-important data (automated logging info) - ignore
- Orange: potentially important data (user made changes) – ask the user
- Red: critical data (invoices !) – Migrate these documents
At a high level, the plan is:
- Choose your SharePoint Online Plan (for most companies already included in o365 plan)
Compare SharePoint Online options
- Choose a migration tool to help you migrate the content online
i.e. at SSW we use Sharegate
- Install the migration tool
- Migration tool - Configure connections to your source and target SharePoint site collections
-
Migration tool - Migrate your content
- Structure migration and content (dry-run)
- Analyse result reports
- Fix potential errors and warnings (repeat until you get to zero - see rule #2)
- Structure migration and content (for real)
- Remove permissions on your on-premises SharePoint site(s) and give access to SharePoint Online
- After a week, decommission your on-premises farm
Even if you get rid of unsupported content before migration, your first dry-run migrations are very likely to include errors. Here are the most common errors and how to fix them.
Document ID Service
Error: Document ID Service feature cannot be automatically activated. Please activate the feature manually from the Site Collection Administration page.
Solution: Active Document ID feature on SharePoint online (target).
Source: https://support.share-gate.com/hc/en-us/articles/115000643448
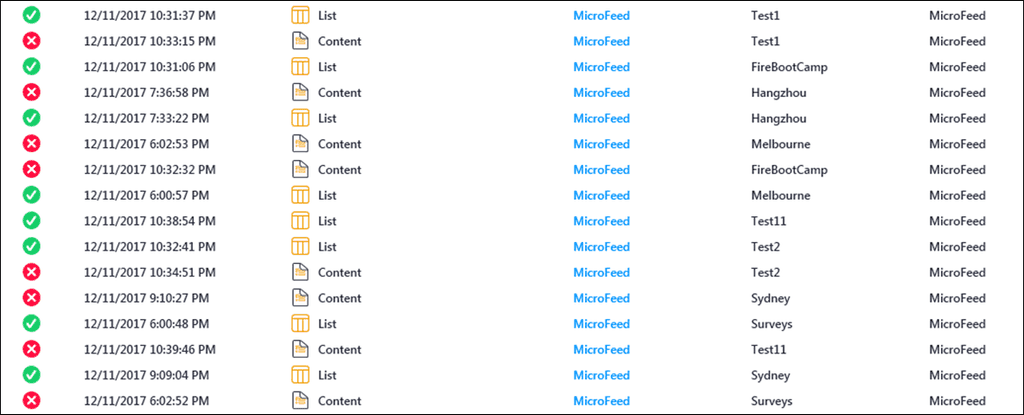
MicroFeed
Error: Copying the content from a MicroFeed list is not supported. Copying the content to a MicroFeed list is not supported.
Solution: Clean up all “MicroFeed" lists as they are not supported to be migrated to the cloud.
Source: https://support.share-gate.com/hc/en-us/articles/115000600227
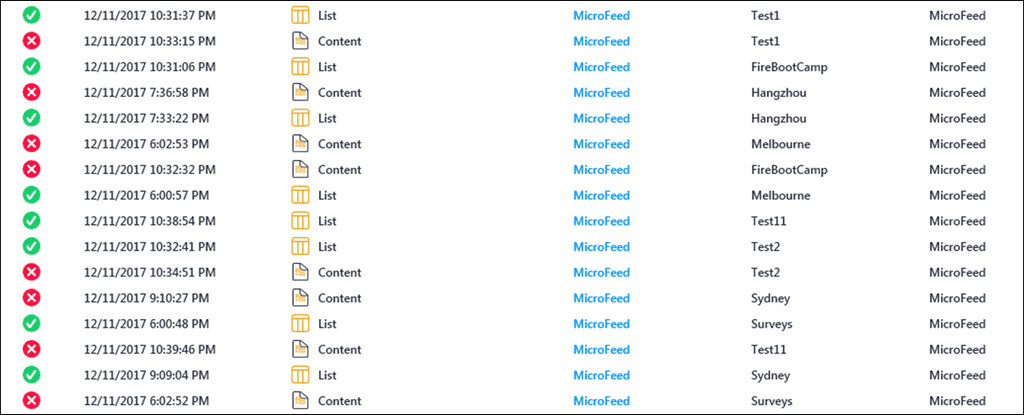
Figure: errors due to micro feed migration Lookup fields
Error: Property Receipt: The following values are unavailable: 'XXXXX'. Please specify another value.
Solution: Disable circular references for lookup fields.
Calculated columns
Error: The formula of a calculated column cannot contain volatile functions like Today and Me.
Solution: Remove Calculated columns using “Me" or “Today" markups (unsupported)
External Content Types
Error: Entity (External Content Type) cannot be found with Namespace = 'xxxxxxxxx', Name = 'xxxxx'.
Solution: Enable/Configure External Content Types if needed on destination (target) .
Orphan users
Error: Property 'xxx': The following users and groups were not found: XXXXX The current user has been assigned.
OR
Property Target Audiences: The Target Audience 'xxxxxxxxxxxxxx' could not be found.
Solution: The error won't stop the migration of the item, but to get rid of it, the missing user needs to be present in target directory (it can be disabled though).
Too many Requests
Error: The remote server returned an error: (429).
Solution: Re-run content migration migrate them. Big items are likely to give this error multiple times. If this happens, simply use content migration for these specific items on a separate migration task.
Custom pages
Error: Warning for version 1.0: Unable to convert WebPart: The content of the WebPart is not in a WebPart Zone for page 'xxxxxxxxxxxxxxxxxxxx'.
OR
Error: Unable to recover source WebParts: You are not authorized to perform the requested operation.
OR
Error: This page contains WebParts for which the correct zone could not be found. They have been assigned to the default zone, and may need to be edited manually.
Solution: Get rid of SharePoint Designer customization on webpart pages.
Managed metadata
Warning: This item has values in managed metadata columns which are not supported by the Insane Mode.
Solution: Remove managed metadata on folders.
ASPX Pages
Warning: The Insane Mode does not support copying ASPX pages. The copy will continue without using Insane Mode.
Solution: you should manually check ASPX pages for errors after migration.
There are certain features in SharePoint on-premises that are no longer supported with SharePoint Online.
If you migrate using the Sharegate migration tool, you want to have zero errors in their reports. To do so, here are what you should do before considering migration:
- Get rid of SharePoint Designer customizations on List form
Remove unsupported columns such as:
- Publishing HTML
- Publishing Hyperlinks
- Calculated Columns with volatile functions ('Me', 'Today'…)
- Managed Metadata columns on folders
- Get rid of MicroFeed
Before migrating your content over SharePoint Online, you want to get rid of unused or old content. Migration is the perfect time to audit your content and delete what you can. You may also use the migration to identify (and get rid of) Orphan Users, and Documents with Custom permissions (look for SharePoint best practices on permissions).
Use the Sharegate migration tool to generate reports on your site collections and sites, so you can easily identify problems. Reporting tool comes with a lot of out of the box reports, and you can even create custom ones.
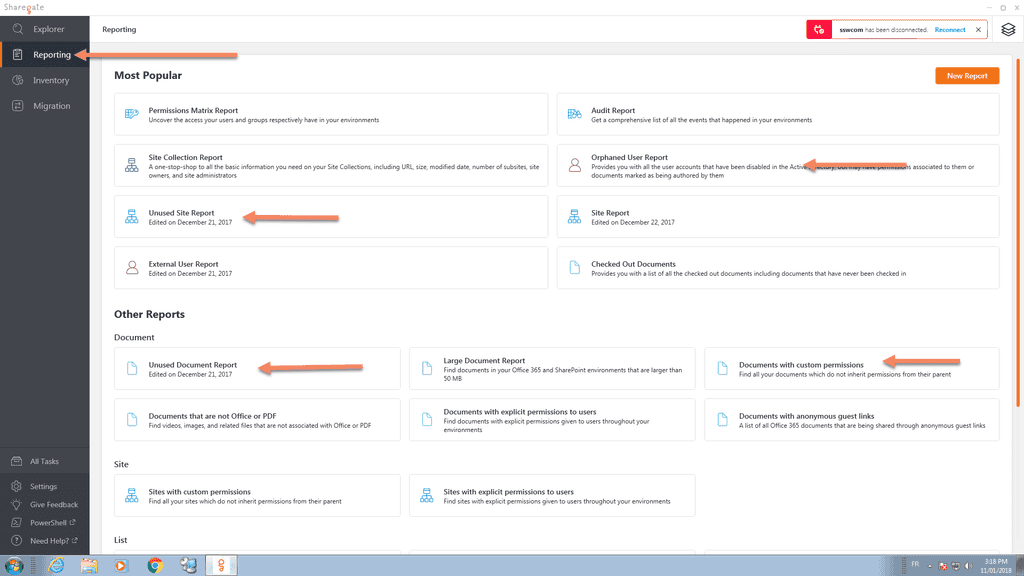
Figure: Sharegate reporting menu have 4 main reports Once identified, check with Site Owners to ensure the content can be deleted. Alternatively, if you don't want to delete content, you can zz it.
Ideally, before migration starts, you should put your source sites to read-only mode using "site collection lock". But if you cannot put your source sites into read-only mode due to some reasons (e.g. migration tool needs to write auditing logs), then at least put a notification bar on the top of your site to prevent users editing it during the migration.

Sharegate supports 'Pre-check' before kicking off the real migration, it can tell the potential errors. For example, you might have orphen users do not exist in Office 365, which you might have to temporarily enable to ensure the "Created By" and "Modified By" user info is correctly migrated for ASPX pages (ASPX pages do not support insant mode).
Although Sharegate migration tool works very well to help you with your SharePoint migration, some manual steps might be necessary to complete the migration. These extra steps include:
- Configuring any custom Search scopes/refinements
- Remove permissions from On-premise Intranet (or turn it to Read-Only)
- Ask users to change their mapped folders
- Communicate about the changes
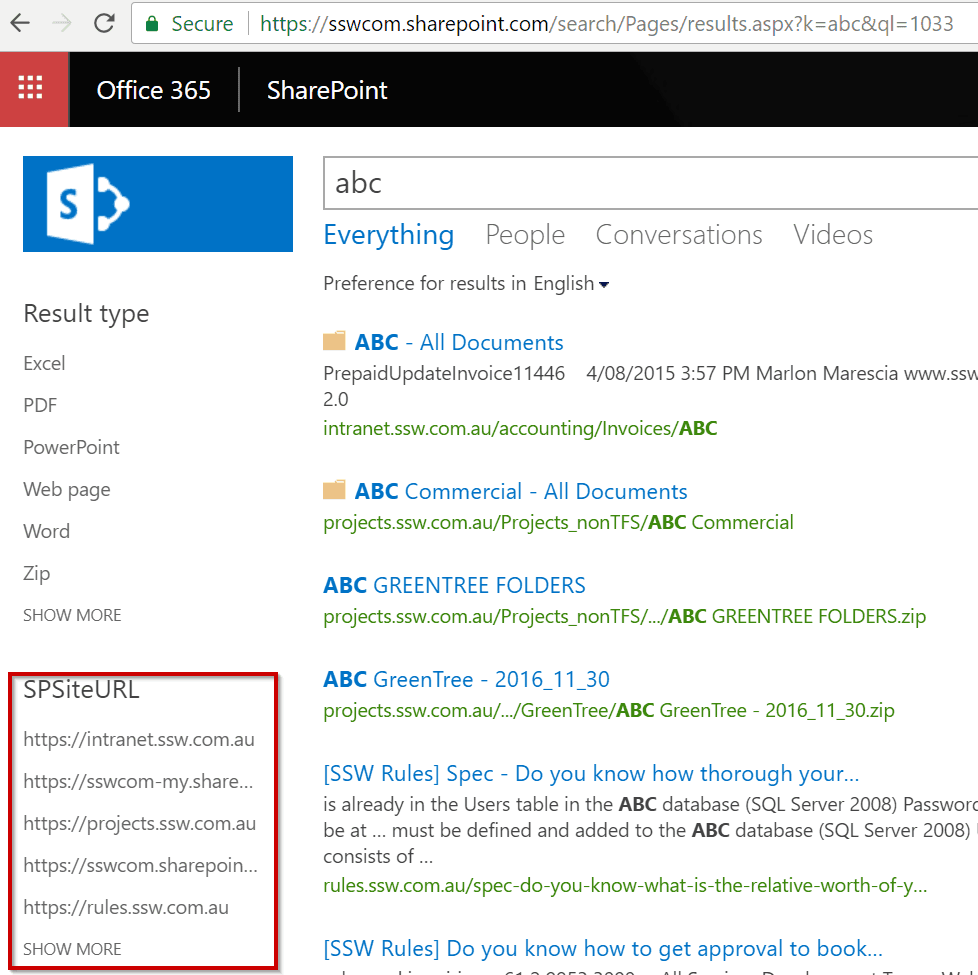
Figure: After migration set your custom refinements so users can filter down into a specific area
