If you want to track appointments and emails in Microsoft Dynamics 365 (CRM), you first need to set up your mailbox in the system.
Do the following:
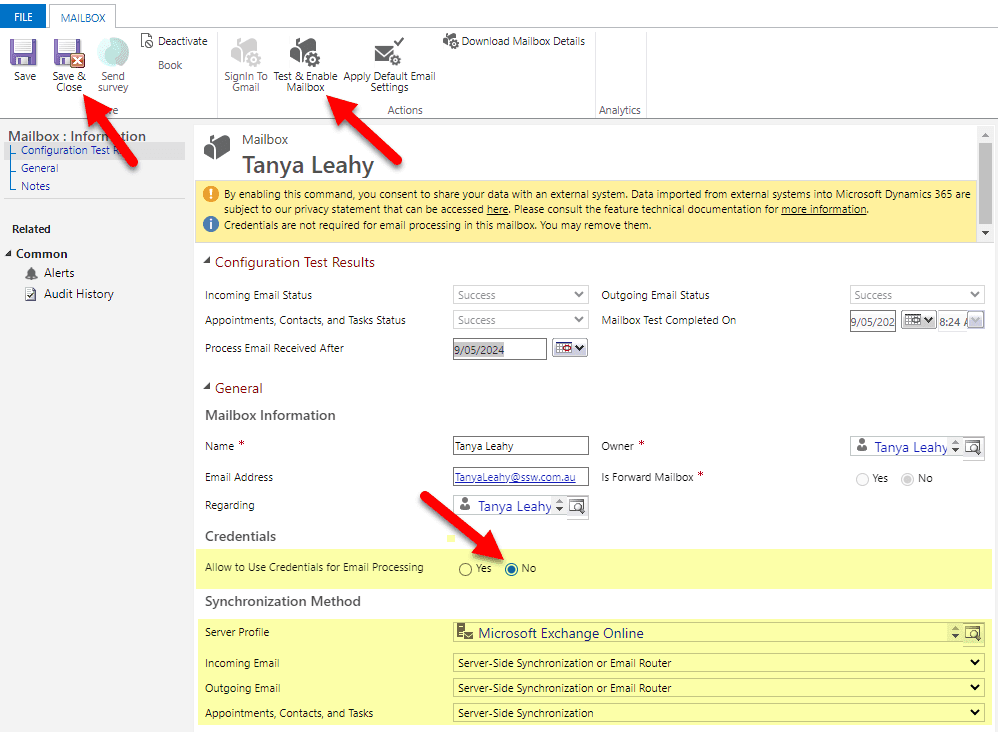
- Browse to your Dynamics 365 Online URL | Advanced Settings | Settings | Email Configuration | Mailboxes | Browse for your mailbox:

-
Make sure the following options are set (they might differ a bit depending on your CRM configuration):
- Allow to Use Credentials for Email Processing: No
- User Name:
UserName@company.com - Server Profile: Microsoft Exchange Online
- Incoming Mail: Server-Side Synchronization or Email Router
- Outgoing Mail: Server-Side Synchronization or Email Router
- Appointments, Contacts, and Tasks: Server-Side Synchronization
- Click Test & Enable Mailbox If successful, you will receive an email, if not, contact your nearest SysAdmin
- Click Save & Close!

If you need more guidance on setting it up, you can find more on Microsoft documentation: Set incoming and outgoing email synchronization.
After this is done, you should install the Dynamics 365 App for Outlook.
