Rules to Better Video Recording - 69 Rules
Need a video for your business? Check SSW's Video Production consulting page.
Creating high-quality videos consistently requires more than just a great idea. You need a dedicated setup that allows you to focus.
The popular open plan office will commonly result in poor vocal audio, bad lighting, and an inconsistent background that detracts from your content. A streamlined, self contained recording space can help save time and ensure your videos look and sound professional without the technical burden.
Avoid common pitfalls
When setting up the video recording space, be aware of these issues that can lead to a poor-quality video:
-
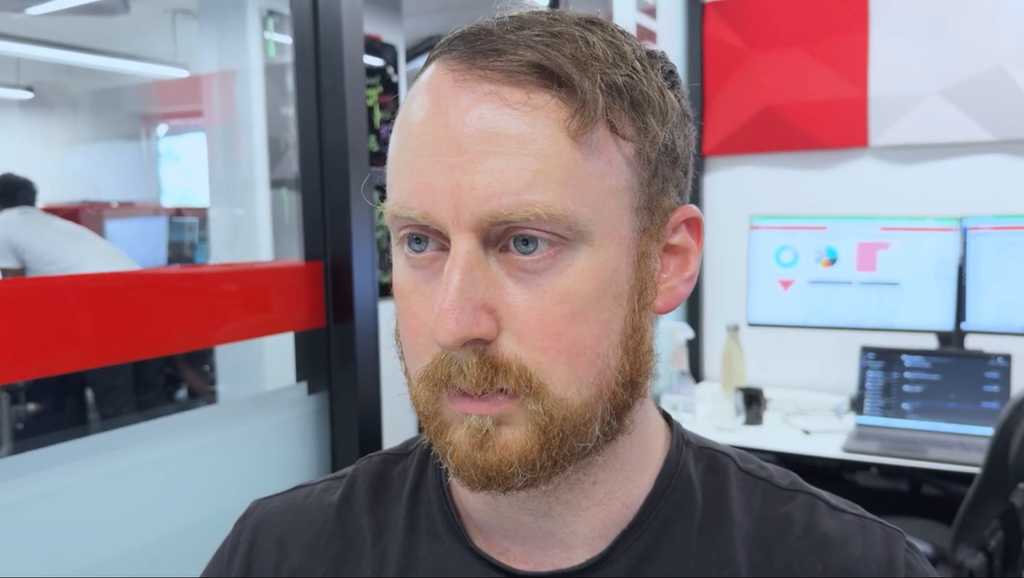
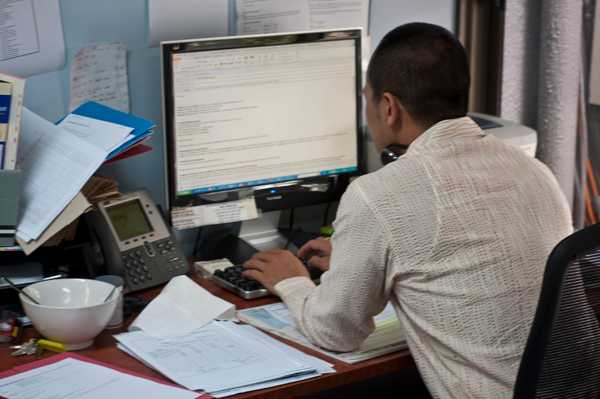
Busy environment - Recording in a busy office with harsh fluorescent lights with background chatter and unpredictable changes to the ambient workspace volume and background elements
Figure: Bad example - Shared noisy environment makes it hard to capture clear audio and branded visuals -
Non-permanent setup - Setting up and tearing down equipment each time you want to record
Figure: Bad example - Difficult setups leading to inconsistent quality and wasting time
How to set up an effective recording space
A good recording space should be optimized for sound, lighting, background, and ease of use. Here are some tips:
-
Audio - Create a soundproof environment
- Use a quiet room, preferably away from noisy areas
- Consider soundproofing with foam panels, carpets, or curtains to minimize echoes and background noise
-
Lights - Set up proper lighting
- Use soft, diffused lighting to avoid harsh shadows. Ring lights, softboxes, or LED panels can help
- Ensure the lighting setup is consistent and avoids flickering or changes during recording
- See these examples for lighting
-
Background - Choose a clean, professional background
- Opt for a neutral or branded background that is visually appealing and not overly busy
- Consider a dedicated backdrop or a wall with minimal design to keep the focus on the speaker
- Here's some tips on backgrounds
-
Easy Setup - Plug and play equipment
- Keep your camera, microphone, and lighting equipment permanently set up and ready to go. A "plug and play" system minimizes setup time and ensures consistent quality
- Use a tripod for your camera and adjustable stands for lighting, so they are always in the correct position
- Consider an external microphone for better sound quality, and test audio levels regularly
An office pod or studio with soundproofing, diffused soft lighting, and a mounted camera. The microphone is attached to the desk, and the background is a clean, branded wall with subtle colors. Equipment remains in place, so the recording can begin within minutes.
Figure: Good example - Plug and play system that ensures consistent quality and saves time By setting up a dedicated recording space that addresses these factors, you can streamline your workflow, reduce stress, and consistently produce high-quality videos that engage your audience. Spend time to get your space right once, and you’ll save hours on every future recording session.
Try recording your own video today and share it with the world!
-
When you've finished a PBI you should record a video to send to your Product Owner and anyone else that is interested. A 'Done' video is much better than a screenshot because you are proving the PBI workflow actually works. Even better, this video can double as documentation or release notes for your users.
When deciding whether a PBI might be a good contender to record a Done Video for, consider these factors:
- Is it a key piece of functionality that has high business value?
- Would it be difficult to quickly demo in the Sprint Review without a video?
- Is it UI heavy? i.e. Would the video be compelling?
Tip 1: Choose the right software
To record your screen and camera together
Check out "Do you know how to record your screen?" for the best options.
To edit your video
- Basic editing: Clipchamp, Video Editor (for Windows), iMovie (for Mac)
- Advanced editing: Adobe Premiere Pro, Final Cut, DaVinci Resolve
How tos
Clipchamp
Here's a video describing how to record** and edit a quick Done Video using Clipchamp:
Tip: Jump to 04:31 for how to record screen and webcam.
Video: 🎬 BEST Clipchamp Video Editing Tips and Tricks (14 min)Warning: Clipchamp has a record limit of 30 minutes for a single project. If you are planning on recording several takes, start a new project.
OBS Studio
Here's a video describing how to record a quick Done video using OBS:
Video: How to Record your Computer Screen & Webcam in OBS Studio (8 min)Note: The Picture in Picture will be permanently embedded in the exported video and cannot be altered later.
For a more professional video that requires some editing
Here's a quick video describing how to record your webcam and screen separately in high-resolution using OBS for post-processing and editing:
Video: How to Record Webcam and Game Separately in OBS Studio | Tutorial (10 min)Note: You will be able to alter the PIP, remove it, go full screen on your face. Also note that you'll need to set the output to 30 FPS in your OBS settings - not 60 FPS as outlined in the video. Setting the output to 30 FPS will ensure you don't experience syncing issues or lag between the video and audio.
Switching Scenes in OBS
It is quite easy to do with these simple steps using OBS Hotkeys!
Video: How To Switch Scenes In OBS Easily! (OBS Hotkeys) | Tutorial (4 min)Tip #2: Follow the 'Done Video' structure
Your Done Videos should follow the following format:
-
Intro
- Prepare and practice your talking points and visual elements
- Start with a medium close up shot of yourself
- Start with a smile the camera for 2 seconds before speaking
- Briefly introduce yourself. E.g. "I'm David, Solution Architect at SSW"
-
Post-intro
- Transition into a screen share with the solution you've created on screen, moving your portrait shot to the bottom right corner of the screen
- Provide an overview of the PBI you are going to discuss, remembering to zoom out before showing code samples or demos (see rule - Do you zoom out then in)
- The tabs you are planning to use should be already open
-
Show the pain
- Explain the problem you or the stakeholder was having before you finished your work
- Show a example of where this issue occurred
-
Demo the solution
- Provide a working example of your code
- Demo the code with a realistic use case
- Direct attention and give people an idea of where to look
- Harken back to the pain showing the value of your solution
-
Outro
- Transition back into a medium close up shot of yourself
- Provide a brief summary of what you discussed in the video
- Use a signature to bid farewell to the audience. E.g. "This is David signing off"
- Hold eye contact and a smile to the camera for 2 seconds before the video ends
Tip #3: Look sharp when presenting
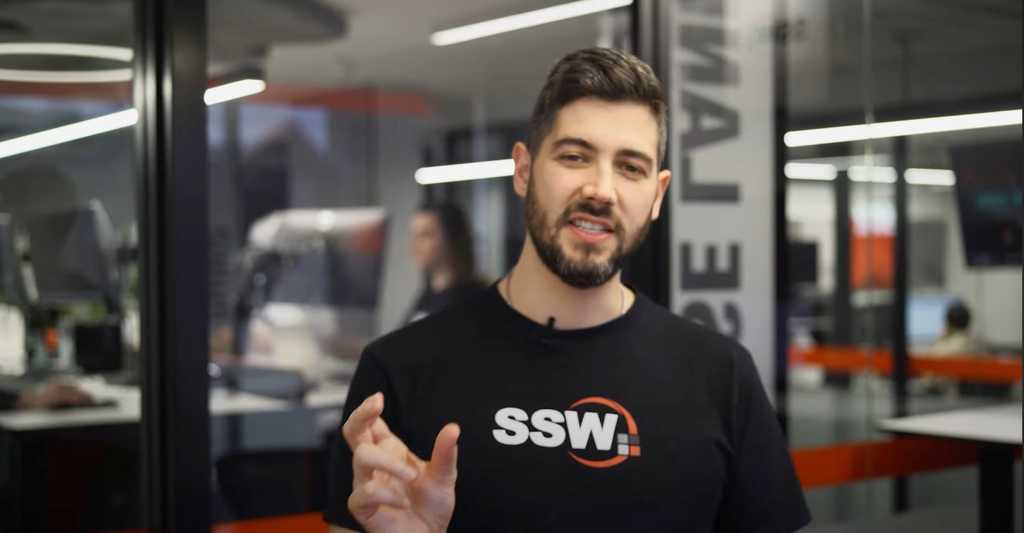
If your company has branded clothing, make sure it's ironed, tidy and visible. Wear it proudly! Alternatively, wear clean, neutral color clothing. E.g. White, grey, or black shirt.
Tip #4: Be friendly and natural
Smile, speak naturally, and imagine you're talking to a friend... it helps build connection and keeps viewers engaged.
If you want a visual cue, only have your key dot points rather than reading from a script. This keeps your delivery natural and helps you to follow your main points.
See this great example by Ben Cull:
Video: Make a Quick and Dirty "Done" video in Camtasia (2 min)Looking to improve your presentation skills?
See our tips to craft and deliver engaging presentations.
Tip #5: Frame yourself properly
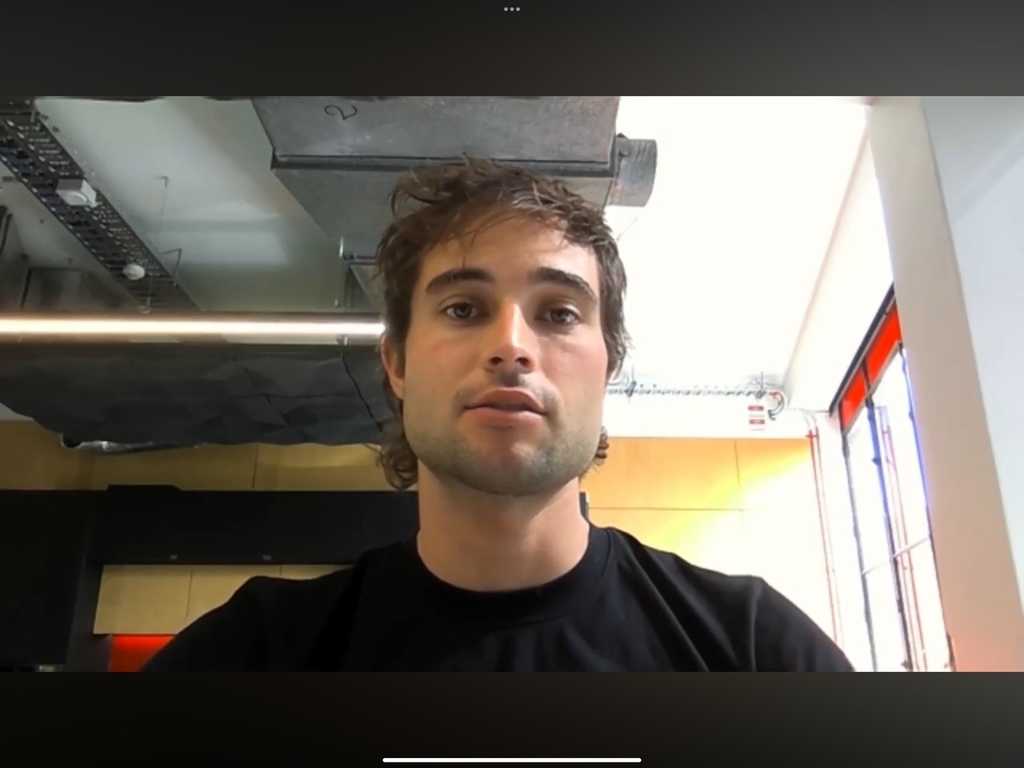
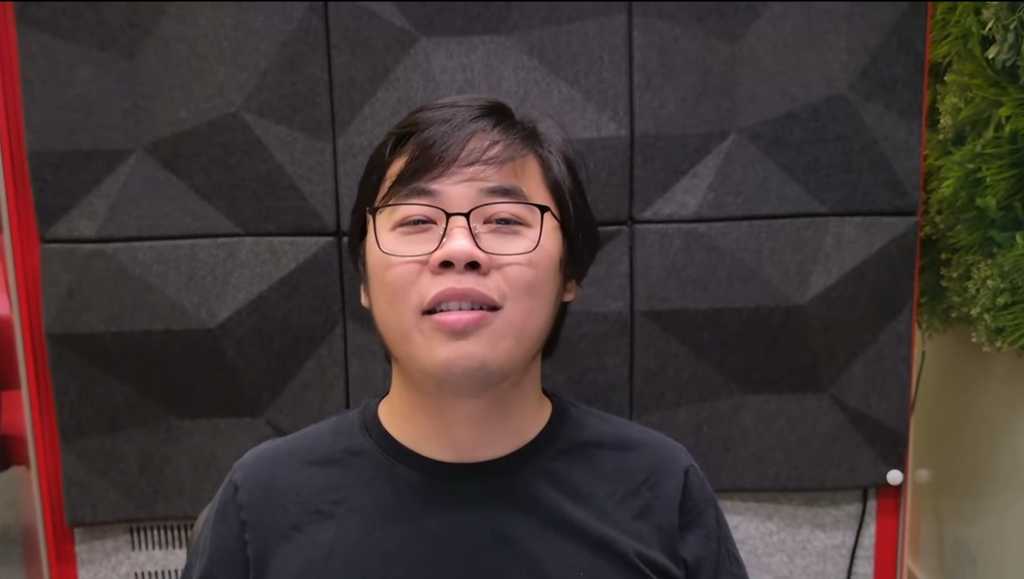
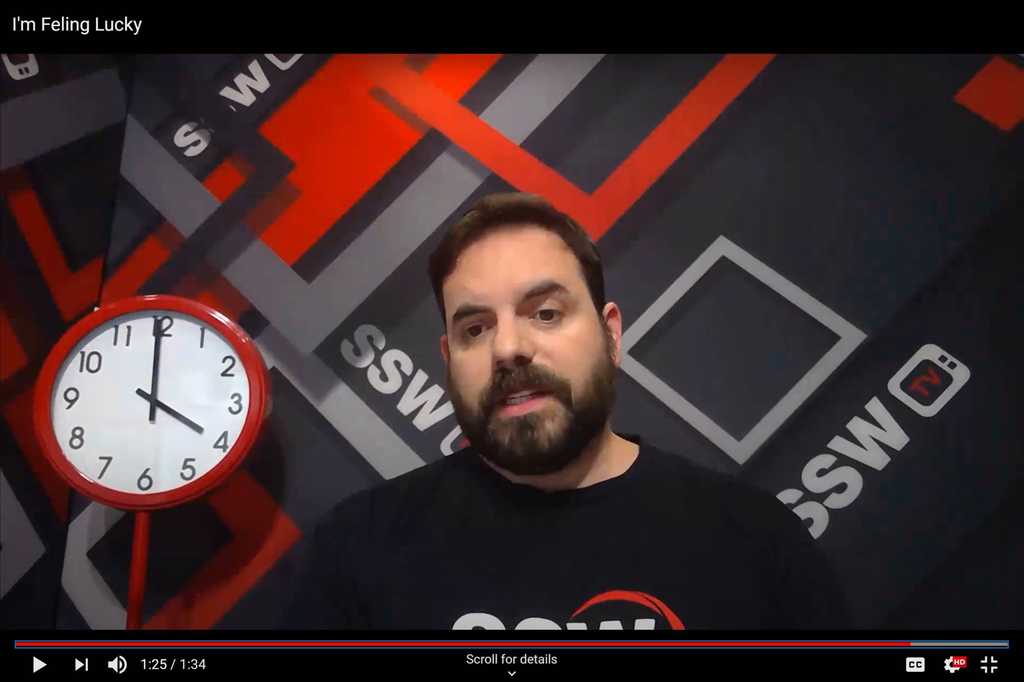
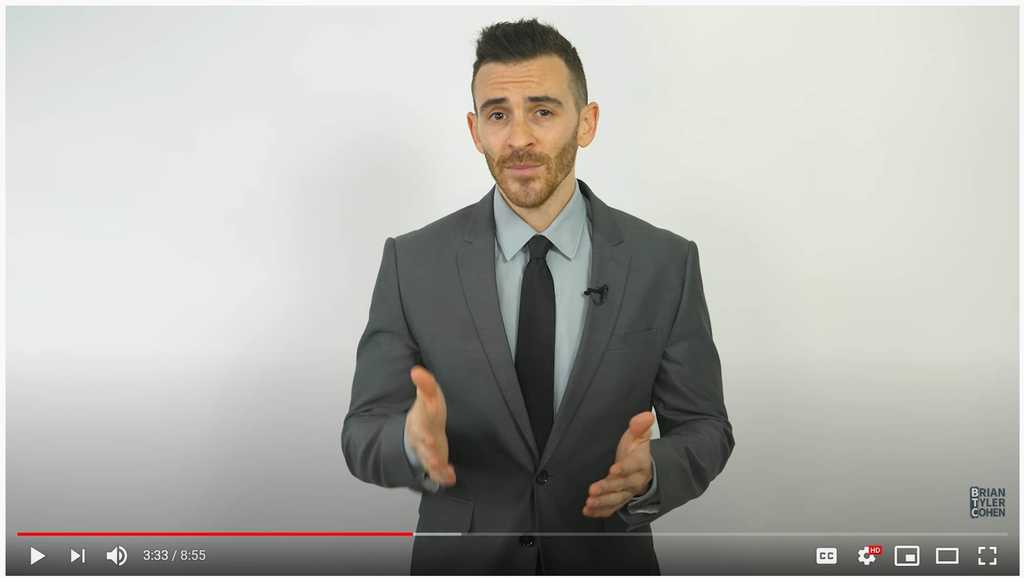
Have your webcam height at eye level for engagement. Make sure there is sufficient headroom - not too little (don't cut off the top of your head in the frame) and no too much (the subject needs to fill the frame).
Ensure your branded clothing is visible and the background is clean and tidy, also consider tilting the camera for a more dynamic background with depth instead of a flat background
Figure: Good example - Good framing, lights and background Tip #6: Get your lighting right
Ensure there is optimal room lighting and facial brightness. Consider a ceiling-pointing lamp for additional light. Avoid intense backlights to prevent silhouetting
Tip #7: Record in one take
Record it in one take, but start again if it's super bad. If something out-of-your control happens, try to be natural! If you mistype a word or click the wrong button, don't freak out and start again, incorporate it. E.g. "Whoops, clicked build accidently. Let me just refresh and go again"
If your video is short (1-2 mins), then starting again may be optimal. However, if your video is longer ( more than 5 minutes), then try to incorporate any accidental errors and keep going.
Tip #8: Keep the UI clean
When using a browser, IDE, or any relevant app, make sure the interface is readable, clean and free of distractions.
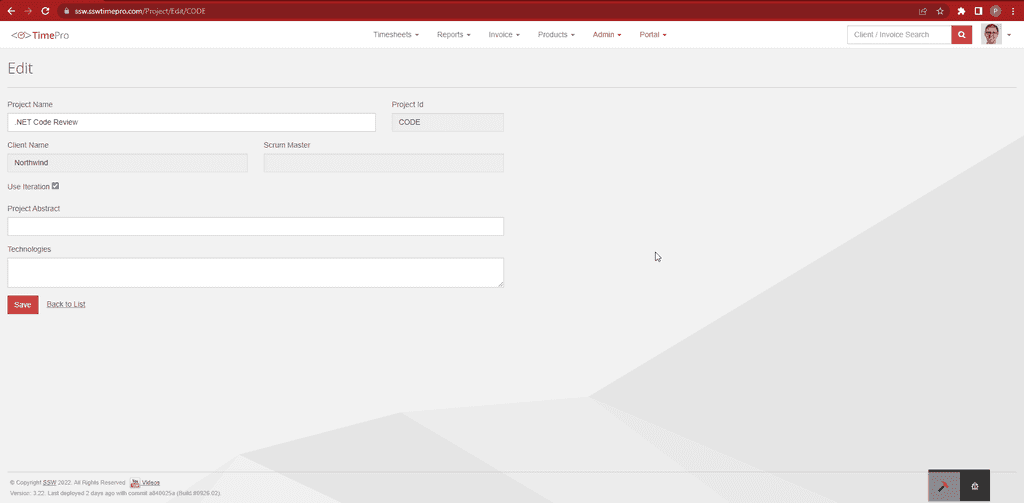
- Resolution - Set your screen to 1080p (1920x1080)
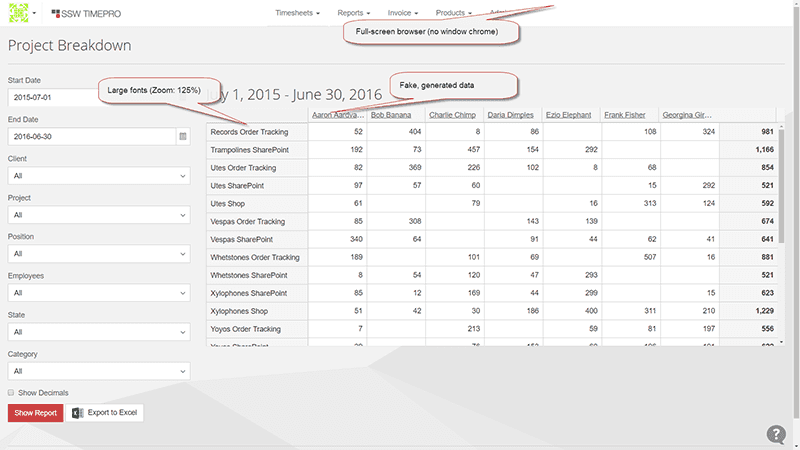
- Browser - Hide the bookmarks bar, set the zoom to 125%. (You can easily get a clean browser by using a guest or incognito profile)
- Environment - Ensure your app is in a production environment (URL should be https://northwind365.com and not http://localhost:3000)
- Microsoft Office - Hide ribbons
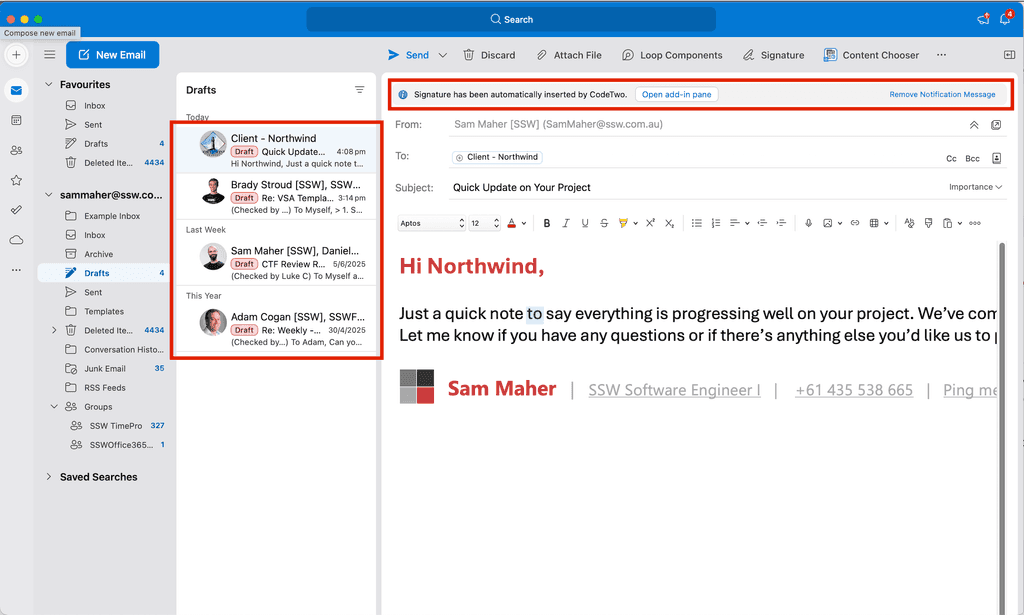
- Outlook and others - Clear any irrelevant reminders, clear messages and notifications
- Everywhere - Don't share sensitive information
Extra: Make your mouse cursor larger and more visible by increasing its size and adding a bright color.
This helps viewers follow your actions easily — especially on high-resolution screens or busy UIs.
Tip #9: Use clear audio
Check your audio devices for the best quality and make sure your audio is clear and not distracting. E.g. Position the microphone close to your mouth.
Tip #10: Do a quick test first
After all this effort to capture a great video this can catch any last-minute changes and cut down on potential re-recordings. E.g. Test your intro hook and screen transitions.
Tip #11: Watch examples
Remember to watch some "Done" videos to get an idea of what a good 'Done Video' looks like!
Video: Good example - Record yourself and your screen | Tables in TinaCMS (2 min)
Although it can be daunting, creating a awesome 'Done Video' doesn't have to be hard. Luckily, we have you covered with these key tips to make your 'Done Video' great!
Content
- Generic - Keep your video appealing and easy to understand for a global audience. The video should not directly discuss the specific tasks of a PBI, but rather address the new feature or change as a whole.
- Prepare - Plan what you're going to say and open the browser tabs you'll show beforehand. This means you should practice what you're going to say, especially your Intro and Outro!
- Introduction - Start by introducing yourself and what you will be talking about. E.g. "Hi everyone, my name is Bob Northwind and today I would like to show you..."
- Show the Pain - Demonstrate the problem that your new feature will fix, then demonstrate your feature.
- Ending - Finish with a strong closing that summarizes what you talked about and conclude with a compelling call-to-action (CTA). See the rule about SSW.Rules | Production - Do you have a call to action (aka CTA)?
- Quick - Keep it short, concise, and don't repeat yourself! Ideally we want to keep the video under 5 minutes.
- Directing Attention - Give people an idea of where to look by mentioning positions on the screen before taking actions. E.g. "At the bottom of the screen" or "in the top right-hand corner."
- Presentation - Present data from X to Y. E.g. for financial data start with the last month and then show the current month.
Presentation
- Apparel - If your company has branded clothing, make sure it's ironed, tidy and visible. Wear it proudly! Alternatively, wear clean, neutral color clothing. E.g. White, grey, or black shirt
- Framing - Have your webcam height at eye level for engagement. Make sure there is sufficient headroom: not too little (don't cut off the top of your head in the frame) and no too much (the subject needs to fill the frame). Ensure your branded clothing is visible and the background is clean and tidy, also consider tilting the camera for a more dynamic background with depth instead of a flat background.
- Lighting - Ensure there is optimal room lighting and facial brightness. Consider a ceiling-pointing lamp for additional light. Avoid intense backlights to prevent silhouetting.
-
One-Take - Record it in one take, but start again if it's super bad. If something out-of-your control happens, try to be natural! If you mistype a word or click the wrong button, don't freak out and start again, incorporate it. E.g. "Whoops, clicked build accidently. Let me just refresh and go again."
- Note: If your video is short (1-2 mins), then starting again may be optimal. However, if your video is long. E.g. 15-20 minutes, then try to incorporate any accidental errors and keep going.
- White Space - When you click on something and it starts spinning, say what’s coming up next so you don’t end up in awkward silence.
-
Clean UI - When using a browser, IDE, or any relevant application, ensure a clean interface:
- For your browser, hide the bookmarks bar and set the zoom to 125%. (You can easily get a clean browser by using a guest or incognito profile)
- If presenting in Microsoft Office, hide the ribbon.
- When using Outlook for presentations, clear any irrelevant reminders.
- Resolution - Set your screen to 1080p (1920x1080).
- Recording - Record both your screen and webcam.
- Audio - Check your audio devices for the best quality and make sure your audio is clear and not distracting. E.g. Position the microphone close to your mouth.
- Be Friendly - Interact with your webcam like it's a person, and smile at the Intro and Outro.
- No Edits - Don't edit the video; use a picture-in-picture format and hotkeys to switch visuals.
- Do a Test Recording - After all this effort to capture a great video this can catch any last-minute changes and cut down on potential re-recordings. E.g. Test your Intro hook and screen transitions.
Remember to watch some "Done" videos to get an idea of what a good "Done Video" looks like!
Video: Make a Quick and Dirty "Done" video in Camtasia (2 min)Producing video content for YouTube and TikTok can help you increase brand awareness, engage with potential clients, and showcase your expertise in the software industry. Here are some types of video that you might create:
- Educational - These could be tutorials, how-to guides, or deep dives into specific topics.
- Successful client stories - Showcase your clients' success storieshighlighting the benefits they've got from your custom software solutions.
- Industry news and insights - Share your insights and expertise on the latest trends and developments in the software industry.
- Q&A sessions - Host Q&A sessions on YouTube or TikTok where you answer questions from your audience about software development, your company, or anything else related to your industry.
- Product Demonstrations - Demonstrate your custom software solutions and highlight their features and benefits to potential clients.
- Collaboration Videos - Collaborate with other businesses in the software industry to create content that showcases your collective expertise.
- Behind-the-Scenes - Show your viewers what goes on behind the scenes at your software consultancy. This could be anything from a day in the life of a software developer to a tour of your office.
Remember to tailor your video content to your target audience, keep your videos engaging and informative, and use calls-to-action to encourage engagement and subscriptions to your channels. By consistently producing high-quality video content, you can establish your software consultancy as a thought leader and expert in the industry.
If writing a technical script where you don't have the knowledge to make the final call, it is important to remember that different developers will sometimes have conflicting opinions.
Getting to the end of a video project only to have to go back to the script to make changes is deeply inefficient and creates unnecessary extra workaround. As such, for a technical script to be approved it should be taken for a 'test please' to both the CEO and at least one other developer.
It must be fully approved because changes to the script should not be accepted after the 'test please' has been passed. The developer(s) and the CEO should be made aware that if any changes are requested after the scripting stage it will fall back on them.
Recording a public video is time-consuming... scripting, filming, editing, and reviewing all take extra effort. The biggest waste happens when you record before verifying the accuracy of your content.
Before hitting record, a quick content check can save hours of rework and help you get it right the first time.
The problem
You’ve been asked to record a public video, and after filming, someone spots inaccurate content, missing context, or off-brand messaging. Now you have to re-record, wasting time and effort.
Tip: Always make sure there’s a documented request for public videos, where the requester clearly states the video's public purpose. This ensures everyone understands its importance and treats it accordingly.
The solution
Before you hit record, ask for a content check with a Subject Matter Expert (SME) or the TV/Production Team.
Think of it as the “Checked by xxx” rule for your video content.
Steps for a public video recording
-
Prepare yourself
- Write your talking points, slides, or short script
- Know the key message you want to deliver
-
Get a content check and ask for feedback
- Send your draft or slides
- Let the reviewer mark it as Checked by {{ NAME }}
- If it’s a technical/development topic, get a Dev SME to review
- If it’s a production, marketing, or client-facing topic, get a TV/Production Team member
Note: Sometimes, it’s both!
-
(Optional) Perform presentation/video in full over a call or in person
- Setup a time with them to perform your presentation/video in full over a call or in person. This way, you're getting rapid feedback in a 1 on 1 way. Saving you loads of time later down the line.
-
Apply suggestions
- Update your outline before filming
- You’ve passed the content check ✅
-
Record with confidence
- Hit "Record" and share your wonderful knowledge
Examples
“I’ve already recorded the full video — please review and tell me what to fix.”
Figure: Bad example - Too late... It’ll cost time and energy to redo the video
“Here’s my outline for the Azure feature video - Content checked by Dave (Dev) and Ted (TV Team). Recording tomorrow.”
Figure: Good example - Content was checked before recording
-
Aligning expectations with stakeholders is key to success, especially for creative content where the outcome is very variable. Make sure you define what kinds of videos need what quality level.
Gold
Definition
- Extra equipment needed to film, more filming locations, lots of B-Roll, many rounds of feedback, high level of audio post and colour grading etc.
Specific examples
- Why work at SSW – to go on ssw.com.au/ssw/Employment/default.aspx
- Home page video – to go on ssw.com.au/ssw/
- Landing page video – to go on ssw.com.au/ssw/Consulting/Web-Applications.aspx
General examples
- Any high value videos that generate sales that will live on your website rather than just your social media
- Consulting page videos
- Testimonial videos
Silver
Definition
- Basic equipment used to film, less B-Roll, fewer round of feedback, quick and dirty colour grading and audio post
Specific examples
- All the videos from the latest conference/event
- Brainstorming day video
General examples
- All Social Media videos
- All User Group videos
- All Event videos
- All Rules videos
When filming a video, it's crucial that images are of the highest possible quality. Capturing a screenshot with a 1080p monitor can be problematic because the screenshot might need to be cropped or zoomed in on causing it to be low resolution in the video. Moreover, there may be elements in the screenshot that should be edited such as sensitive information or the placement of a button.
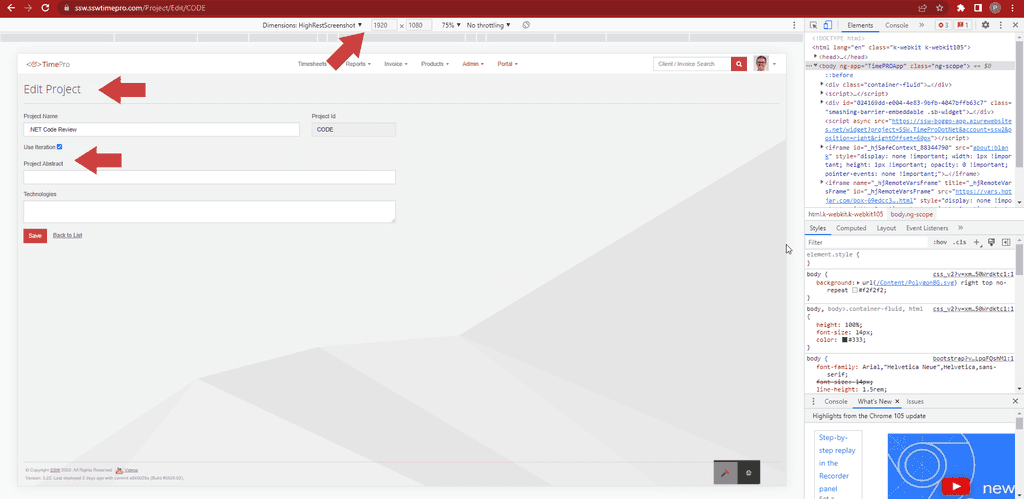
Luckily, the developer console equips you with an impressive array of tricks for capturing screenshots with extremely high resolution while easily editing elements on the screen.
The Developer Console
The developer console lets a user manipulate a web page to fit their requirements. It can be used to:
✅ Take high-resolution screenshots in 8k or higher
Tip: David Augustat explains how to accomplish this✅ Hide or edit HTML elements e.g. moving a button, editing the text in a heading or hiding a div
Tip: The right click + "inspect" menu option helps locate the required HTML element✅ Pinpoint the page area you want to screenshot by either capturing the entire page or zooming in on an area of interest
Focus peaking is a valuable tool that assists videographers and filmmakers in achieving precise and accurate focus in their shots.
It highlights the areas of the image that are in sharp focus with a distinct and often colourful outline. This visual aid is superimposed onto the live view or monitor display, making it easier for the videographer to identify the focal points within the frame.
Focus peaking is included in most professional video cameras and external video monitors.
Without a 'call to action' (viewers to do something at the end of a video) the purpose of the video is lost. So you don't waste all your hard work editing, you should include a CTA at the end.
Common objectives are to:
- Obtain the viewer's email address
- Get the viewer to provide info and request a service from the company
- Get them to subscribe to the company's social media pages
A good 'call to action' should:
- Be short (no more than 30 seconds).
- Not have too many options - a visitor is much more likely to do a task if he's not confused by being given dozens of social media options.
- (Optionally) Tell them they get value. E.g. if they comment they will make a difference.
- If you have a paid subscription offering or a free one like YouTube) give incentives to subscribe now, along with the benefits subscribed users get.
- Remember that people have different preferences for social media. You pretty much need to cover your bases. Have a Twitter page, Facebook page, LinkedIn account, YouTube channel, etc. Of course, don't have all these in the 'call to action', but make sure that those options are easily accessible.
- If you are using YouTube or another service that provides the option to have annotations, use annotations that prompt the viewer to comment or subscribe. A 'subscribe' link in the annotation gets more subscribers
Thanks, have a good one!
Figure: Bad example – No call to action
Please leave a comment, and go to our website, Facebook, YouTube, Twitter, and LinkedIn. Also please sign up for our newsletter.
Figure: Bad example - Too many options breeds choice paralysis
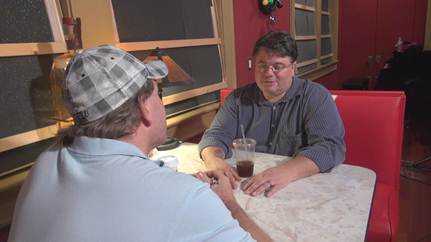
Though each interviewer will have their own style, line of questions etc, there are some basic rules that you should follow when conducting an interview:
- Introduce yourself, then the interviewee, then the topic of the interview.
"Hi guys, today we're talking about J Query with Peter Smith, how's it going Peter?"
Figure: Bad Example - The Interviewer did not introduce him or herself, nor did he/she explain who the interviewee is. Also, the topic is a little too broad, it will be extremely rare to find a video that covers every single aspect of a major subject like that
"Hi Guys, I'm Adam Cogan and I'm here with Peter Smith of 123 Development Solutions Inc. Today we're going to be discussing J Query and how the latest edition will affect your source code. How's it going, Peter?"
Figure: Good Example - correct order, sufficient detail, and straight to the point
- Tell the interviewee not to speak until they are introduced.
- When the interviewee is speaking, remain quiet. This is about the audience receiving the information, not you.
- When the interviewee is finished speaking, simply move straight to the next question (either follow-up or planned) but do not comment or react to what they said, it distracts the audience from their own reaction and comes across as self-centered. If you read the transcript of an interview in a magazine, you will notice that in professional interviews you won't be reading the words "huh that's really interesting" or "ah ok" as this does nothing for the reader, they came to learn from the interviewee.
- Saying something unusual to catch the audience's attention at the beginning can sometimes heighten the value of an interview, but choose carefully. You want to say something that conveys good communication and honesty, both with the interviewee and the audience, even if it is slightly distancing. A good way to do this can be to disclose your bias upfront.
"To start with I should explain that I don't like your company or your personality"
Figure: Bad Example - Don't say something downright offensive with no point to it
[In a video titled "C# vs JavaScript"] "Before we start, I should explain that I am a JavaScipt guy and you're going to have to work hard to convince me"
Figure: Good Example - This builds trust with the audience, creates a challenge for the interviewee, and creates an interesting sense of contract between the 2 of you
- If you are conducting a webcam interview, look at the camera as much as possible and have your notes close to the camera on your screen.
- Overprepare, don't under prepare. Having a set of questions figured out before-hand can have a large impact on the value of your video, as it slows the pacing to have the people on screen figuring the interview out as they go. It can also be distracting to see the interviewer constantly checking their notes. Keep in mind follow-up questions can stack up and end up making your video last too long, so use them sparingly.
- If you are going to use screencap cutaways at all, figure out beforehand which ones you plan on using and have them ready to go at a moment's notice, the audience does not want to watch you logging in and waiting for load times, etc. They also do not want to see you figuring out a piece of software as you go, this is a major no-no.
"'And that's the SSW Rules site, yes?' 'Yes, I'll just open that up so you can see it............. there you go.' 'And how are the editing features on that?' 'Um, they're pretty good, I'll just show you here.......... let me log in........................ just gotta wait for it to load............ Yeah, so you can see here............ sorry, one sec................. yeah, it's great when it comes to HTML source editing if I open the code here.......................hang on............................ (etc.)'
Figure: Bad Example - This is painful to watch and comes across as very unprofessional. It is also difficult to edit out in post-production
"'And that's the SSW Rules site, yes?' 'Yes, which you can see here on my screen' 'And how are the editing features on that?' 'Well here you can see the editing screen layout and it's quite effective and easy to understand. If we look here at the code you'll notice that it's very clean (etc)'
Figure: Good Example - No messing around and keeps the pace up
- Ask the interviewee to include your question in the start of their answer. This reinforces the question for the audience, gives a strong start to the interviewee’s response, and also makes it possible to create incredibly useful smaller video segments.
"Why do you like the SSW Rules?" "They are very useful"
Figure: Bad Example - Interviewee’s statement is very general and could be referring to anything
"Why do you like the SSW Rules?" "I like the SSW Rules because they are very useful"
Figure: Good Example - establishes an immediate context for the interviewee’s response, and is a powerful statement when heard without the interviewer’s question
Recording live video interviews on location can be difficult. The key to success is to make the process as simple as possible, so you continue to record and release interviews.
As there may be many variables during a shoot on location, you need to be able to keep track of multiple things during the interview.The most important things to focus on are:
-
Audio
- Is each microphone coming through clearly
- Are there any sounds that would make it hard to hear the interview (e.g. passing trucks, air conditioning on, machinery)
-
Lighting
- Are your subjects bright enough to see clearly
- Are there any harsh or awkward shadows blocking their face or body?
-
Framing
- Can you see everything you need to?
If any of these are not right, you will probably need to record again!
Tips to simplify the process:
- The interviewer should hold the camera and interview the subject at the same time.
- Keep a tight frame - don’t have lots of empty space around the subject.
- Use the rule of thirds. See:
- Don't zoom erratically – Ease in and ease out of zooms 5. If someone starts speaking off camera, move to them slowly and smoothly without rushing (it is OK for them to talk off camera for a short time) 6. To record both voices use a single shotgun microphone for both interviewer and subject
-
Read the tutorial: Learn the Camtasia recording process, complete basic video edits, and successfully share a video.
OR
Follow these steps to start recording using Camtasia:
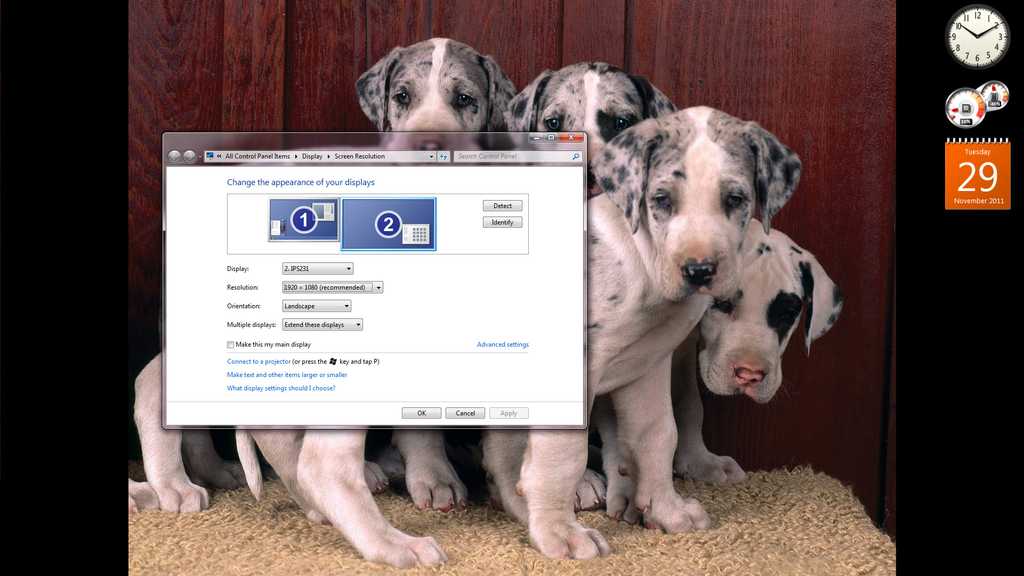
Windows Display Settings
- On the monitor you will be using for your video, set your screen resolution to 1920x1080.
If your screen resolution is too low then it will be difficult for people to follow the video, and you may need to record it again.
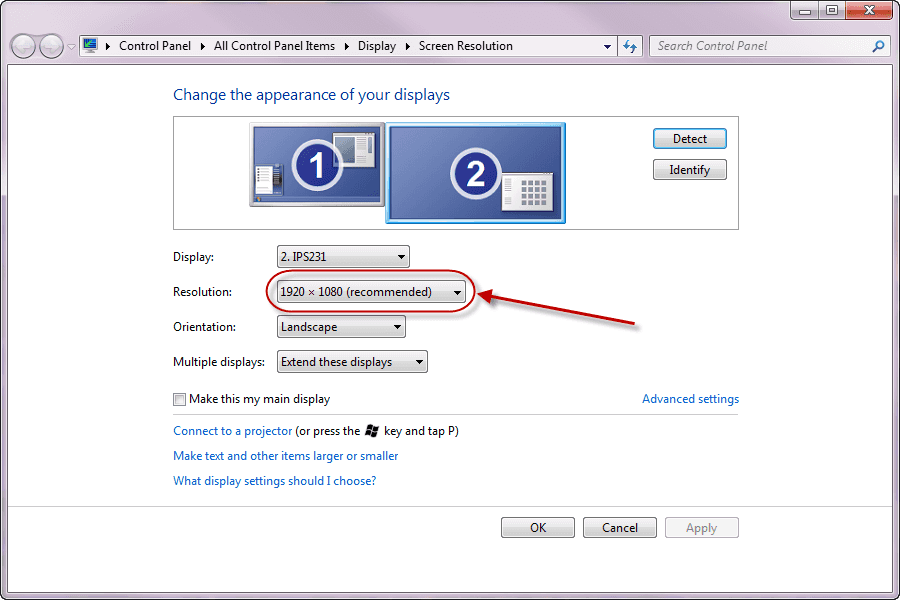
Figure: Set your screen resolution as high as possible without exceeding 1920 x 1080 Camtasia
Note: We recommend you use Camtasia 2019 or above.
-
Start Camtasia and check the following settings:
- Screen:
- Check that the correct screen is selected and set to Full Screen
- Camera:
- Check correct camera is selected
- Check height – it should be at eye level
- Check framing as per: ssw.com.au/rules/production-do-you-know-the-correct-way-to-frame-your-subject
- Check lighting as per: ssw.com.au/rules/have-good-lighting-on-your-home-office
- Audio:
- Set up your audio environment as per: ssw.com.au/rules/record-better-audio
- Microphone - Check correct device is selected (e.g. Blue Yeti USB microphone)
- Microphone - Check volume levels - audio should be in the green range and responding to changes in audio. If the range is orange or red you will need to turn down your microphone. See here for more information
- System Audio - You will need this enabled if your presentation needs computer sounds (e.g. playing a YouTube video)
-
Test record:
- Watch back to check audio and video
-
Prepare what you are talking about:
- Rehearse your content!
- Look into the camera when you start, finish, and when you are talking to the audience
- Be friendly and smile 😊
- Make sure your introduction is clear, full of energy, and without errors.
- Keep the energy up, but don’t rush. *TIP: Before recording, take a deep breath.
- Record as per: /record-a-quick-and-dirty-done-video
-
Watch your video back so you can record again if needed.
- Write edit notes
- Write the best sections
- Copy the source files to the server, as per: /post-production-do-you-know-how-to-structure-your-files
Tip: Alternatively, you can use Loom, which works as a Google Chrome extension.
When presenting the screen to an audience it is important to alter a few things for the best possible experience for the audience. The most import thing is to increase your font to make the content more visible.
Here are some of the applications where it is especially important:
- Visual Studio
- Text Editor
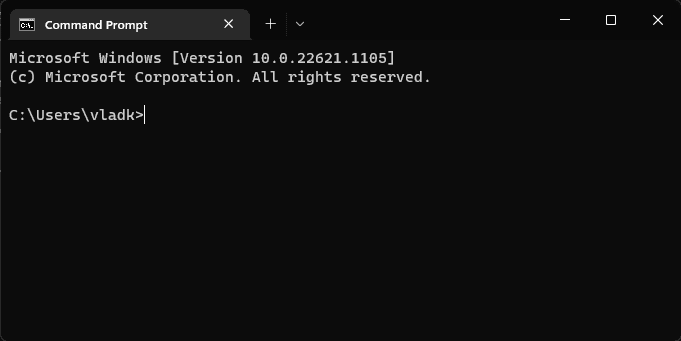
- Command Prompt
Visual Studio
-
Make your font bigger. This is probably rule number one. There's nothing worse than not being able to see the excellent code you're trying to demo.
- Increase the font of the Text Editor from 10 to 14 or more.
- Increase the font of your Environment from 9 to 12 or more.
- Remove any distracting panes or other windows. These usually just get in the way. If you really need them, make sure they're set to pin mode, so they hide when not in use.
- Most importantly, you can have all these things done for you at the click of a button by using the presentation mode extension by Mads.
Video: Use Presentation Mode in Visual Studio (5 min)
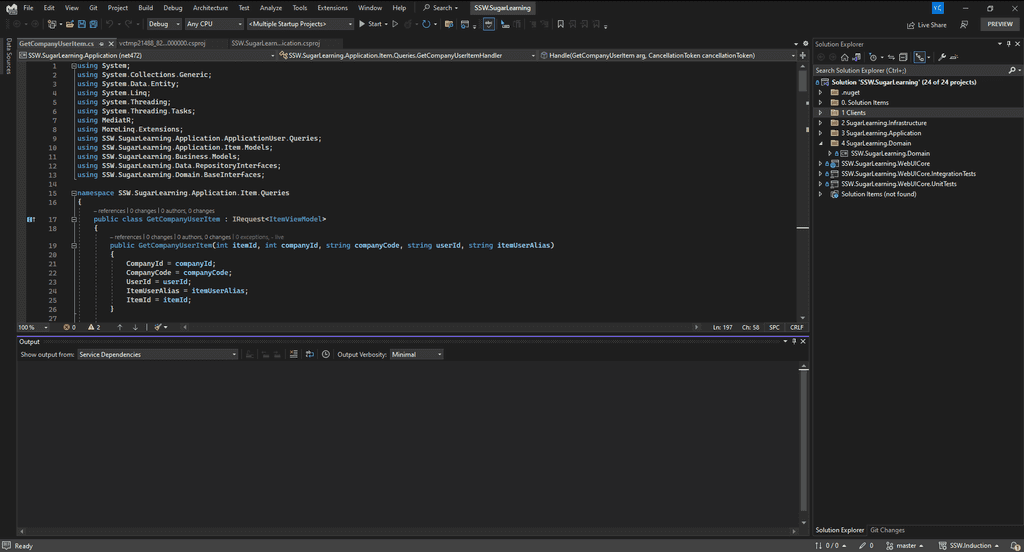
Figure: Bad example - Most of the Visual Studio UI is too small to read and the Output window takes up a lot of space 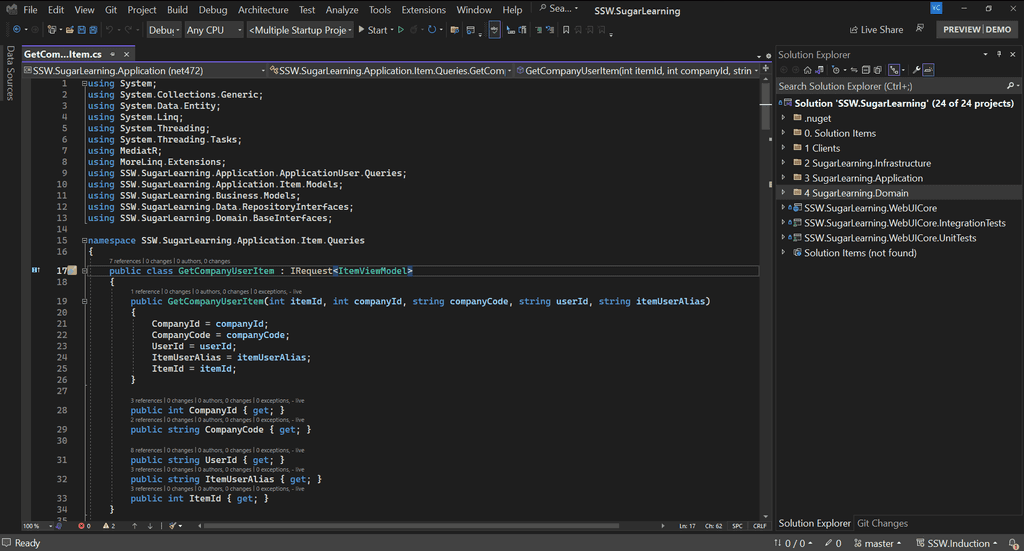
Figure: Good example - Presentation mode creates a full alternative profile so you can adjust font sizes across the whole UI 
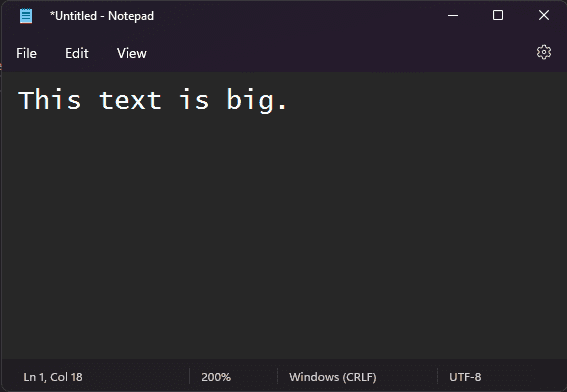
Figure: Open Visual Studio Presentation mode Text Editor
Change font size in your text editor. Zoom in from 100% to 200%.
Command Prompt
And don't forget to change your command prompt as well. Increase the font size from 12 to 16 or more.
Extra - Create a Command Prompt profile
You can create a custom profile for Command Prompt in Command Prompt | Settings | Add a new profile.
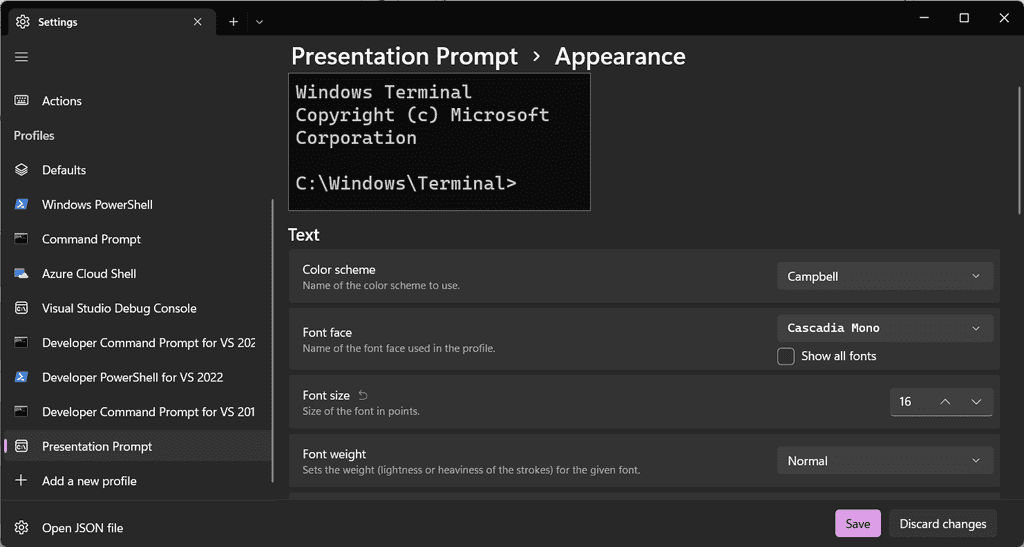
Figure: Command Prompt profiles 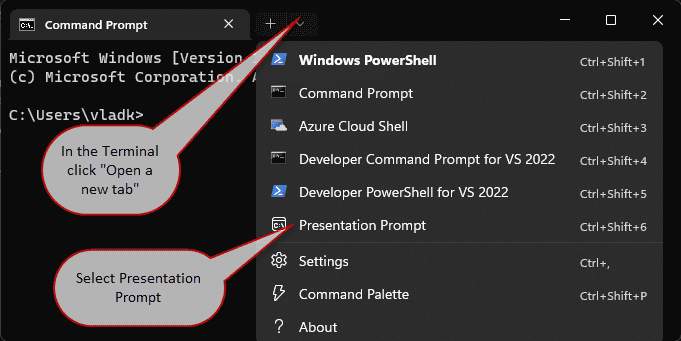
Figure: Open Presentation Prompt Most developers like to set up their screen efficiently – often that means small fonts, visible bookmark bars and a huge amount of browser tabs and taskbar items. While this is great for efficiency, it is not very good for recordings or presentations, and the clutter should be removed.
Before recording your screen reduce visual noise by:
- Removing unnecessary tabs - Open the tab in its own window
- Avoiding small fonts - Zoom in to 125% by holding Ctrl and scrolling up on the mouse wheel. If you're using a 4K or large monitor, consider zooming further or increasing your display scale to 175% or 200% instead of the recommended 150%
-
Hiding the bookmark bar
- Windows shortcut: Ctrl + Shift + b
- Mac shortcut: Cmd + Shift + b
When recording your screen, whether for a tutorial, a webinar, or a demo, your on-camera appearance is just as important as the content itself. Wearing a company-branded t-shirt not only enhances your professional presence but also reinforces your company’s identity with every video you create.
Why wear a company t-shirt?
- Brand recognition – Every video you record is an opportunity to strengthen brand visibility
- Professionalism – A branded shirt shows that your company values quality and consistency
- Trust and credibility – Audiences perceive a well-branded presenter as more authoritative
- Consistency – Helps maintain a uniform look across all videos, making your brand more recognizable
When should you wear it?
You should always wear your company t-shirt when:
- Recording tutorials or educational content
- Creating product demos or walkthroughs
- Hosting webinars or live streams
- Appearing in customer-facing videos for your website or social media
However, if the video is for a formal corporate audience, consider dressing appropriately while still maintaining a polished and professional look.
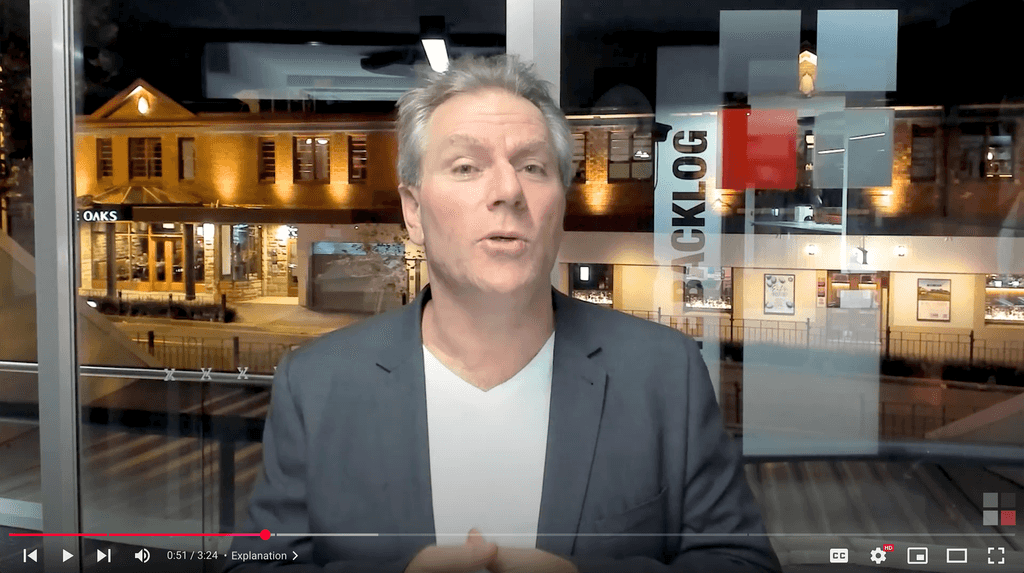
Figure: Bad example - The presenter is wearing a plain, non-branded t-shirt, missing a chance to reinforce the company's identity 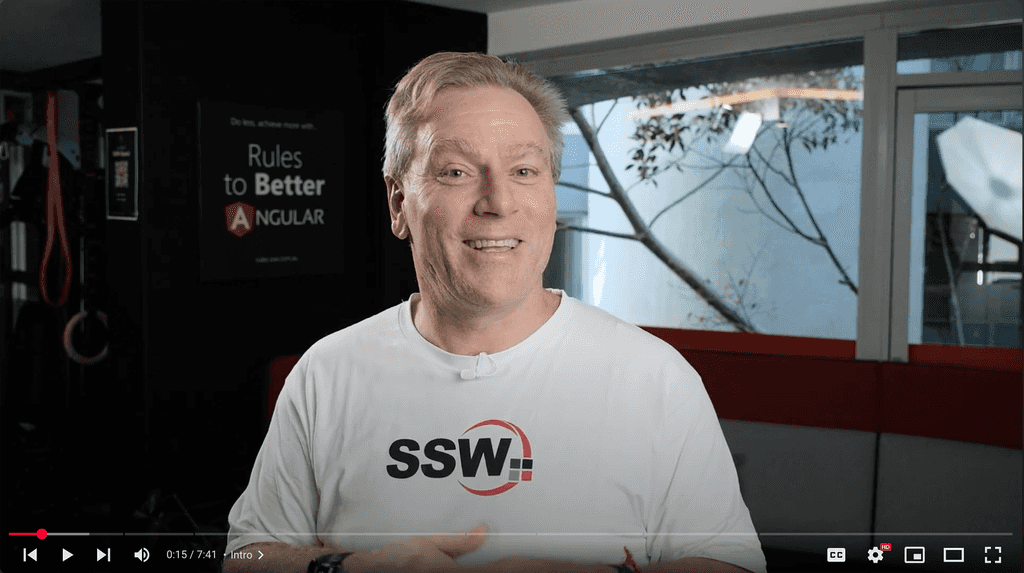
Figure: Good example - The presenter is wearing a company-branded t-shirt, ensuring brand visibility and professionalism Bonus Tip: Make sure your logo is visible
When recording, ensure that:
- The camera angle clearly shows the company logo
- The t-shirt is clean and in good condition
- The background and lighting don’t overshadow your appearance
By consistently wearing your company t-shirt during screen recordings, you turn every video into a branding opportunity while ensuring a professional and polished presence.
Depending on the type of video you are making, you will need to decide what microphone works best for you.
Webcam/built-in microphone
The most common type of microphone many of us use is the built-in one on your laptop.
While some modern ones are a little more advanced than normal, they generally offer the poorest sound quality out of any microphone type. This is because they’re designed for conferencing and web calls, which prioritizes things like ambient noise cancellation. This can sound like a benefit, but in reality, it causes audio to sound ‘tinny’ vs proper microphones.
Headset microphone
Headsets are handy because they offer combined audio feedback and microphone in one. This is the recommended setup for most people.
A headset mic offers the advantage of being very close to the source of the audio (your mouth), which is important to consider when recording video.
Some headsets are better than others, we recommend the Audio Technica BPHS1’s like the ‘go-to’ option for really great broadcast-quality audio recordings.

Figure: Audio Technica BPHS1 ‘aviation-style’ headset On the lower end, the Logitech H340 USB headset is a good option.

Figure: Logitech H340 headset Warning: These look poor on video.
Desktop microphone (portable)
Desktop mics can offer better audio quality than headsets mics overall.
There are many models to pick with different characteristics. Our choice is the Yeti. It connects via USB to your laptop and works without additional drivers.
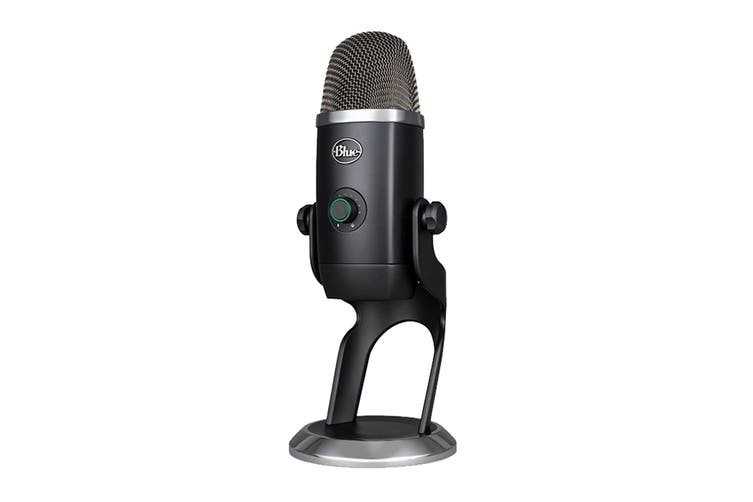
Figure: Desktop microphone – plugs into USB and sits in front of you on the desk. Preferred for done videos and is portable Desktop microphone (non-portable)
You can go beyond a portable desktop mic and get something like the Rode Procaster mic on an arm. These are typically used by professional podcasters.
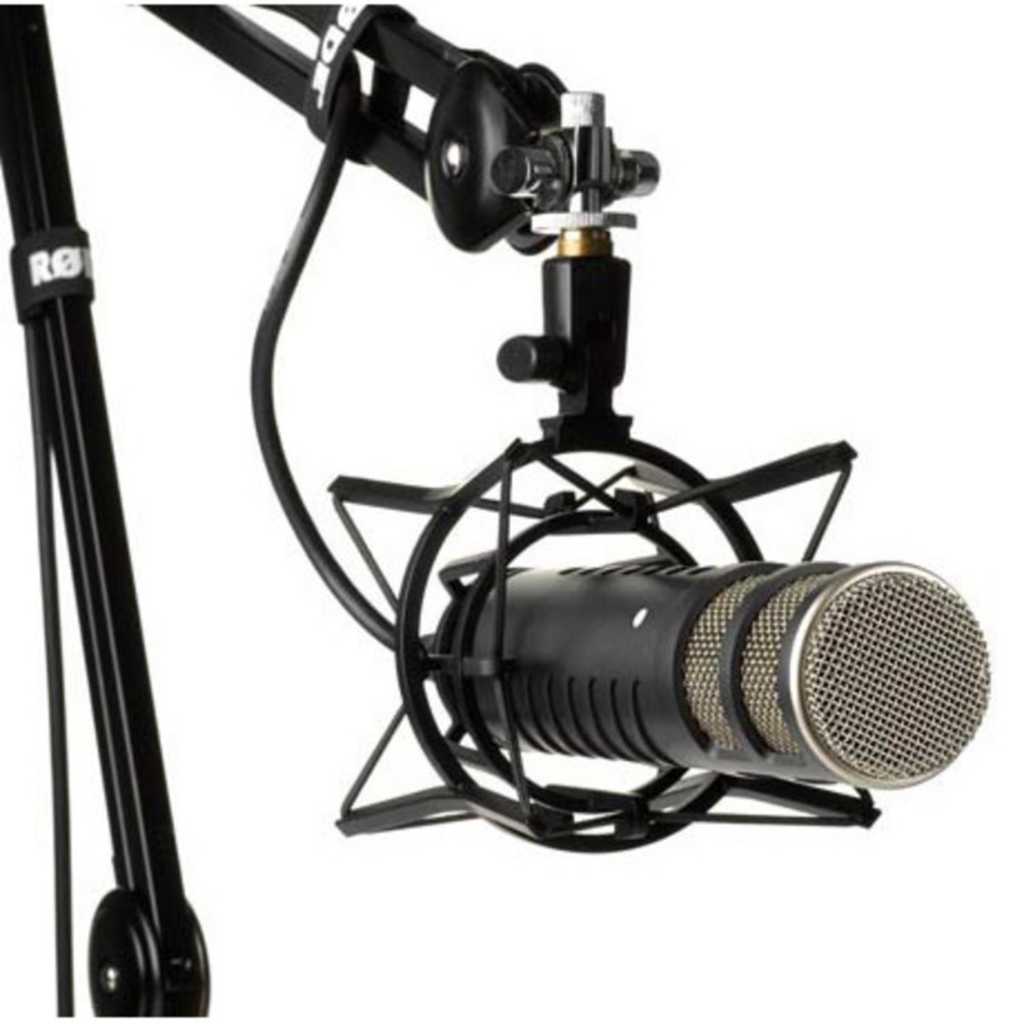
Figure: Professional podcasting mic Lapel microphone
Lapel mics are a great option for both mobile and PC devices.
The Rode smartLav+ is a lapel that works on devices that support TRRS connectors (phones, tablets and modern laptops).The benefit of this type of mic is that it is placed on your shirt and close to your mouth, which provides cleaner audio and more ambient noise rejection.

Figure: Rode smartLav+ Lapel Microphone for Smart Phones Warning: The cable can look poor on video.
Shotgun microphone
Shotgun Microphones are, by definition, built to capture the audio from the source they are directly pointed at. They are designed to cut out audio from other directions. This means that if someone behind the microphone says something, it will likely not be picked up clearly.These are traditionally used on film and TV sets and offer among the highest quality recordings.
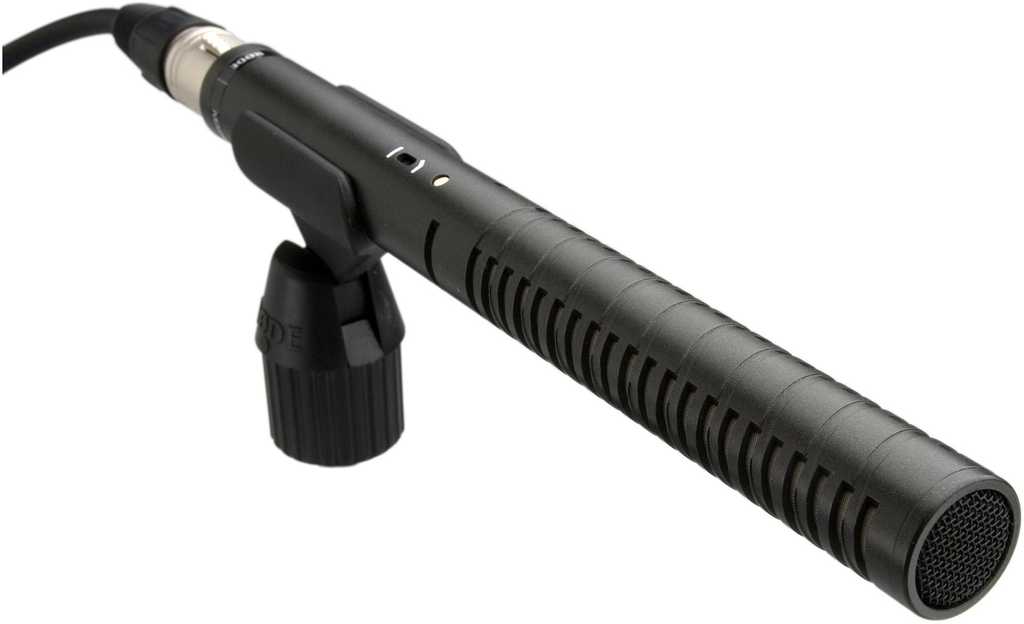
Figure: Shotgun mic Understanding basic video editing terminology allows for better communication during the post-production workflow. It's important for anyone involved to know the basic terms to keep feedback clear and concise.
Video: Video Editing Terminology | Adam and Eve Cogan | SSW Rules (4 min)1. Primary Footage (aka Main Footage)
Primary footage is what tells the story by conveying a message. These are general types of primary footage:
- Talking heads in an interview
- Screen share during a live demo
- Combination of talking heads in a split screen
For example, the interview of Adam and Jakob talking is the "primary footage" which drives the story.
Video: Primary Footage - Talking head - 0:38 - 3:05
Note: Most edits that affect the timeline are done to the primary footage, such as removal of sentences or whole sections.
Feedback example: "1:32 - 1:51, remove this section as it's redundant"
Feedback example: "At 2:22, can we stay on the primary footage of Adam until he finishes his comment, before we cut to b-roll?"
2. Overlay
An overlay is a general term for any footage, graphic or visual element placed on the screen that adds detail or information to the main footage. You will learn more about them in this rule.
The common types of overlays used by SSW TV are B-roll, lower third, and PIP.
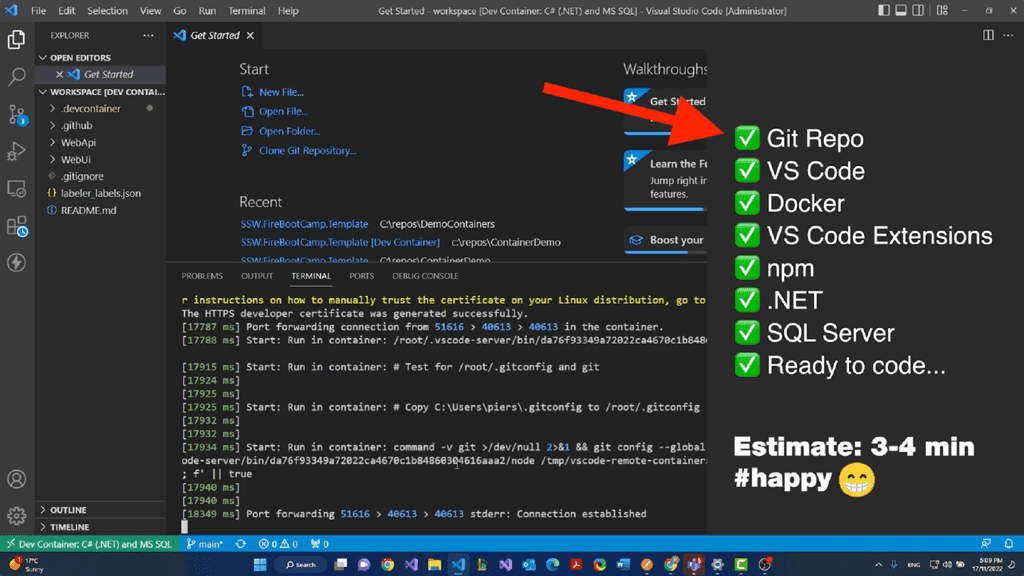
For example, when talking about what's needed to start a coding project in Visual Studio and displaying a checklist confirming all the components.
Video: Overlay - 2:10 - 2:15
Feedback example: "At 2:22, add in some overlay to show what they are talking about in the primary footage."
3. Lower Third
Lower third is a type of overlay. Lower third gives the audience information about a presenter's name and title or what's displayed on the screen and can be a combination of text and graphical elements.
For example, the lower third here is the presenter's name and job title.
Video: Lower Third - 0:15 - 0:21
Feedback example: "At 2:22, the presenter's name is misspelled in the lower third."
Tip: Remember to always remove
https://www.from links.*💡 Use a subtle sound effect, like a soft ding 🛎️ when a lower third appears. This can help draw the viewer’s attention without being distracting. It’s especially useful when the lower third contains important context or speaker information.
4. B-Roll Footage
B-Roll is a type of overlay. B-Roll is any supplemental footage used to visually support the primary footage in telling the story by adding detail and examples. B-Roll is placed over the top of primary footage to help clarify the topic/subject for the viewer. Primary footage can be greatly enhanced by using B-Roll.
The video here uses B-Roll footage of developers at work, to supplement the primary footage audio "our developers are working really hard".
Video: B-Roll - Developers at work - 1:01 - 1:04
Feedback example: "At 2:22, the B-Roll - looks out of focus, can we swap it out for something else?"
5. PIP (Picture-In-Picture)
PIP is a type of overlay. PIP is when one video source is placed over the primary footage and is generally small and to one lower corner of the screen, displaying both videos simultaneously.
For example, the screen share in this presentation uses a PIP effect of the presenter's video over the demonstration recording.
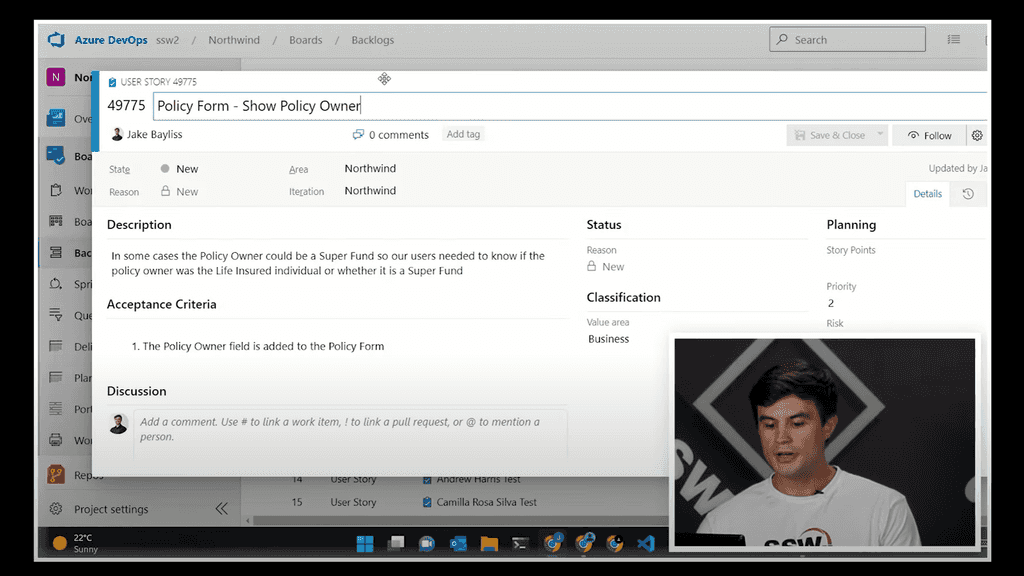 Video: PIP - 3:32 - 4:21
Feedback example: "At 2:22, show the PIP so we can see Jason talking."
Notes:
- Consistency - It looks better to keep the PIP position consistent, e.g. If you start a video with a PIP on the right, any time it appears in that video should be on the right.
- Position - It generally looks better to have the PIP on the bottom right of the screen, however some programs put the PIP on the left (e.g. StreamYard & Loom)
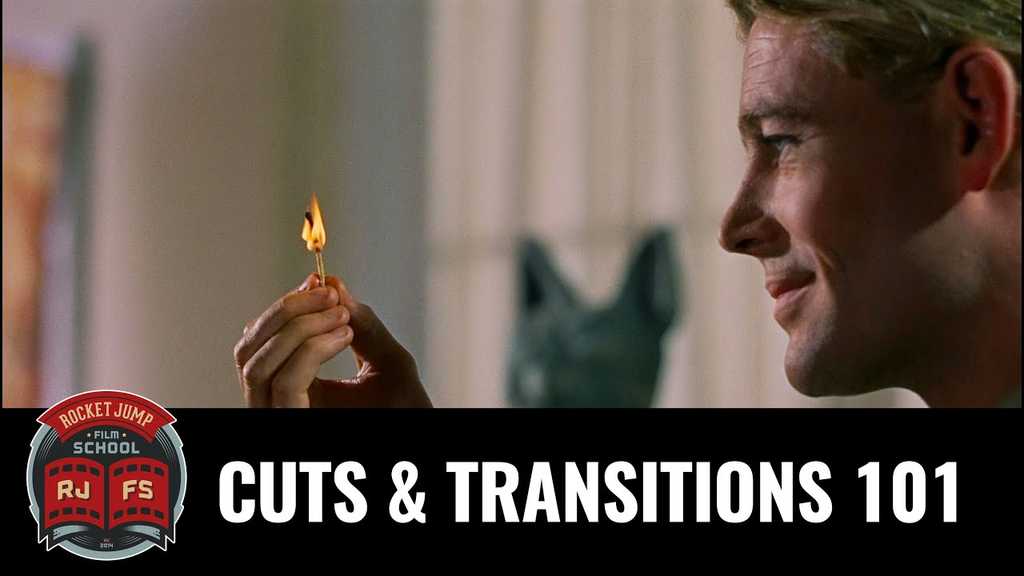
6. Cutaway
The cutaway shot is a filmmaking and video editing technique. It is a supplementary shot that “cuts away” from the main action.
Commonly, technical videos do not often use cutaways, the SSW TV channel prefers to use overlay footage.
Sometimes people can say "cut away to this footage" and actually mean "cut to b-roll footage"
Video: Cutaway - Different types - 0:06-1:39
For example, a cutaway can manipulate tension, convey humor or cast doubt or ambiguity on a scene, among other things. In a way, the director can speak directly to the audience.
7. Sequence
A sequence is a series of clips that are edited in a linear or non-linear order to deliver a story or message.
Video: Sequence - Give context a scene - 5:18 - 5:23
Feedback example: "At 2:22, we need to add B-roll to the sequence of him walking up to the SSW office."
8. Montage
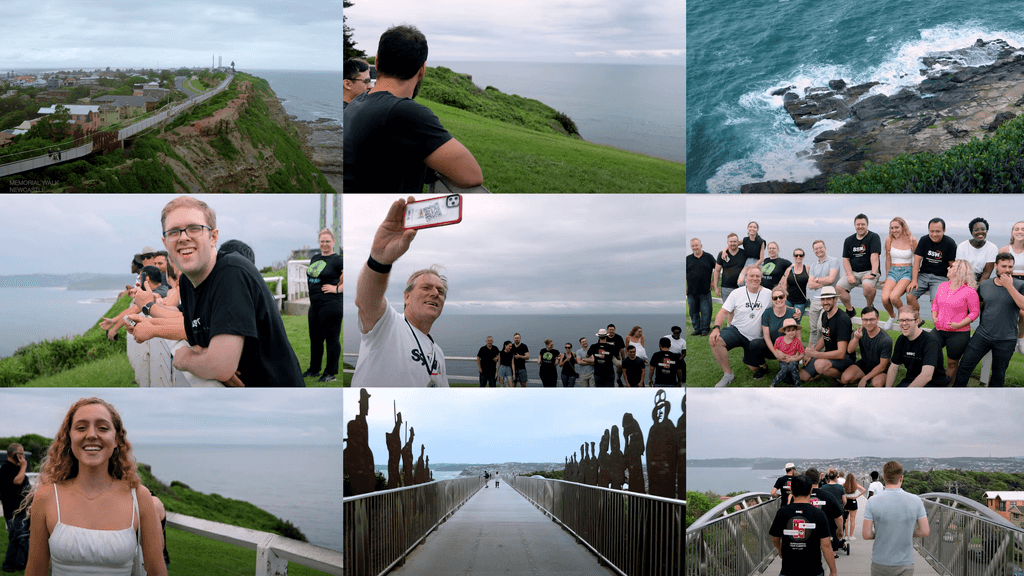
A montage is video editing together several video clips to form a new idea, meaning or create a summary of events.
For example, a montage can help reveal the connections between things and show the nature of what's happening over time.
Video: Montage - Hiking over memorial walk - 3:07 - 3:47
Feedback example: "At 2:22, change add a shot in the montage of the SSW team waving at the camera."
9. Intro
An intro can include a title sequence, logo or a hook (short and catchy footage). Often a opening theme song with visuals are used.
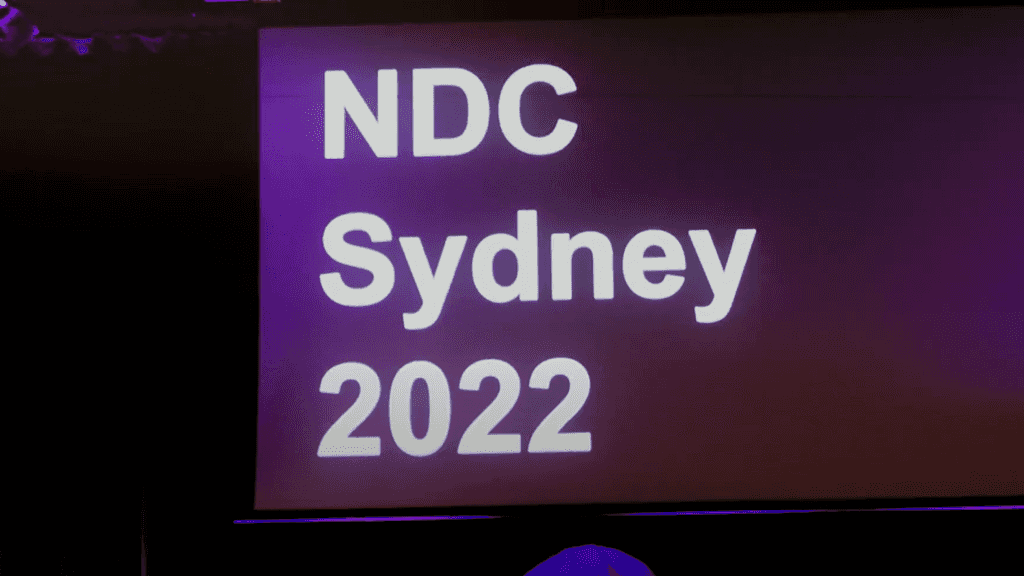
Video: Intro - NDC intro - 0:00 - 0:18
Feedback example: "At 2:22, let's remove the intro and just get into the primary footage."
10. Outro
An outro is the closing visual that appears at the end of a video. It can include a call to action message, contact details or social media links.
Video: Outro - 3:22 - 3:44
Feedback example: "At 2:22, in the outro, have a link to our latest video on our YouTube channel."
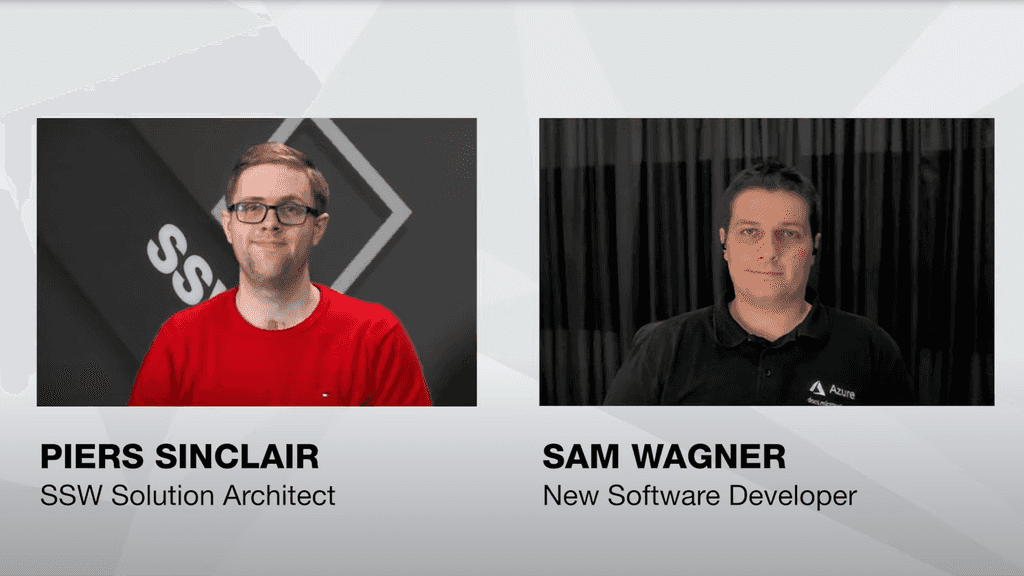
11. Split Screen
Split screen is a type of primary footage and is used less often. Split screen is a video editing technique in which the frame is divided into discrete non-overlapping images or video sources.
For example, Piers and Sam are shown on a split screen during the interview.
Video: Split Screen - 0:22 - 1:34
Feedback example: "At 2:22, it would be better if see both presenters. Can we use a split screen here?"
12. Video Scrubbing
In editing software, video scrubbing can be done by moving the cursor forwards or backward through the timeline to quickly skip forward or backward in the sequence to review footage quickly for feedback purposes.
For example, just like skipping forward or back in YouTube by using the arrow keys, in Premiere Pro, you can do the same by moving the play head.
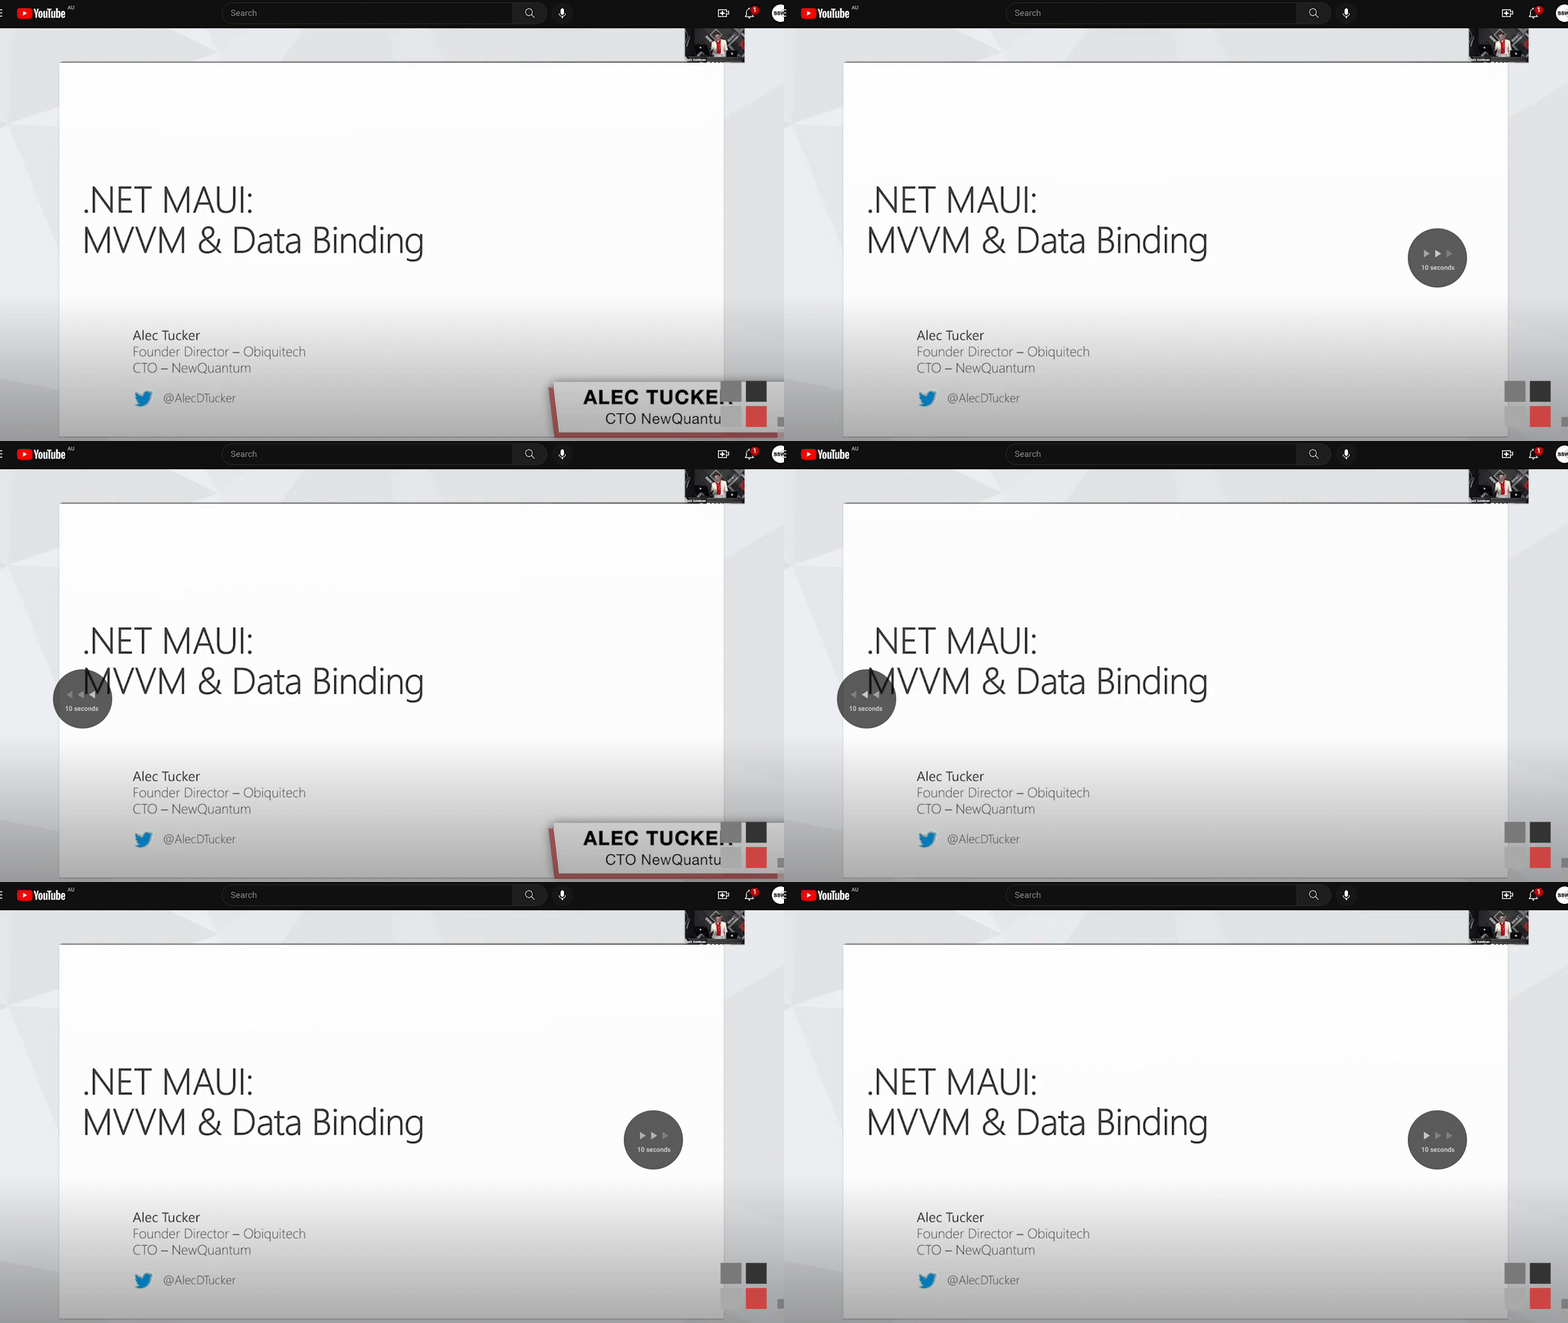
Figure: Scrubbing this YouTube video 10s 
Figure: Scrubbing this Premiere Pro video in the timeline Feedback example: "Hey Sam starting at 2:22, please scrub through the primary footage and see which take is my best to use. Thanks!"
13. Aspect Ratio
The aspect ratio relates to how the width and height of your video relate to each other. Those dimensions are expressed through a ratio.
Examples of the most common are 4:3, 16:9, 1.85:1
For example, on the SSWTV channel, we often use 16:9 for online media platforms and 9:16 on TikTok and YouTube shorts.
See the image below for more aspect ratios.
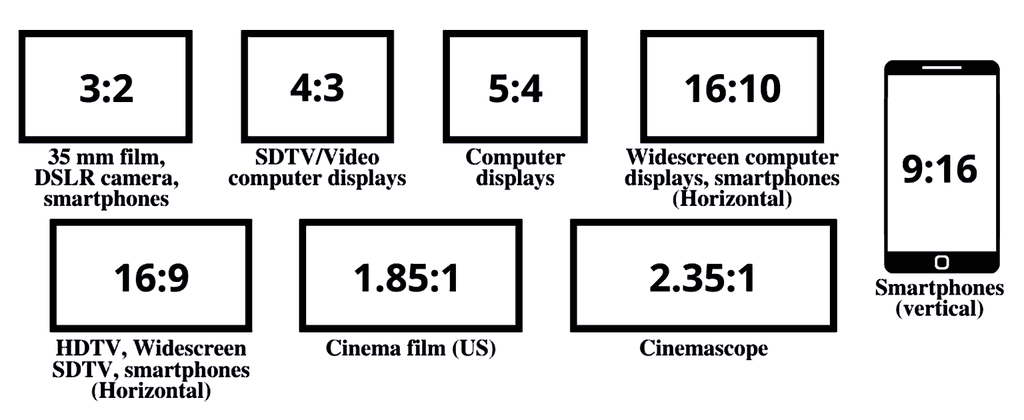
Figure: Aspect ratio example Feedback example: "This video export is the wrong size, it's not SSW TV standards. Can we check the aspect ratio?"
14. Colour - White Balance
A proper white balance is characterized by the whites in an image truly being the colour white.
For instance, in an improper white balance, the whites may have tints of yellow, green, red, or some other colour. White balance’s formal definition is the process of gathering accurate colours for the available light. Your camera may come with a white balance menu and an auto white balance feature.

Figure: The bad example and good example of white balance Feedback example: "At 2:22, Jason's shirt seems a little too yellow, can we check the white balance?"
15. Audio - Sync
When the audio is recorded separately from the camera, you will need to sync the recording to the camera audio during the edit.
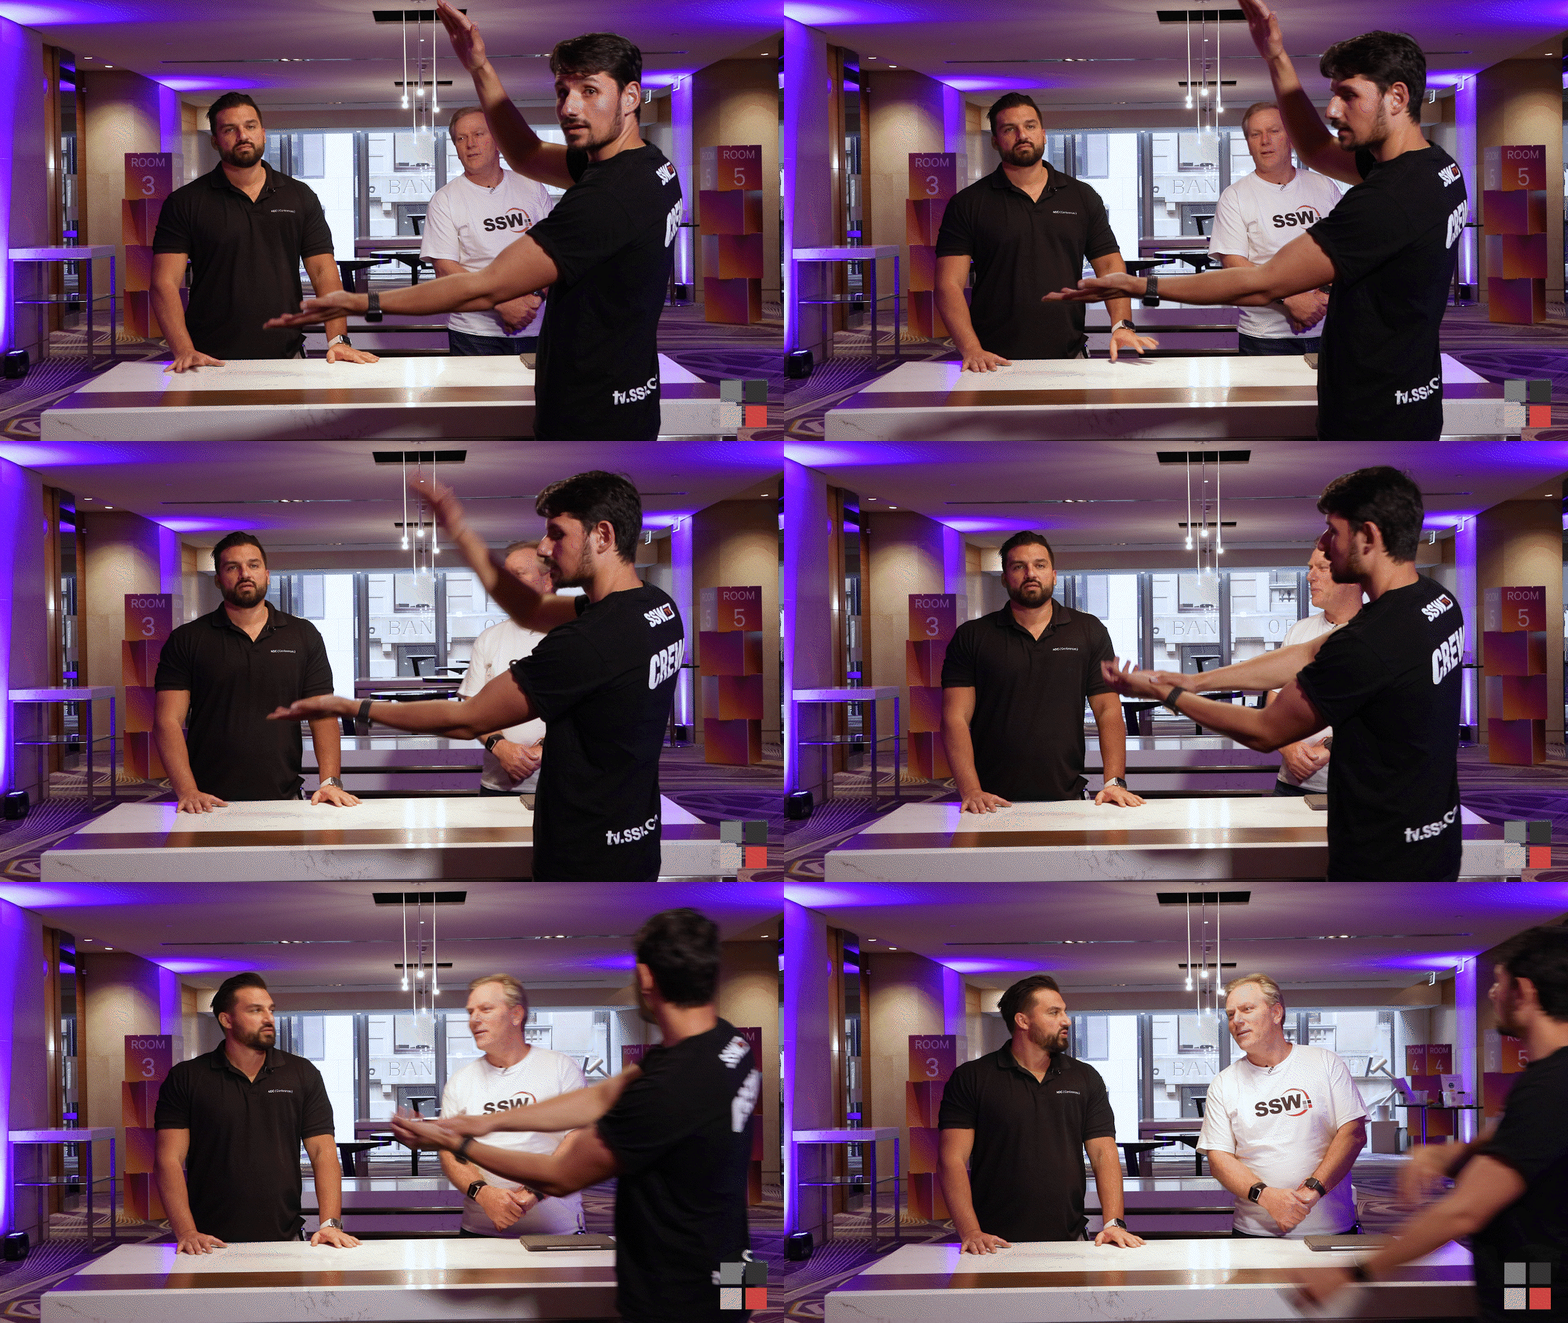
Figure: Clapping at the beginning of the recording can help synchronize the audio Feedback example: "At 2:22, Adam's mouth moving at a different time than the recording audio, it has an audio sync error."
16. Audio - Denoise
Audio denoising is the process of reducing unwanted audio anomalies like background ambience, wind, or static from dialogue without affecting the quality.
Feedback example: "At 2:22, I can hear a buzzing sound with my headphones on, but not when watching on my iPad. Can we denoise the audio?"
17. Audio - Levels
When video editing, it's important to have standard audio levelling.
For example, if the presenter's voice is too quiet, it can be improved by increasing the gain of the audio clip. Vice versa if the dialogue/music is too loud, the audio levels would need to be lowered to reduce peaking.
Figure: The speaker's face was away from the microphone Feedback example: "At 2:22, Adam's audio sounds soft because he turns his head away from the microphone, please increase the levels."
18. Cut - Jump Cut
Is when a piece of footage is removed to give the effect of jumping forward in time. Jump cuts are a quick and dirty way to remove silence in an interview or presentation and "Ums" in the dialogue.
Some YouTube channels don't use jump cuts, the SSW TV channel is one of them.
Tip: It is recommended to use a punch-in or a transition to disguise a jump cut.
Video: Jump Cut - 2:13 - 2:59
Feedback example: "At 2:22, the jump cut here is too noticeable. Can we try a different angle?"
19. Cut - Punch In
This is when the same video clip is used from one cut to another, but the scale is increased from one zoom level to the next.
For example, you can punch in from a wide shot to a medium shot using the same clip to get a closer angle.
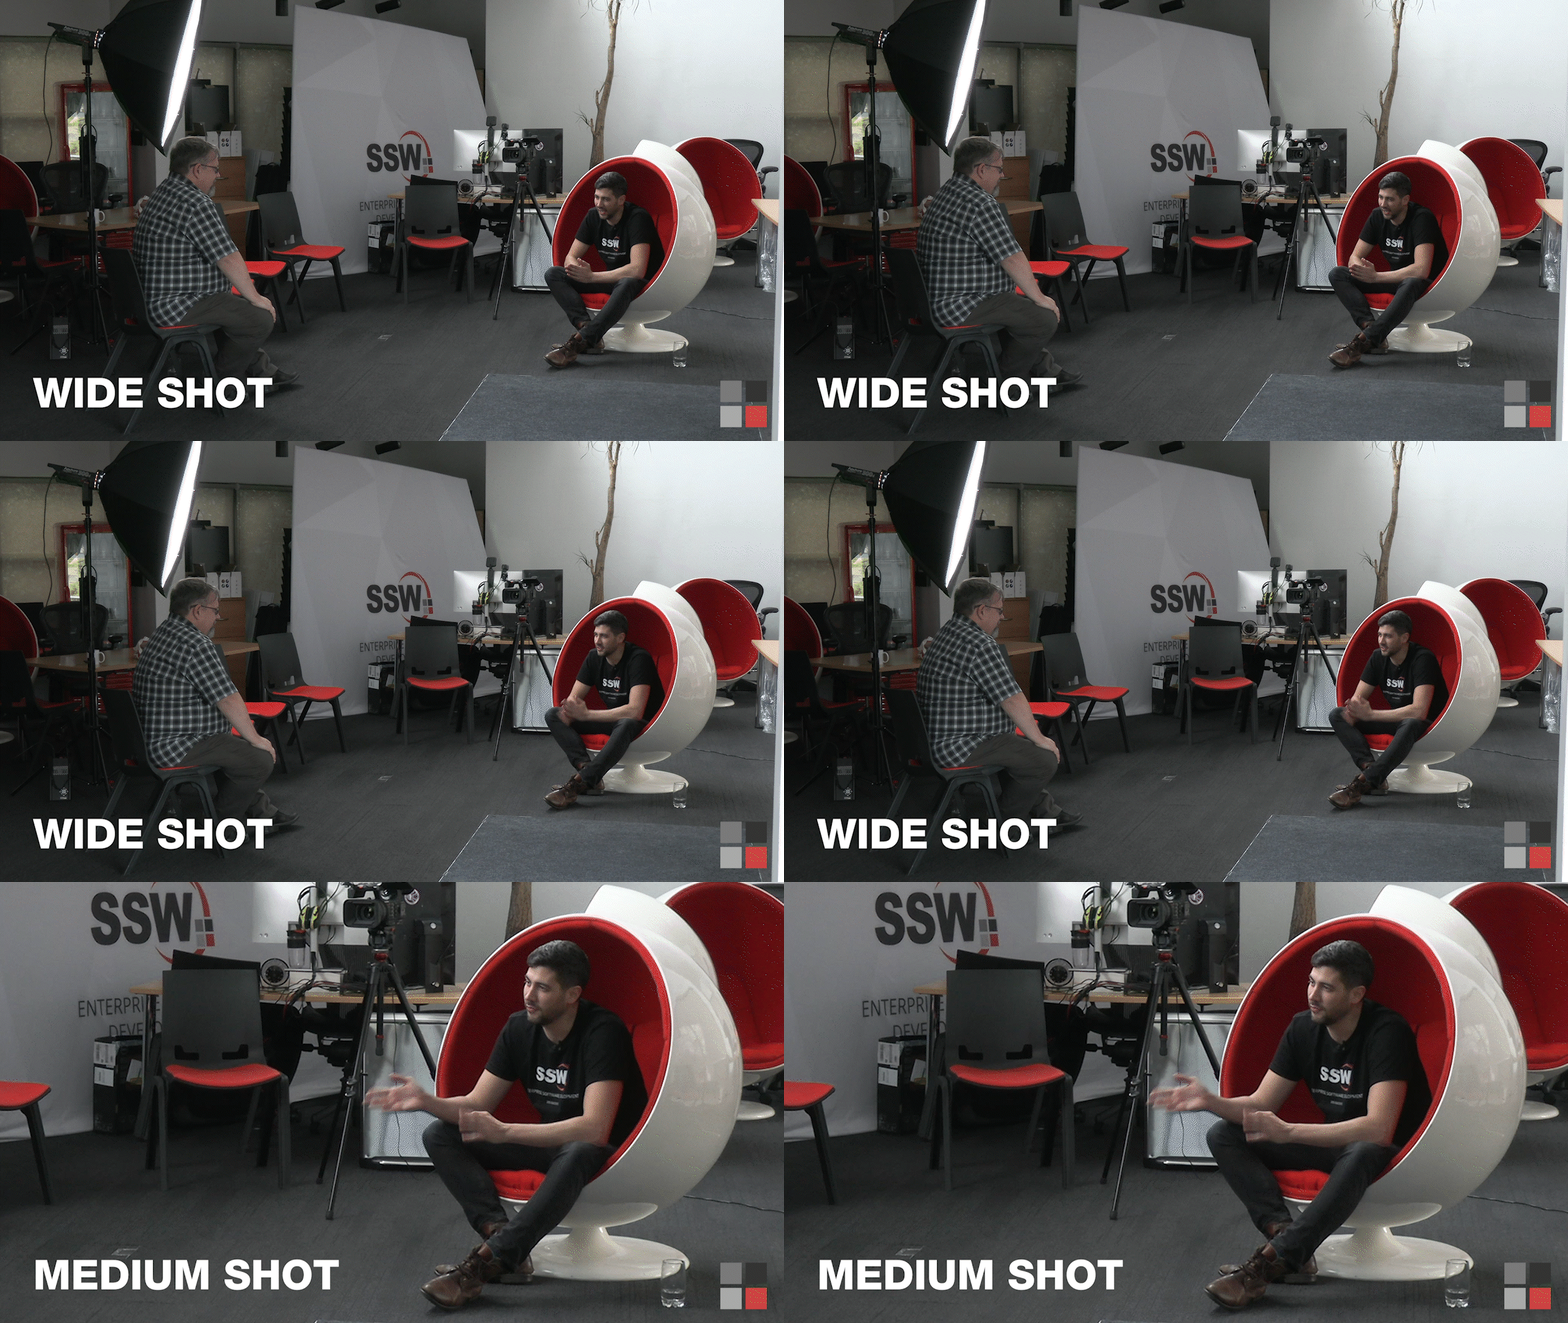
Video: Punch In - 1:34 - 1:54
Feedback example: "At 2:22, he is talking about something really important, can we punch in?"
Note: This is easily achieved when using 2k or 4k resolution footage.
20. Transition - Cross Dissolve
Is a transition effect in which one video clip (or picture) gradually fades out and is replaced by another image or video clip.
For example, when transitioning from a full-screen share to the presenter on stage, using a cross dissolve makes the edit smoother.
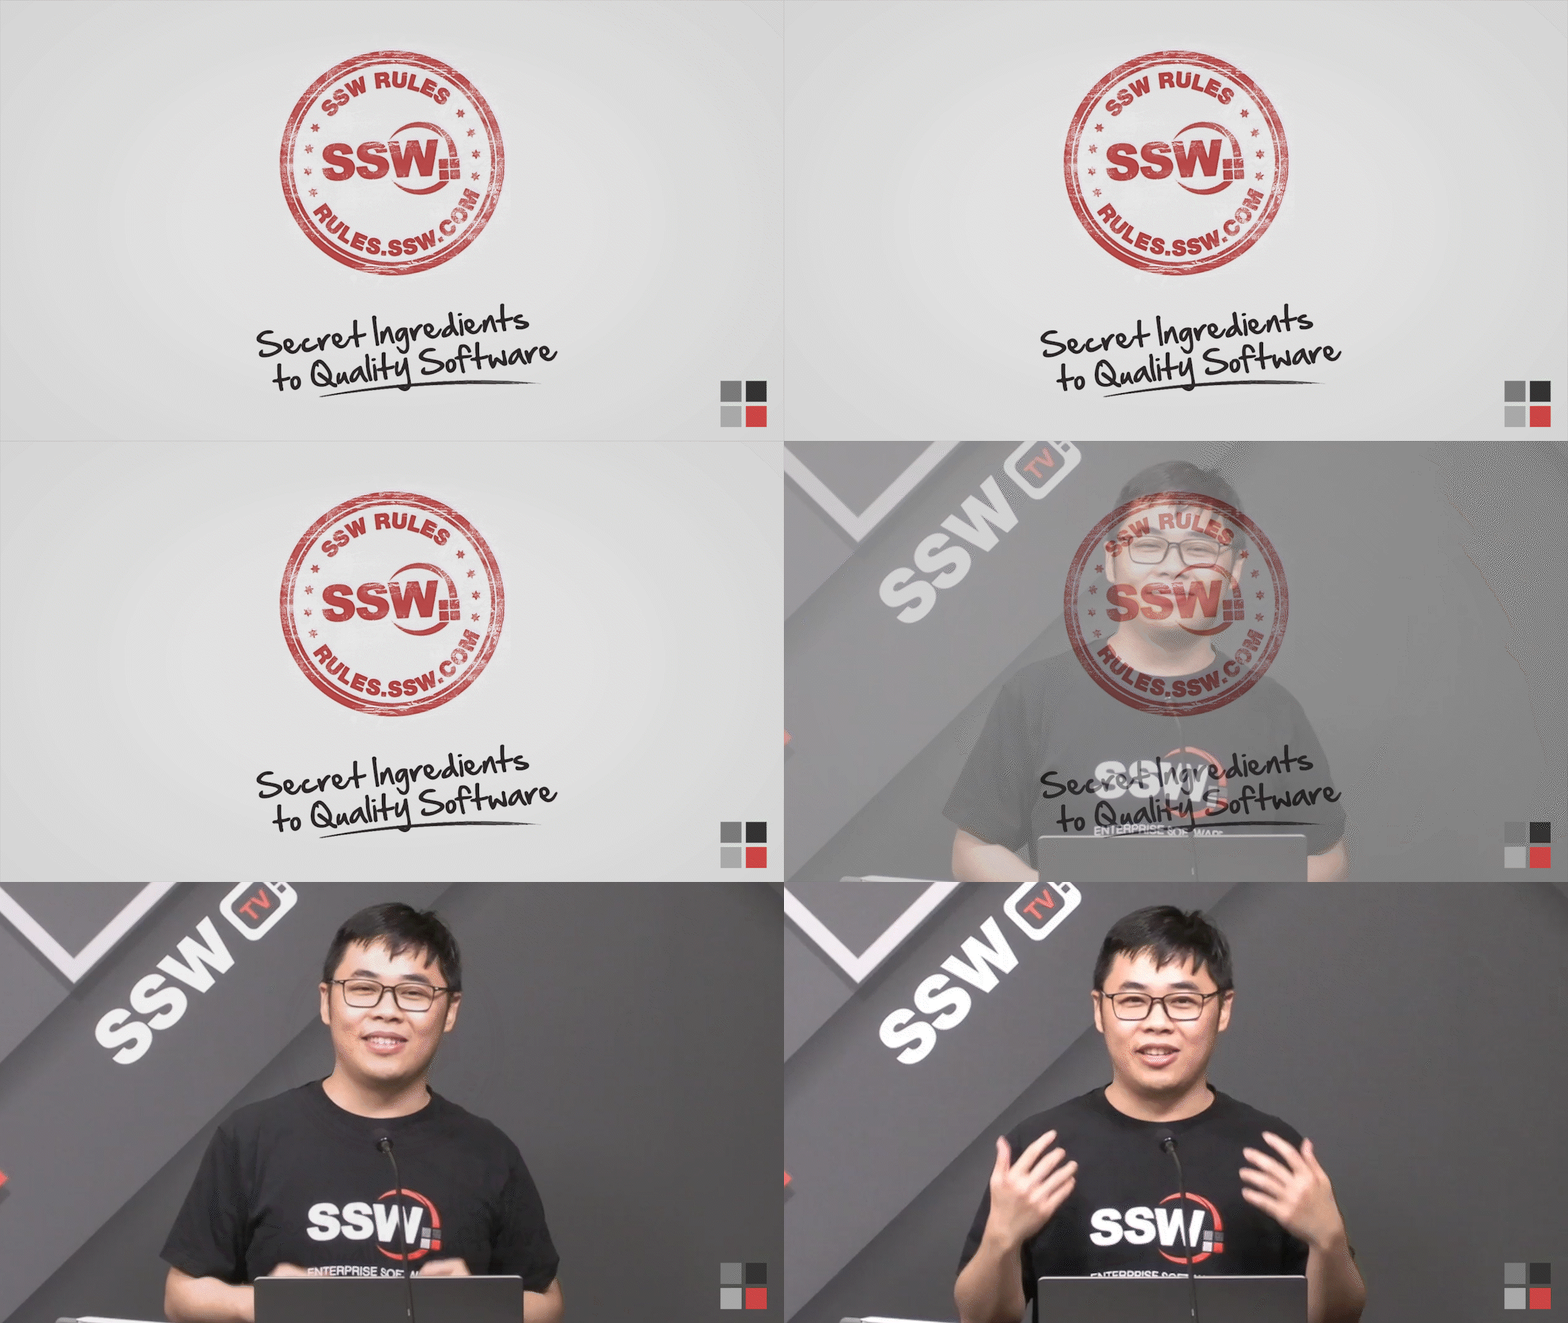
Figure: Cross dissolution makes the video transition more natural Feedback example: "At 2:22, add in a cross dissolve from the intro to the presenter."
21. Transition - Fade
Is a transition effect in which one video clip (or picture) fades out gradually as it blends into (or appears out of) a colour clip.
For example, "Fade to Black" is commonly used to visually signal the end of a scene or when changing from one subject to another.

Figure: Fade to black at the end of the scene Feedback example: "At 2:22, fade to black at the end of the demo."
22. Video Rendering
Is the operation by which the computer processes the edited sequence to allow for a full-resolution preview to be watched. This includes all visual effects without the need for buffering and results in a smoother viewing experience during playback.
Video rendering is similar to compiling code for developers.
23. Video Export
When a video edit is complete, it's time to export a video file from your video editing software. The exported file is usually uploaded to an online platform e.g. Youtube.
Note: It is important to check the export settings to ensure that they are set to High-Quality 1080p as a standard.
24. Test Passed (aka Picture Locked)
The video has been approved and the feedback loop is closed. It is the stage of the editing process in which there are no more alterations to the length and order of the shots. The editing crew may continue to work on the sound and visual effects at their discretion as long as it does not drastically change the overall message, tempo, beats, and story of the picture-locked video.
Feedback example: "Great work! Test Passed, I can't wait to share it once it's live."
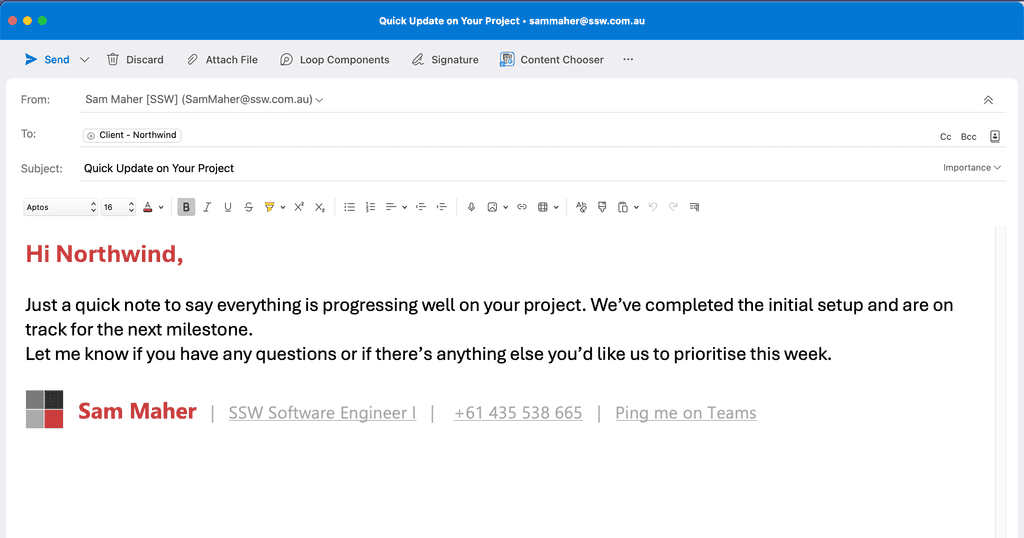
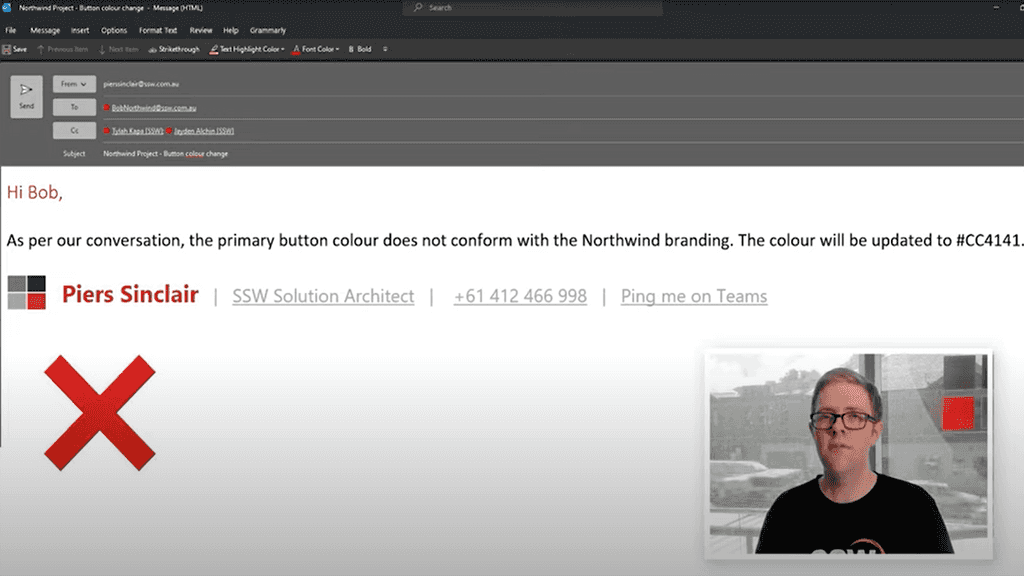
Sample feedback email
Here is a sample email that you can use to provide feedback to the video editor.

Figure: Sample email when sending video feedback including timestamps It can be time-consuming to think and plan a shoot with the background in mind. It is much better to have a library of different office backgrounds to save time.
These will also act as approved office backgrounds from the Product Owner, giving the video team assurance and confidence in shooting the video. It also allows developers who are less creative or nervous about shooting to choose what background they would like.
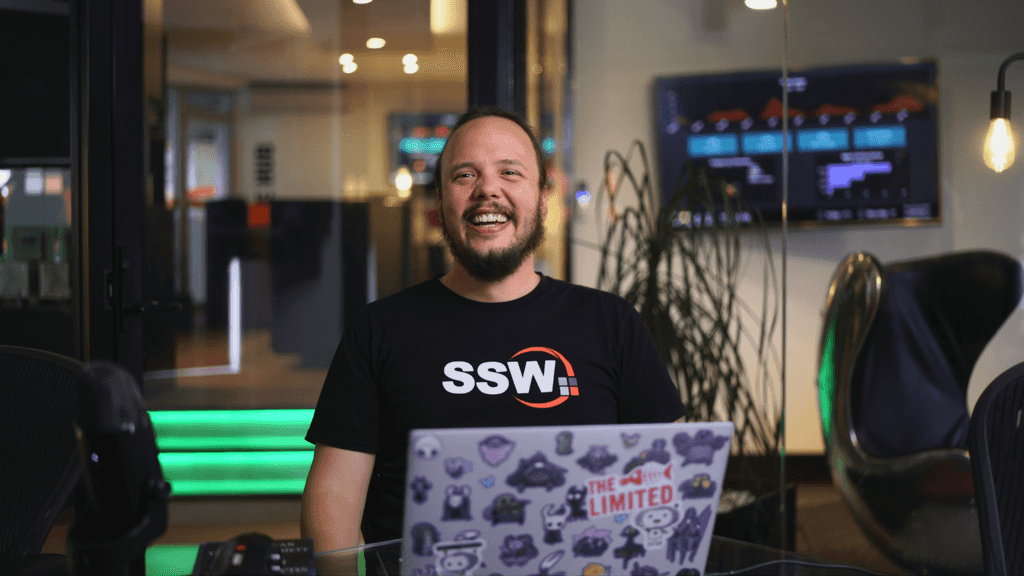
Figure: Presenter - solo and sitting down 
Figure: Presenter - solo and standing up 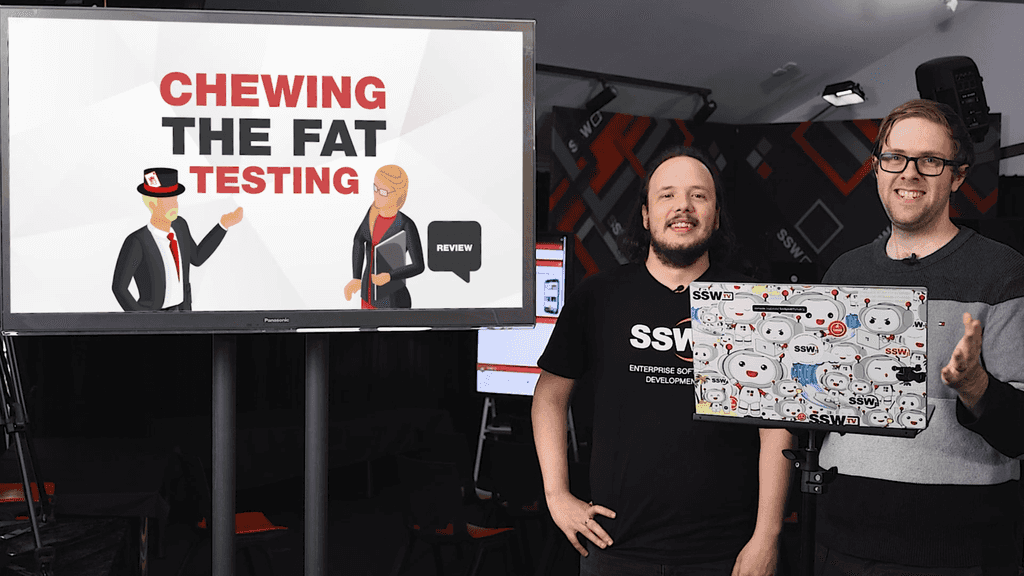
Figure: Two presenters - standing 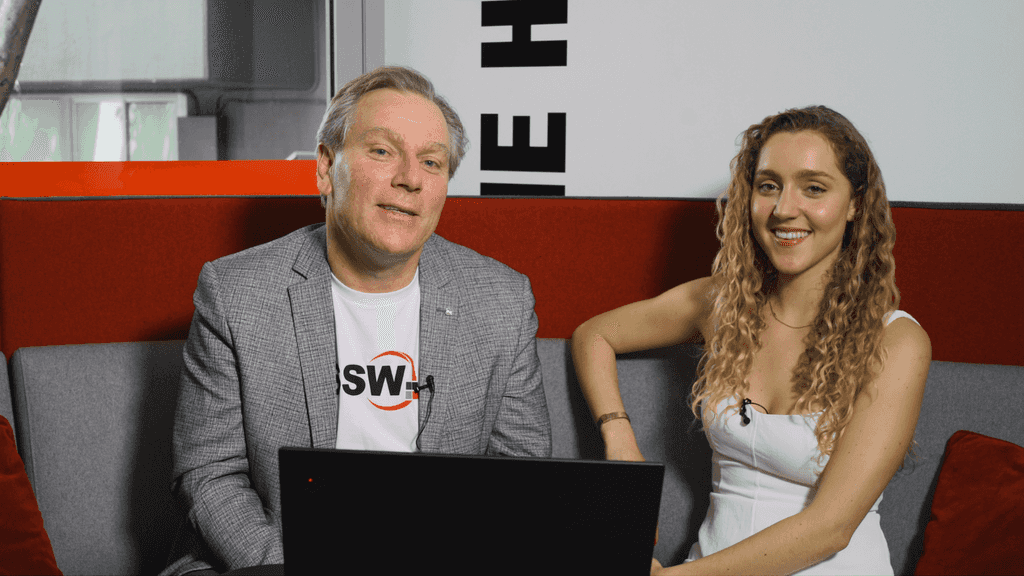
Figure: Two presenters - sitting down 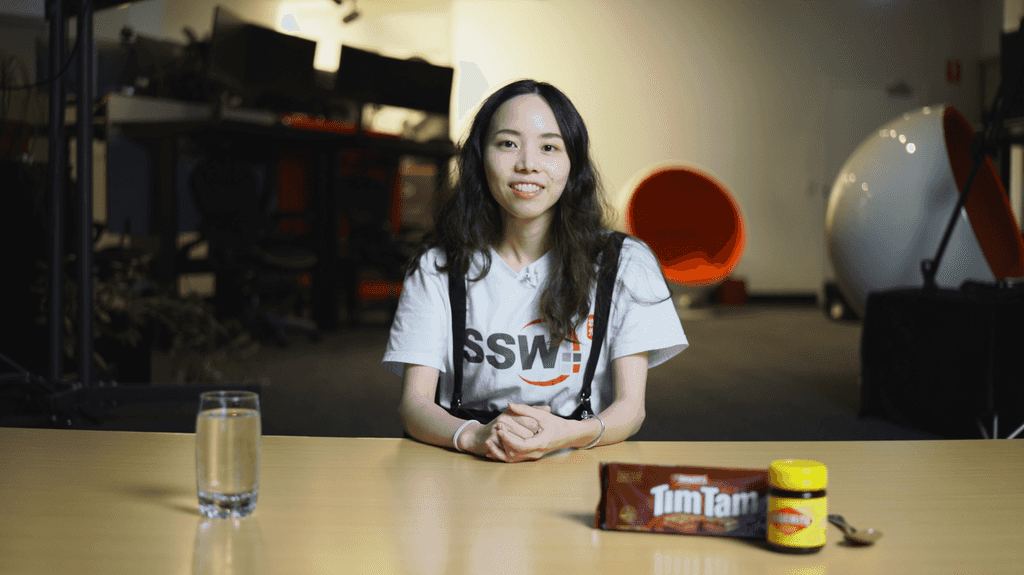
Figure: Interview - piece to camera and sitting down 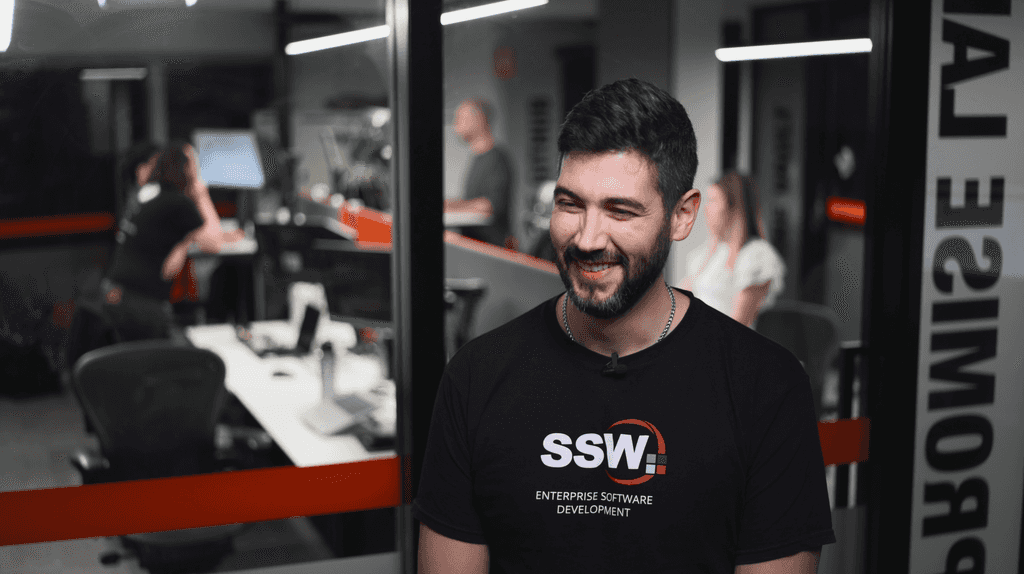
Figure: Interview - standing up and developers in background 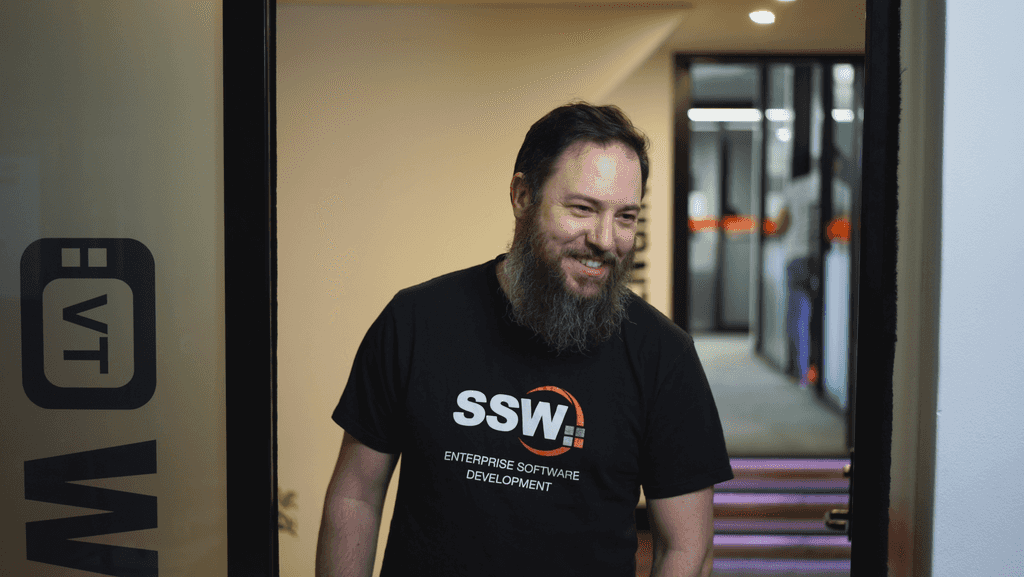
Figure: Interview - standing up in a doorway 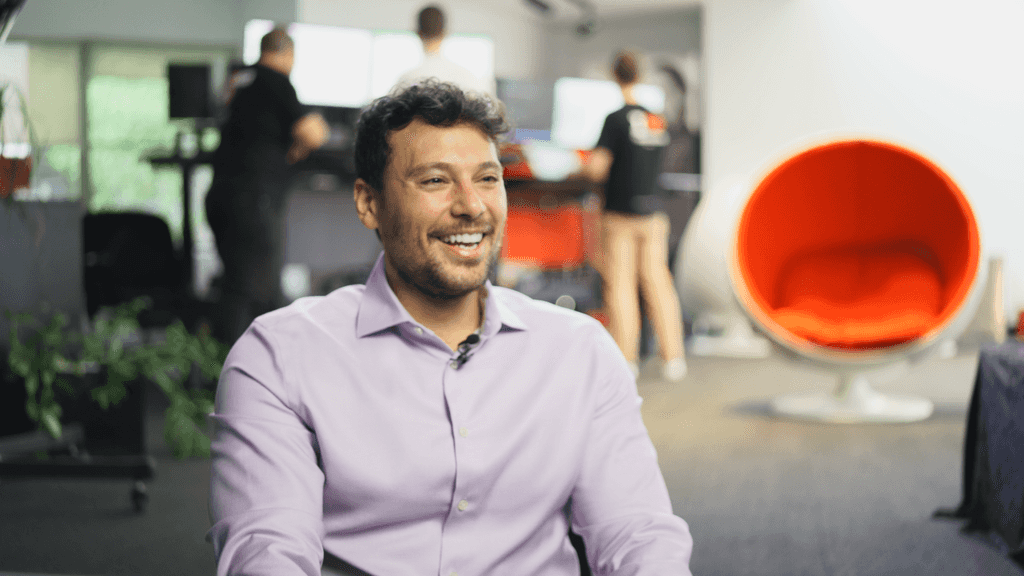
Figure: Interview - sitting down and developers in background 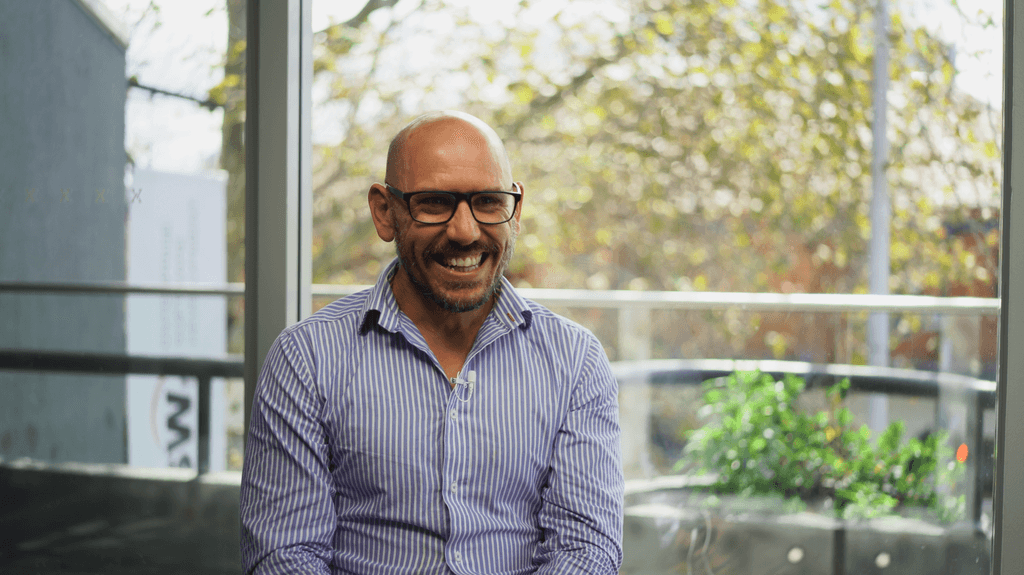
Figure: Interview - sitting down and trees in background Hey Sophie,
Cool video idea. What were you thinking for the background?
Figure: Bad example - Vague question and no visual references
Hey Sophie,
As per our conversation, this is a great and valuable video to make. Please check out the different options of backgrounds we can use for you:
ssw.com.au/rules/unique-office-backgrounds
- Choose the one you most prefer
Figure: Good example - Link to visual references and options for approved backgrounds
When filming a subject (or subjects) there are numerous ways to frame them.
Basic rules to follow include:
- Avoid positioning them on opposite, far sides of the frame, as this creates a feeling of emotional distance between the two characters. Distances seem bigger in the camera, so position your subjects as close together as they are comfortable with, especially if you are using tight framing and/or filming with one camera.
- By using the rule of thirds, you can create more visually pleasing shots. That is, if you divide the x and y axis's into 3 segments, the lines diving these segments should align with certain lines in the image. The intersection of these lines is a good place to position a focal point such as someone's eye.
- Avoid too much space in the frame, especially if space has nothing in it. This is referred to as Dead Space. This can occur when the subjects are placed in front of a blank wall.
- If you can (such as if you have access to 2 or more cameras) avoid filming directly side on, at 90 degrees to the subjects. Always try to be as face-on with your subject as possible.
- Try and have an interesting background. Patterns, movement, and depth can help to create a more interesting shot.
- For corporate and educational videos, a mid-shot works well to capture the content. This is from the belly button up.
- Avoid areas of high contrast - a hot spot (where the light is concentrated into a pure white) or a very dark spot or section of the frame in a predominantly light frame can draw the viewer's eye. If this is not what you want them to focus on, don't include it in the frame.
- If there is only one person in the frame (or if two people are looking the same direction), place them on the opposite side to the direction they're looking for. That is if they're looking left to right, place them on the left side of the frame. If this is not followed, your subject will be pressed up against the edge of the frame and this can create an uncomfortable feeling for the audience.

Figure: Bad example – too much dead space, the characters are unevenly placed, there is an uninteresting background, it's side on and the framing is too far out 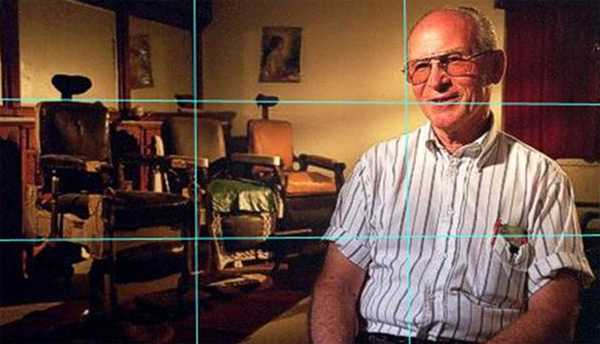
Figure: Good example – the rule of thirds followed, mid-shot, interesting background, no dead space, fairly face on, subject placed on the right side because he's looking from right to left (leading room) When positioning your subjects it is important to remember several factors:
- It is a good idea (if you want to have one of your subjects more face on) to have the interviewee more face-on than the interviewer.
- The interviewer should be on the right side of the frame - you'll notice talk show hosts will always look right to left.
- The interviewer should avoid leaning into the interviewee too much as it might make them feel uncomfortable and seem a little weird in the frame.
- The best way to position your subjects is at 90° to each other and at 45° to the camera:
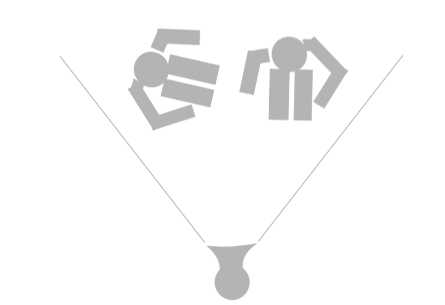
Figure: Bad example - Interviewee (left) is facing toward the interviewer (right) too much and the interviewer is faced towards the camera too much When doing an over the shoulder shot (OTS) for a corporate video, it is generally best to stay at a level height with the subject. Looking up or down at them can create unnecessary meaning in the shot. It is also a good idea to avoid using the wide-angle setting on your camera as it makes the subject seem distant and small in comparison to the person whose shoulder we can see.
One of the hardest things to deal with when presenting to an audience is the correct way to deal with questions.
Try and give firm guidelines when you start as to the correct way to ask a question.
Speaker: "No questions please. Ask your questions at the end"
Figure: Bad example - This kills the sense of interactivity that is so appealing about live presentations
Speaker: "Questions are fine as long as they are on-topic... something about the current slide"
Figure: Good example - This allows interactivity but stops the audience from distracting and derailing the speaker
It is quite common for one audience member to derail the speaker with a lot of questions. If this happens, simply respond:
Speaker: "OK Bob, I think that is your 10th question and your quota has expired. I want to give everyone a fair go, so you get 1 more question after this"
Figure: Good example - This is a firm yet amicable way of managing the situation
Audience microphone
Have an audience mic ready for audience interactions & questions.
- Always include and test the audience microphone before the session
- Make sure audience questions are audible to the presenter, the live attendees, and for recording/livestream purposes
- Encourage audience members to use the mic, and instruct presenters to paraphrase or repeat the question before answering—this ensures context and clarity for all audiences
When communicating with others, it is important to match the tone of your voice with your intent. The way you deliver your message can significantly impact how it is received. A well-matched tone ensures clarity, understanding, and strengthens relationships, allowing your true intentions to shine through effectively.
This is extra important for consultants - we need to make sure our clients trust us and feel confident in the solutions we provide.
Video: Are you Engaging to Listen to? How you Sound Matters (30 sec) Video: Do you match tone with intent | Brady Stroud & Adam Cogan | SSW Rules (3 min)Match tone with intent
- Show confidence - Avoid a raised inflection at the end of your statements. This habit can make your statements sound like questions, reducing your perceived confidence and authority.
Instead, aim to finish your sentences with a neutral or downward inflection to project confidence. - Show you care - Speak with lots of energy to keep your listeners engaged and feeling good
- Avoid sounding defensive - It can come across as agressive
- Pause effectively - Use pauses to emphasise key points and show you are thinking about something
Improve your vocal tone
By yourself
To ensure your tone matches your intent, try these steps:
- During your next call, record your voice
- Reflect - Listen to the recording and ask yourself these questions:
- Are you showing confidence?
- Are you showing care?
- Do you sound defensive?
In a team
- In your next Daily Scrum, play the videos at the start: Are you Engaging to Listen to? How you Sound Matters (30 sec) Do you match tone with intent | Brady Stroud & Adam Cogan | SSW Rules (3 min)
- Then do your Daily Scrum while being careful with tone
- Ask if anybody wants to comment on tone suggestions
- Ask the question "Show a thumbs up if everyone's tone was great"
After doing this for a while, you will start to notice patterns in your tone and be able to adjust it in realtime.
You can also improve your tone by watching a good speaker and trying to mimic their tone.
Tip: Before a call, its important to get in the right mindset E.g., Some people like to smile at the camera before they start a call 😄
- Show confidence - Avoid a raised inflection at the end of your statements. This habit can make your statements sound like questions, reducing your perceived confidence and authority.
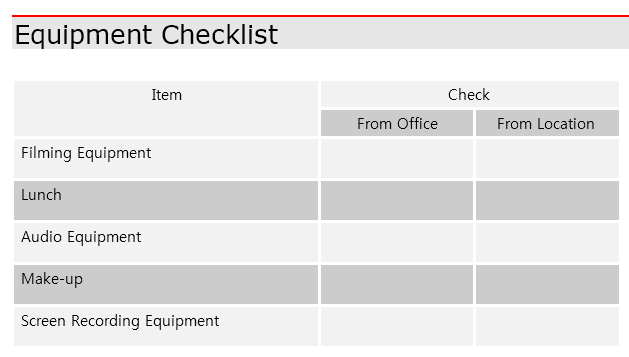
Nothing is worse or more embarrassing than forgetting a vital piece of equipment in the office when you are set to record a presentation in a few moments, so making sure you use a checklist before going to the shooting location is vital in order to ensure the production goes smoothly.
Remember, it is key to make sure that the speaker is kept happy and willing, so do not keep them waiting for unnecessary periods of time. Running back to the office for the tripod plate will make you look unprofessional, and it affects your company's image.
As part of the checklist, it is also important to test the equipment beforehand. So anything electronic such as the wireless mic needs a quick check to see if everything is working as it should. Also, make sure to check if the camera has enough free space for what you are about to record.
It is vital to have the speaker ready and equipped prior to recording. There are a number of things that need to be done to make sure the speaker is ready for recording.
Here are the steps to follow when preparing the speaker for recording:
- **Attach the mic to the speaker ** Assuming you are using a lapel microphone, make sure that it is attached to the speakers' shirt or jacket. For each speaker you need to adjust the sensitivity of the microphone. Do this according to the instructions provided by the manufacturer. As a general rule, test to see that the mic input level does not peak (the audio meter on the device will reach the top). Adjust the mic sensitivity using the device until the input meter does not go past the 2/3rds point. Doing so will create distortions which are difficult to repair in post and waste time. Look at this video to understand more in-depth the correct way to set up a lapel mic system:
The people who watch your video need to know what the questions were in order to understand the context of the answers. The best way to do this is to ask the speaker to paraphrase the question in his or her answer. A simple example would be:
Audience member: "Why should we do things your way? Speaker: "Because..."
Figure: Wrong way to respond (viewer will not understand what the context of the answer without knowing the question.)
Audience member: "Why should we do things your way?" Speaker: "The reason you should do things this is way is because..."
Figure: Correct way to respond The speaker arrives to the venue with a mindset that they are speaking to a room of about 25 - 30 people. It is important to us and the audience at home who watch this online, that the speakers' mindset changes from presenting to a room of people to an audience of thousands 3. Do you enable presentation mode in Visual Studio. 4. Tell the speaker to read Rules to Better PowerPoint Presentations. 5. Assume the speaker will need to play sound through the speakers, even if they say they won't, and set up to allow for it. 6. Explain to the speaker that you will give them a 5-second countdown when you are about to start streaming them and that they should face forward when this happens, instead of looking sideways at you
Unwanted noises such as people walking and talking can ruin a recording. If you have this problem, the best way to avoid it is to use a recording in progress sign that informs people who are passing through the area that they need to be quite and/or leave the area.
 Figure: Bad Example - This design does not imply a sense of alert. You need something that is going to catch the attention of people and imply an important message.
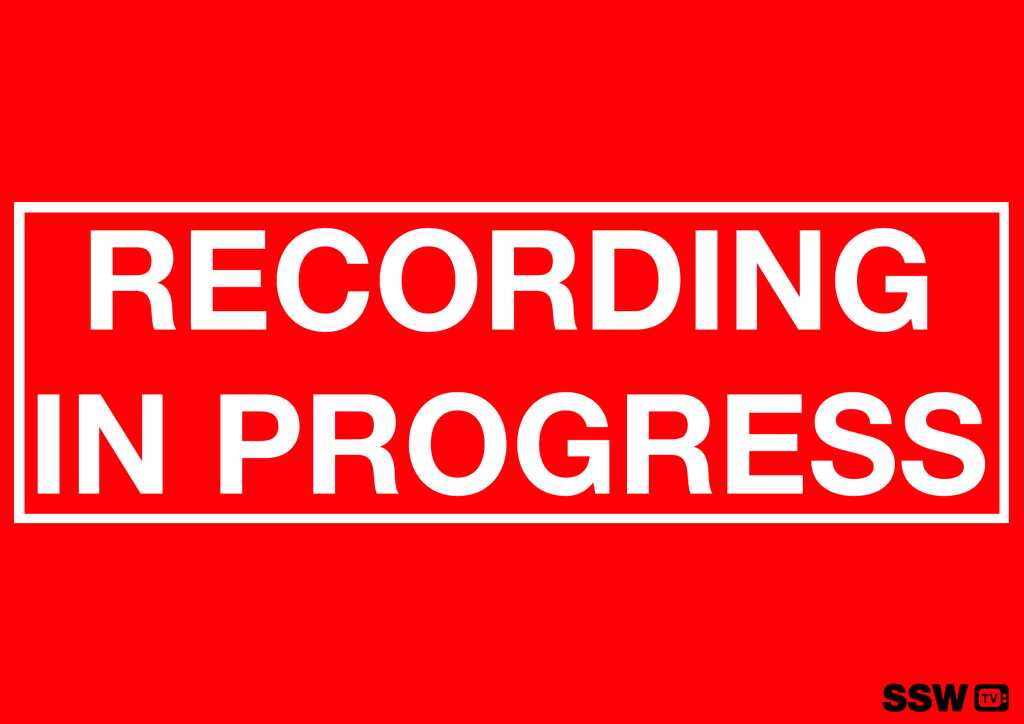 Figure: Good Example - this implies a sense of urgency, it implies 'we are recording so don't make noise or ruin the shoot in any way', instead of 'we are shooting and it's really cool so come check it out!'.
Using a 'Shot List', the camera operator can mark down where in the recording an interesting point is and where a cutaway or caption should appear.
The shot list provides the editor with a breakdown of where the interesting parts of the interview are that need cutaways and captions, and what they could be. This is not always necessary but keep it in mind as a useful tool at your disposal. A simpler method (if working with a script) can be to simply write shot types next to lines.
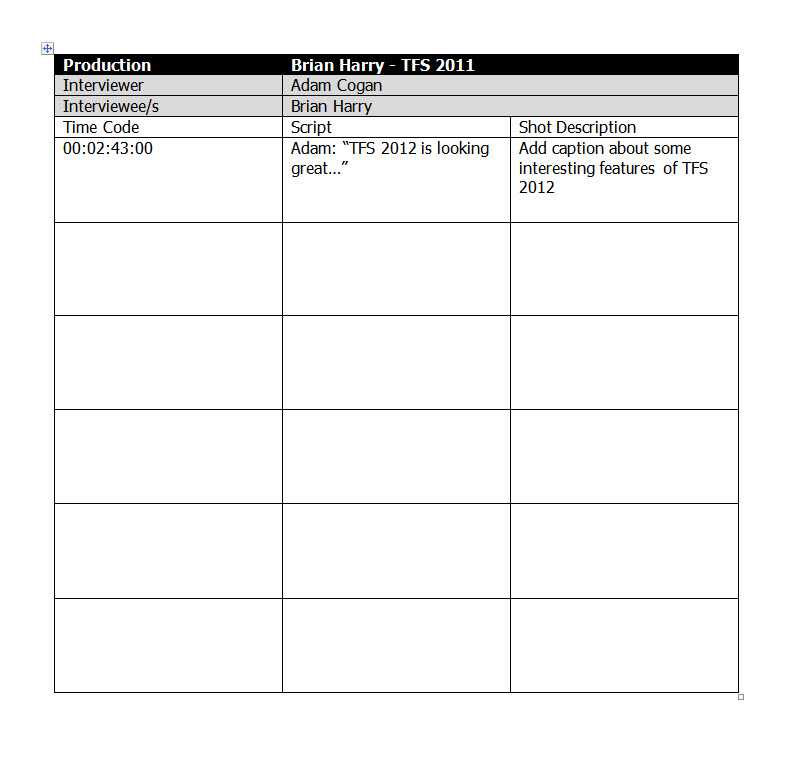 Figure: Example shot list. The camera operator will mark down the time code (visible on the cameras' LCD screen) and note what words were said and what interesting caption or cutaway should be added.
After the interview, review the shot list so that you can see what cutaways are needed, and try to obtain them (See Rule: Do you use cutaways?)
It is important to have solid introduction and closing statements. This is specially useful for product demonstrations.
Intro: "Hi, I’m Steve here to show you what I just did"
Closing: "Thanks for watching"Figure: Bad example - This closing statement ends the video abruptly, and doesn’t leave the viewer satisfied
Intro: "Hi, I’m Steve from SSW and I’m going to show you how our latest feature – the project breakdown report – can give you an overview of where your employees are spending their time." Closing: "I’ve just demonstrated the usefulness of a project breakdown report to understand what it is your employees are working on"
Figure: Good example - The opening and closing statements back each other up, and give the demonstration a sense of purpose
To create more visually pleasing videos consider using a multi camera setup.
The benefit is that you can use the second camera to 'cut away' to (see rule on using cutaways) in the edit.
If you are recording a long interview use two (identical) cameras, covering both the presenter and the interviewee.
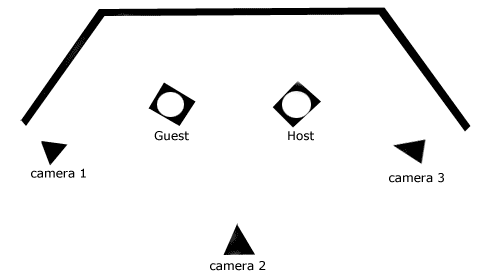
Figure: Multi cam setup for single guest speaker interview If you are recording an event with multiple people and want to maximize the coverage (and obtain cutaway shots) use a second/third camera, either placed on a tripod somewhere of interest or give to someone else to move around with and obtain interesting shots.
Camera 3 should be identical to Camera 1 if available (it is still possible to use two different cameras but this may cause some quality compromise in the form of different colours for each). An iPhone can provide the necessary shots to make a video more interesting, but only use iPhone 7 or later footage if proper lighting, exposure & composition can be achieved (Please see rule about the correct way to frame your subject.)

Figure: Flip camera mounted to a small table top tripod. Ideal for cutaway shots When filming a scene it is always important to remember production design aspects. Production design is basically all of the things (excluding the people) that we see on screen. This includes wardrobe, set design, location, lights and props.
Overall, one should try and use as little colours as possible when designing a production. That doesn't mean use mainly tones, it means try and limit your colour palette to as few colours as possible. If you are creating corporate work try and include your company's colours.
For example, when creating a production for SSW, we'd would use black, white, red and bronze (the bronze refers to the colour of skin - this will almost always be involved in your colour palette). You might end up having to include another colour or two but you will find the less unnecessary colours you use the better. Try and apply this to every aspect of your production design.
Wardrobe
Wardrobe refers to what people wear when they're on screen. Keep in mind the tone, genre, character and mood of your production when choosing clothing. Avoid distracting jewelry or accessories unless it adds to the character. Also avoid stripes; most cameras will produce an unnatural, unpleasant effect when filming them, so make sure your actor isn't wearing their favourite striped shirt! Text on clothing is also a bad idea, the viewer will try to read it instead of listening to what your actor's are saying.
Set Design
Creating a set for a production is a complex and tricky business but there are some basic ideas you can use to create appealing set design. First off try and design your set to reflect the theme of your production. So for example if you were creating a set for a software design talk show, you would probably want lots of metal and technical art, however if you were creating a set for a drama about a youth who's run away from home, you would want something dirty, dark and depressing to reflect the character's grim situation. Again, avoid stripes that are too close together. A general rule of thumb is that the stripes should be at least 5cm in width. Make sure that everything is safe and if there is construction to be done, hire a professional.

Figure: Bad example - Dark wall on the side, boring wall in the middle, reflective surface with people passing behind, lack of depth 
Figure: Good example - Interesting background but not distracting, relevant furniture, set reflects theme of show Location
Location is similar to set design, only in this instance the aspects are mostly out of your control. You can certainly dress the set (see below) but at the end of the day there are some things that will be there no matter what. As such, choose your location carefully.
Things to consider are background, framing, sound and distractions. Is there a loud lecture theatre, highway or skate ramp next door? Is there a window on your set that's going to create a distracting reflection? Is there a boring, featureless wall in your background? Is there a line that appears to be passing straight through someone's head? Also avoid high contrast, such as a very dark wall next to the bright wall your subjects are in front of, or a large white spot on a black wall.
Video: Good and Bad examples of filming locations (1 min)Lights
If you are working with a D.O.P. (Director of Photography) and/or your are lighting your scene, its a good idea to include lights as part of the production design (on the set). Don't include a bright light shining directly into the lens or anything, but a lamp can provide a good source of light to work with and create an interesting object in the frame.
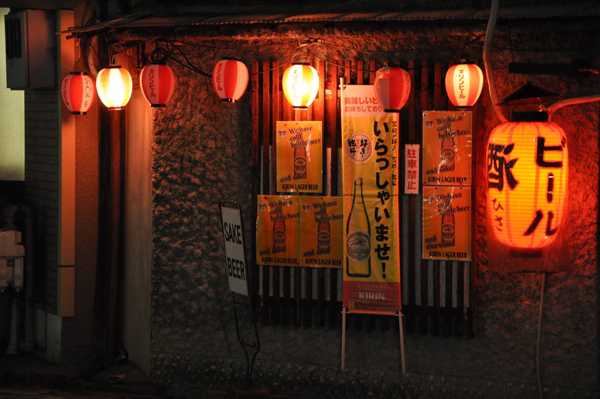
Figure: Good example - These lights are diffused enough that the rest of the picture is clearly visible Props
Props and set dressing are important; props are defined as objects in the script that we know before-hand that the subjects will interact with, set dressing is things that we add to a set to create content. When choosing what props should(n't) be on set it is important to ask yourself, is there a reason for this to be here? A can of coke for example will be ugly and distracting in most circumstances but a pot of flowers might be just the thing to give your scene that extra bit of life, or convey a caring sensitive side of your character.
If your subject needs to drink something while they're on camera, offer them a glass (its more visually pleasing). Look carefully at the frame and ask yourself, is there any camera equipment visible? Does that ugly mess of cables really need to be there? Does this scrap of paper or backpack need to be in the frame? If not, ditch it. If it adds value to the picture and doesn't distract, keep it.
The goal is to have a presenter give the editor zero cuts. Editors should inform the speaker when they have to clean up their presentation in post-production (and you think they would likely make the same mistake again next time).
When the editor hits an issue, talk to the speaker, show them the problem and make them practice doing it again, the right way until you give them a 'pass'.
Now you can hope they won't do it next time, and you won't need to do an edit.
There are a few options when it comes to the best software for editing video content, e.g. creating YouTube videos.
When creating video content, the most popular editing workflows are:
- Adobe Premiere Pro (editor) and After Effects (motion graphics)
- DaVinci Resolve (editor) and Fusion (motion graphics)
- Final Cut Pro (editor) and Apple Motion (motion graphics)
Adobe Premiere Pro and After Effects is the most popular workflow as it works with both PC and Mac ecosystems, and allows integration with additional Adobe creative cloud tools (e.g. Audition, Photoshop, Illustrator, and more).The software is user friendly and allows for a great deal of customization with layouts and third-party plug-ins that can help to significantly improve your editing workflow.
DaVinci Resolve is the fastest growing editing software, and can be used for free (there is a paid Studio upgrade, but the free version is suitable for most editors and projects).It started as a colour-grading tool and then was developed into a full editing software solution, so some editing elements are not as user friendly as other editors, but once you are used to the platform is it a solid choice.DaVinci is made by Blackmagic Design from Melbourne, Australia.
Final Cut Pro is an Apple exclusive workflow, which means that it is not suited to teams with PC/Windows ecosystems. The benefit of this is that Final Cut is continually optimized for Apple’s hardware, so it is a good choice if you work on a Mac and use footage in the ProRes codec.
Note: Avid Media Composer is another video editing software that is still used for TV series and movies, but it has a steep learning curve and is not popular for YouTube content creators.
Often when video editing, you hear terms like “cut to” and “cutaway” when decribing the addition of footage to "show" what is being discussed. They might be used interchangeably in some video teams; however, this might cause confusion when providing feedback to some video editors. Many YouTube channels don’t distinguish been to the 2 terms, but let’s define the difference and what the preference is for the SSWTV team.
The cutaway shot is a filmmaking and video editing technique. It is a supplementary shot that “cuts away” from the main action. Commonly, technical videos do not often use cutaways, the SSW TV channel prefers to use overlay, also called B-Roll footage. Sometimes people can say "cut away to this footage" and actually mean "cut to b-roll footage"
Learn more: https://www.ssw.com.au/rules/video-editing-terms/#6-cutaway
Now let's put that into practise. During an interview, looking at a talking head (the subject) can become monotonous. It is a good idea to ‘cut away’ to the detail/thing that the speaker is referring to. Not only does it make it more interesting, it improves the understandability of the video and allows for your audience to connect with the message and interviewee journey.
As an example, if you are interviewing someone and the topic of unit testing comes up, mid-sentence you can cut to a shot of the unit testing UI.
Figure: Good example - Using B-Roll footage to improve the audiences engagement
Nowadays there are a variety of online video hosting solutions to choose from and it's important you pick the right service for the right purpose.
YouTube is great for exposure, social media sharing and where user engagement is part of your marketing strategy. The best types of content that work on YouTube are Educational and Entertainment.
However, YouTube might not be the best place to host your more marketing based videos, for example, a homepage video selling a service or product.
Hosting platforms like Wistia and Vimeo is better for professional purposes because they can offer things like higher video quality, embedded player customization, improved analytics, external links and capture forms - great for selling a product or service.
A branded intro and outro will associate the video with your company. Intros are the visuals at the very beginning of your video, while outros appear in the end.
Good example: Intros can have the video title; event logo; or speaker details (depending on the type of video you're making) You can get your own video reusable intros and outros at SSW's Video Production services page.
Video thumbnails should entice a visitor to watch the video. We find that images are better than text. If text is used make sure that it is not obstructed by the play button.
Sometimes a video editor wants to communicate good and bad examples to the audience, but they aren't sure the best way to do that. Ticks (✅) and crosses (❌) with sound effects are a great way to highlight good and bad examples to the audience, but they only work if used correctly.
Using ticks and crosses in the will help you emphasize an example and aid comprehension of the content. Including sound effects in the wrong way may interfere with the audience's understanding of the example
A good tick and cross example will have:
- A graphic - Not intrusive on the content and left aligned
- A subtle sound - Significantly lower than the human voice
Note: Using a blend of tick and cross visuals with sound cues will reinforce for your audience which example is good and which is bad.
❌ Bad example #1 - No visuals or sounds
Video: SSW TV - Do you have a product roadmap? | 0:38 - 0:48
The video presents good and bad examples without using other visual elements or sound effects which may cause them to get distracted while watching or have to back-track.
❌ Bad example #2 - Distracting visuals and obnoxiously loud sounds
Video: SSW TV - Do you check before installing 3rd party libraries? | 0:59 - 1:02
Ticks and crosses with sound effects are used in the video, but there are still problems:
- Distracting ticks and crosses - the visuals are too large and placed in the middle of the frame so they draw the audience's attention away from the content.
- Loud sound - When the sound effect is significantly louder than the human voice, it can cause an unpleasant auditory effect.
Therefore, it is important to use an appropriately sized graphic left-aligned (since we read left to right) with a subtle sound effect.
😐 OK Example
Video: SSW TV - Documenting decisions and discoveries with Piers Sinclair | 1:54 - 2:02
This is an OK example using crosses in a video:
- Good size - smaller than the figure in the picture, not visually obtrusive
- Good location - in the margin below the email signature, not covering the example, but drawing the audience's attention to it
- Subtle sound effect - the sound effect is lower than the speaker's voice
However...it would be an even better approach to standardise your ticks and crosses so you can use the same graphic across every video.
✅ Good Example - Lower Thirds
Standarding your ticks and crosses using a lower third helps the team have a consistent sound and visual across every video.
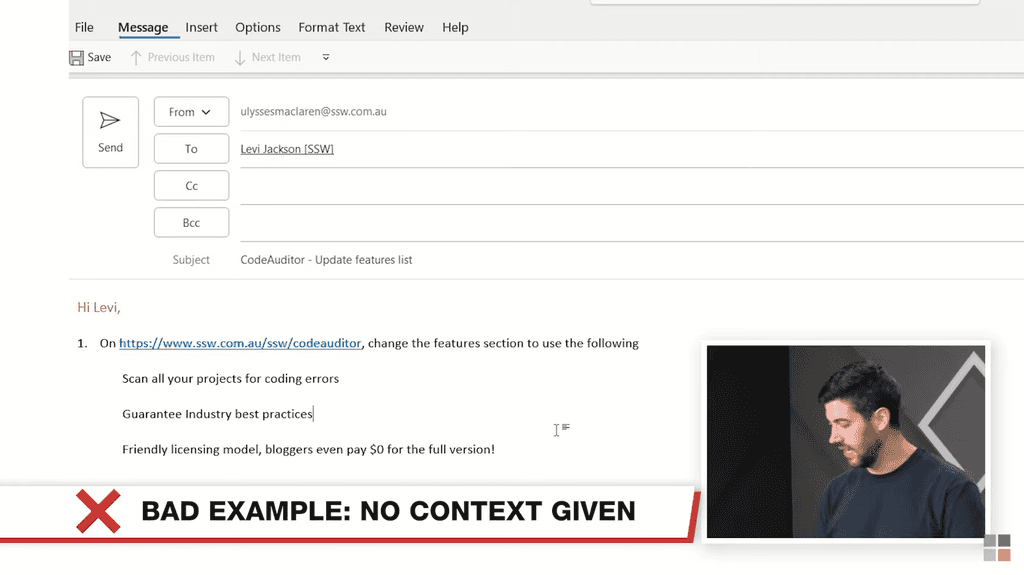
Figure: Good example - The red cross and bad example in the lower third + subtle sound - 0:58 - 1:07
Extra - SSW TV Research: Feedback on videos using ticks and crosses
In a weekly internal form known as "'Chewing the Fat', the SSW TV Team set three questions for SSW employees to answer:
- Question #1 - With sound or without sound: Video Ticks and Crosses - Did you like them?
- Question #2 - Subtle sound or loud sound: Video Ticks and Crosses - Did you like them?
- Question #3 - Comparison: Video Ticks and Crosses V3 - What are your thoughts on the sound?
- Question #4 - Which subtle sound is perfect: Video Ticks and Crosses - Did you like them?
Results - Question #1 - With sound or without sound: Video Ticks and Crosses - Did you like them?
Video #1: SSW TV - Do you check before installing 3rd party libraries? | 00:42 - 00:47
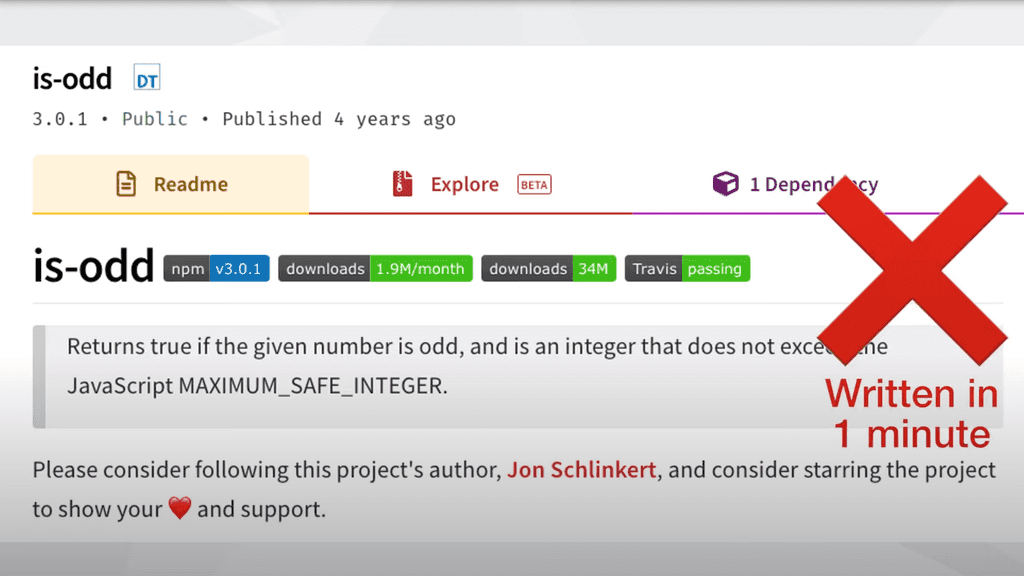
Figure: Distracting red cross with loud sound 
Figure: Question #1 feedback 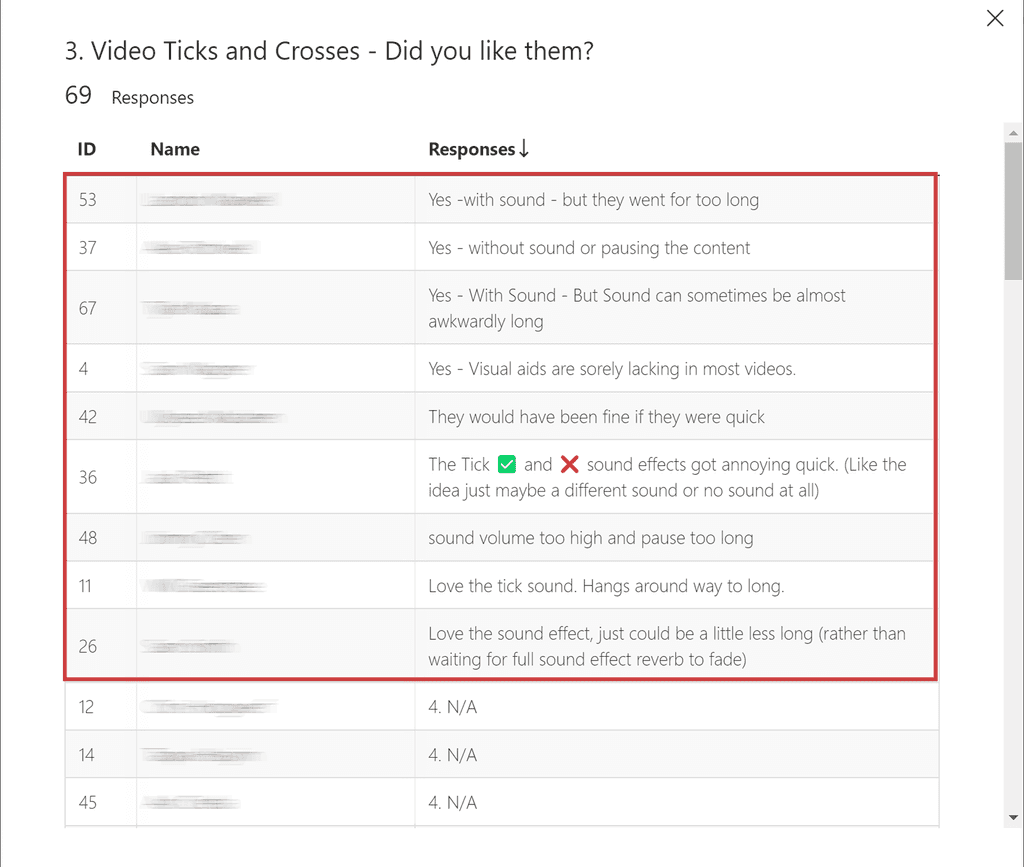
Figure: Question #1 feedback - Option Others After watching video #1, people preferred having a sound rather than having no sound. Of the 9 other responses, 6 preferred with sound but they all thought the sound lasted too long, 2 of them prefer without sound, and the other 1 didn't comment on the sound.
The final results (including other) were:
- 55% prefer to have sound
- 31% prefer to have no sound
- 14% prefer no ticks and crosses at all
Results - Question #2 - Subtle sound or loud sound: Video Ticks and Crosses - Did you like them?
Video #2: SSW TV - Documenting decisions and discoveries with Piers Sinclair | 01:36 - 01:46
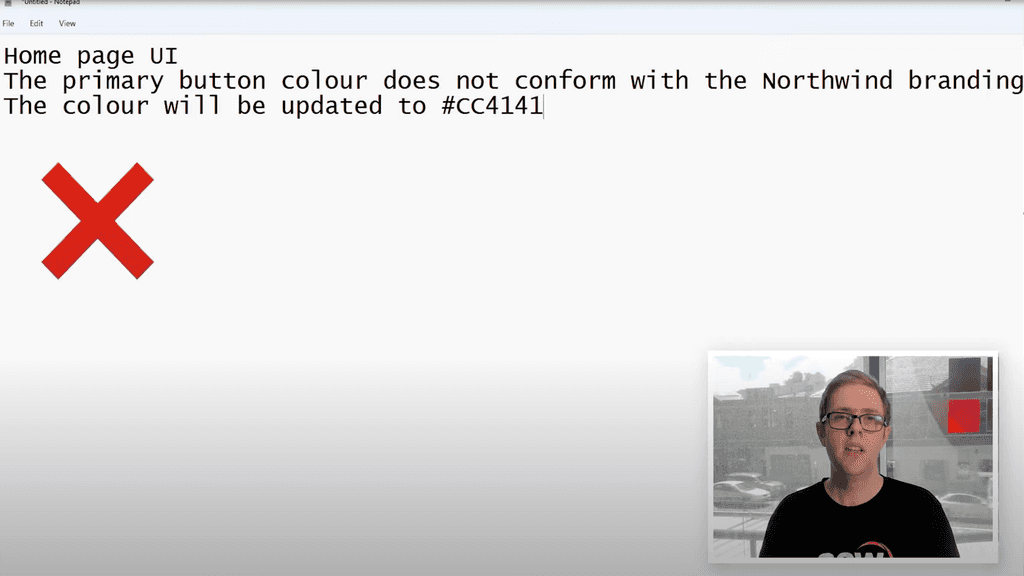
Figure: The red cross with the right size and subtle sound 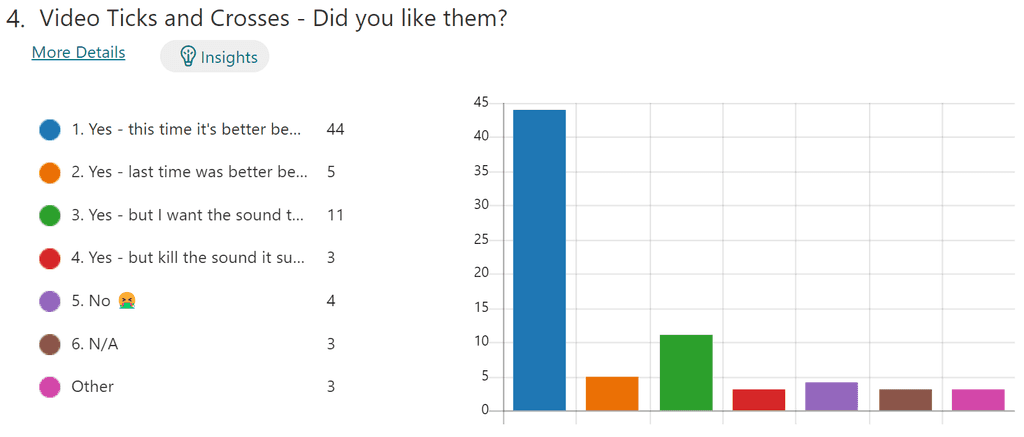
Figure: Question #2 feedback 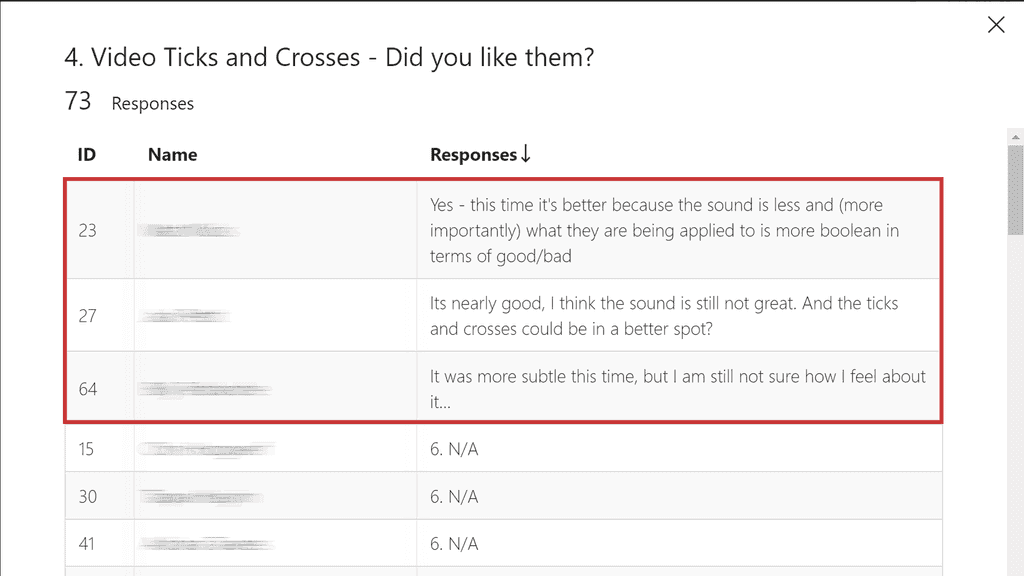
Figure: Question #2 feedback - Option Others After watching video #2, people preferred having a subtle sound rather than having a loud sound. Of the 3 other responses, 2 of them prefer the subtle sound and think it could get even better and the other 1 didn't comment on the sound.
The final results (including other) were:
- 78% prefer to have subtle sound
- 11% prefer no ticks and crosses at all
- 7% prefer to have loud sound
- 4% prefer to have no sound
Results - Question #3 - Comparison: Video Ticks and Crosses V3 - What are your thoughts on the sound?
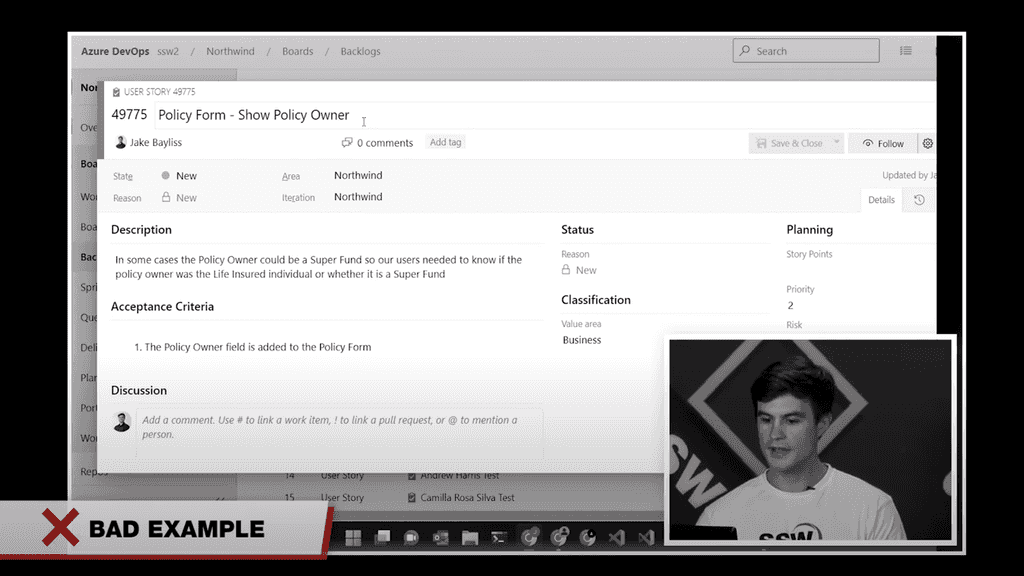
Figure: The red cross and bad example in the lower third, without sound and no colour 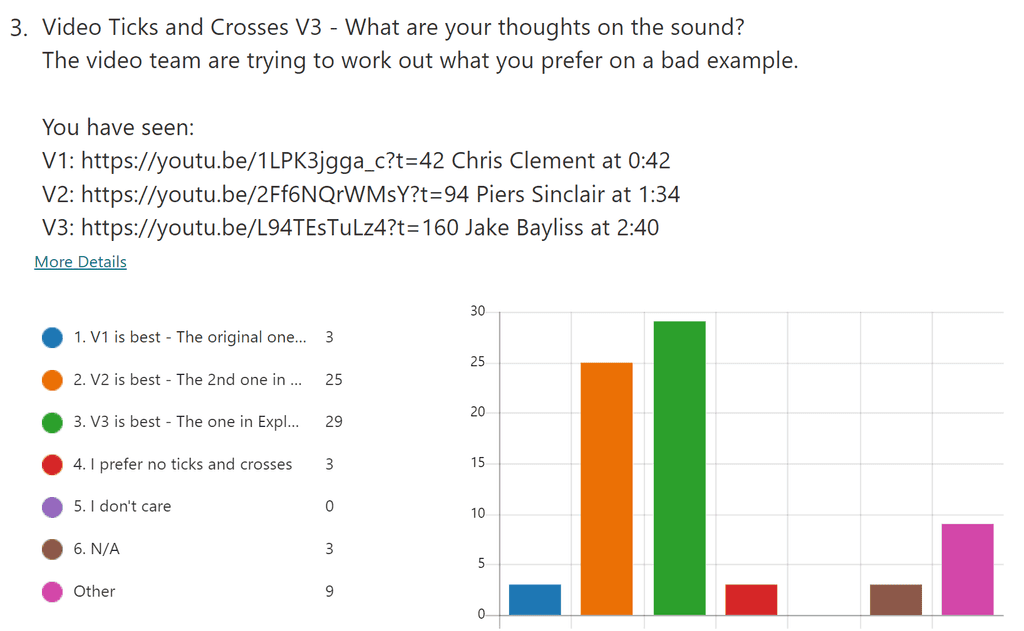
Figure: Question #3 feedback 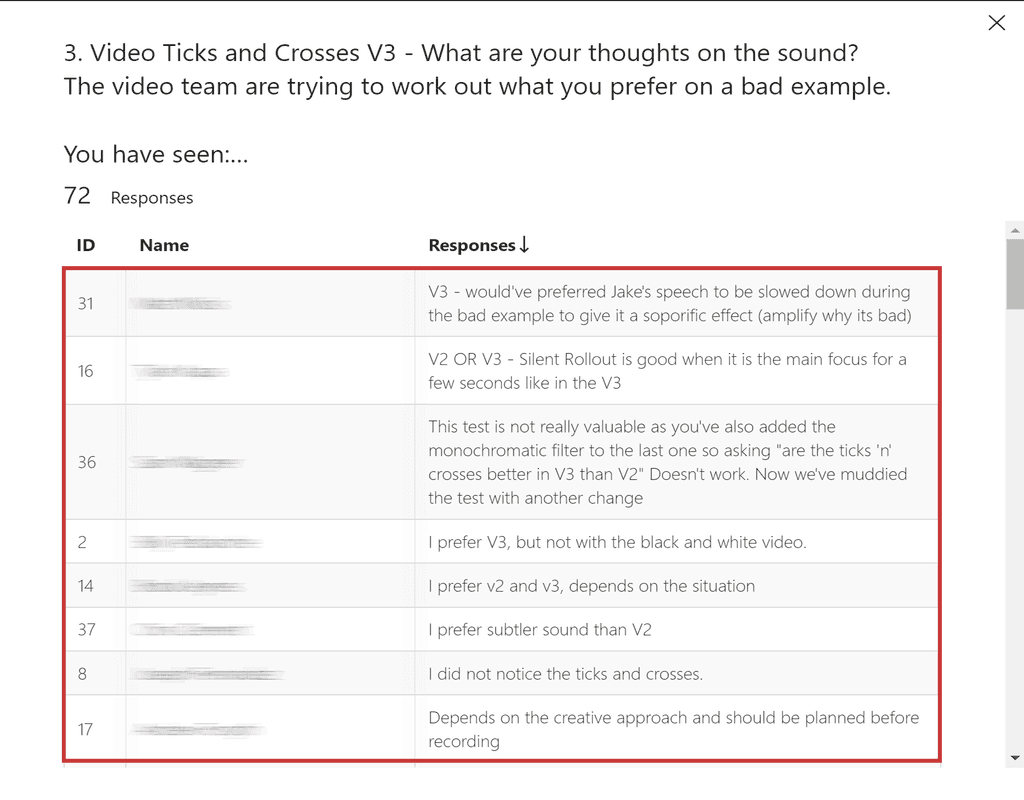
Figure: Question #3 feedback - Option Others After watching video #3, people preferred having a subtle sound or the new tick-cross style with no sound. Of the 9 other responses, they were quite conflicted but video #3 was slightly preferred.
The final results (including other) were:
- 46% prefer to have no sound and use the new tick-cross style
- 39% prefer to have subtle sound
- 11% prefer to have no ticks and crosses
- 4% prefer to have loud sound
Results - Question #4 - Which subtle sound is perfect: Video Ticks and Crosses - Did you like them?
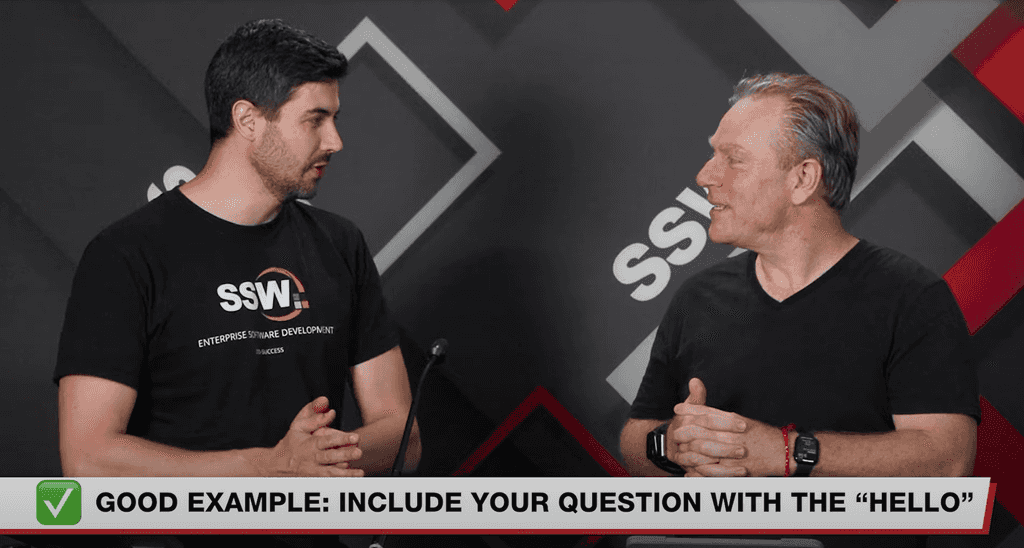
Figure: The good example with a more subtle sound 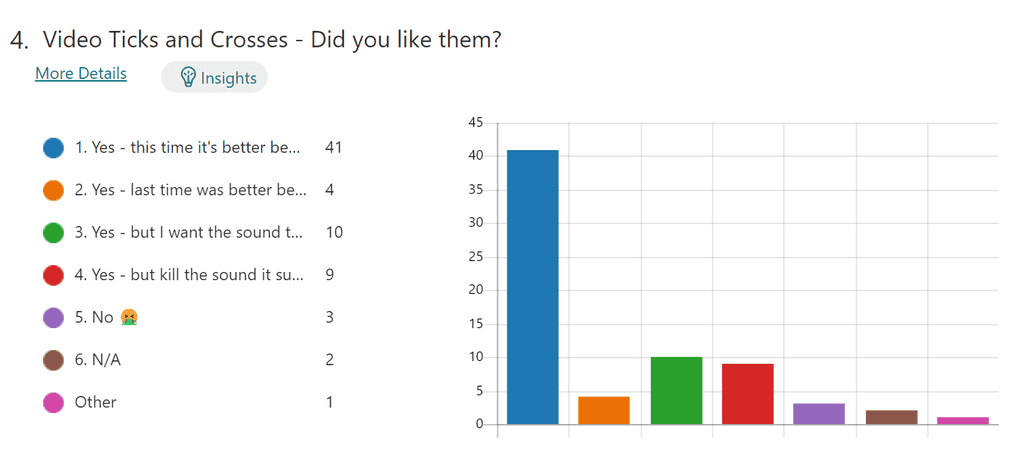
Figure: Question #4 feedback 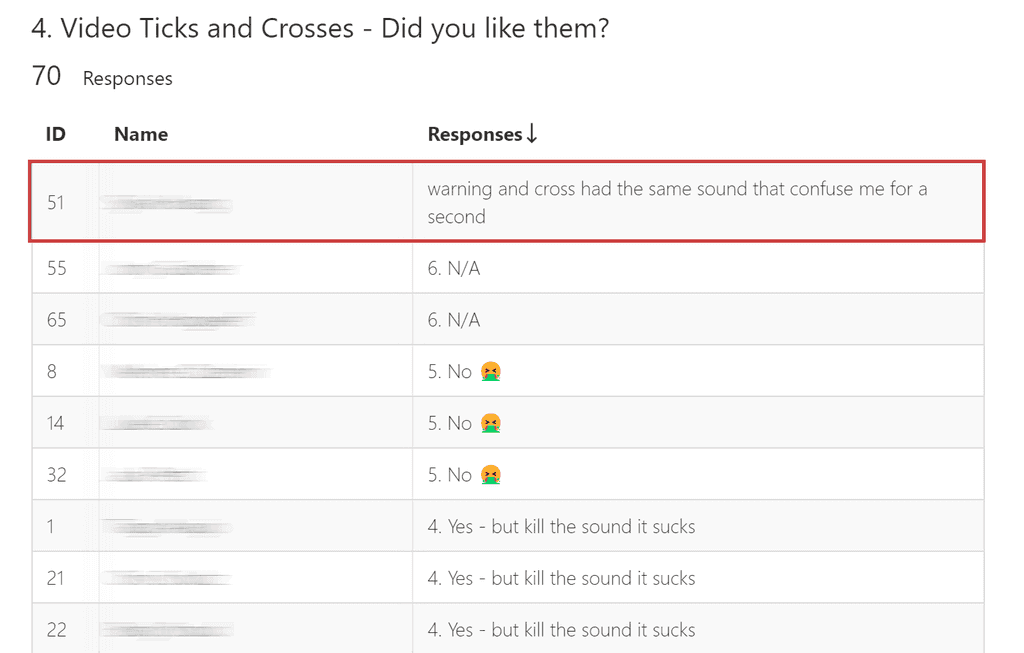
Figure: Question #4 feedback - Option Others After watching video #3, people prefer the subtle sound this time to the subtle sound in video#2. Of the 1 other response, no accurate assessment of how good or bad the two sounds were.
The final results (including Other) were:
- 60% prefer to have subtle sound in video #4
- 14% prefer to have a more subtle sound
- 13% prefer to have ticks and crosses without sound
- 7% prefer no ticks and crosses at all
- 6% prefer to have subtle sound in video #2
Adding text to videos (refer to any text pop-up on screen as a 'caption') can be a powerful way to reinforce the content and make it more engaging and accessible for viewers.
Benefits
Here are some key points on why and how to effectively use text in videos:
Emphasize key points
- Highlighting important information: Text can be used to draw attention to critical pieces of information, ensuring that viewers don't miss the most important parts of your message
- Reinforcement of spoken words: By displaying key phrases or concepts as they are spoken, you help reinforce the message and make it more memorable
Enhance accessibility
- Subtitles and Captions: Adding subtitles or captions ensures that your content is accessible to a broader audience, including those who are hearing impaired or watching without sound. E.g. someone's name, a job title, or date/location
- Multi-language Support: Text can also be translated into multiple languages, allowing your video to reach a global audience
Improve engagement
- Visual appeal: Well-designed text can add a dynamic visual element to your video, making it more engaging and professional-looking
- Viewer interaction: Text prompts, questions, or calls to action can encourage viewers to interact with your content, increasing engagement
Clarify complex information
- Simplifying concepts: When discussing complex topics, breaking them down into text-based bullet points or summaries can help viewers understand and retain the information
- Diagrams and annotations: Text can be used alongside diagrams, charts, or images to provide clear explanations and context
Guide the Viewer’s Attention
- Directing focus: Text can be used to guide viewers' attention to specific parts of the screen or specific elements within the video
- Step-by-step instructions: In instructional or tutorial videos, on-screen text can guide viewers through each step, making the process easier to follow
Branding and Consistency
- Branding elements: Incorporating your brand's colors, fonts, and logos in the text can reinforce brand identity and create a cohesive look
- Consistency: Consistent use of text across your videos helps in maintaining a professional appearance and strengthens brand recognition
Tips for effective use of text in videos
- Keep it concise: Avoid overcrowding the screen with too much text. Stick to short, impactful phrases
- Readability is key: Use clear, legible fonts and ensure the text contrasts well with the background
- Timing Matters: Sync the text with relevant audio or visuals to ensure it enhances rather than distracts from the content
- Placement: Position text in areas that don’t obscure important visuals but are still easily noticeable
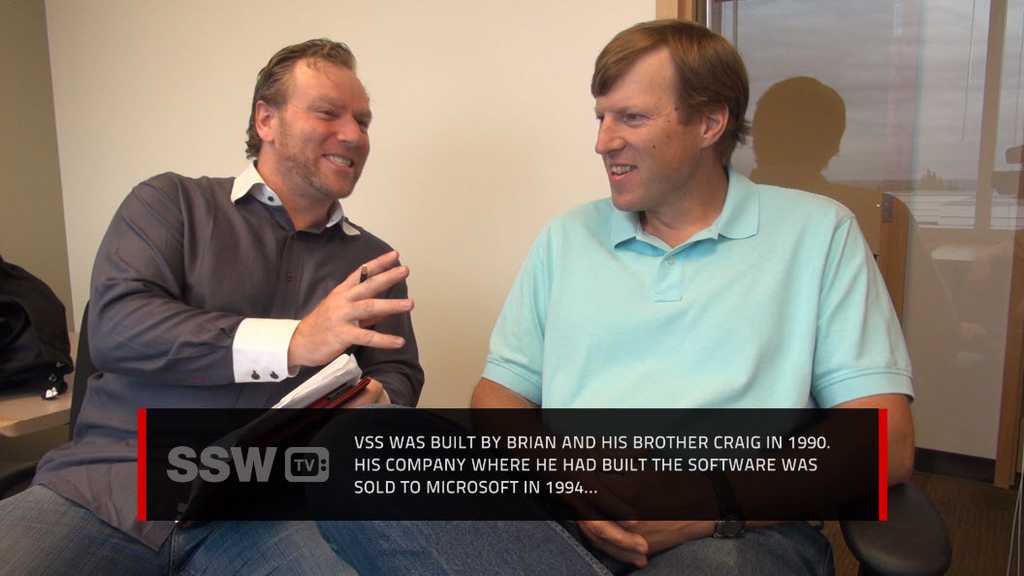
Figure: Good example of captions - Text is clear and legible. Provides extra value to the viewer with content not mentioned in the video Now you cant really have just one type of caption. Have defined styles for different types of videos.
E.g. Here are the styles SSW use for their videos:

Figure: Example 3: SSW Rules Videos - This is a good generic title style and works well for documentary style videos Remember to put any links that you've mentioned in the captions underneath your video in it's own section (with a heading such as 'Show Notes' or 'Related Content'). You can also use this section to put in links that are related to what was said in the video as evidence (similar to footnotes or a bibliography in a book). That way, you will gain more Google juice and it will make it easier for the Product Owner to review your captions.
Incorporating text into your videos can significantly enhance the viewing experience, making your content more engaging, accessible, and memorable for your audience.
So you have just finished that sweet video edit and are now ready to receive feedback from the team or client. You just sent the link to the video with a "test please" and the struggle begins with issues like:
- Feedback and video are in 2 different places - So you have to jump back and forth between feedback notes and video
- No single source of feedback - Feedback is given by word of mouth, multiple email threads, group chat, comments, and/or handwritten notes
- Overlapping or conflicting feedback from different people
- No version control - Versions not linked automatically
- No timecodes - You need to manually document timecodes
- Limited video accessibility - During a Teams call only one person can interact with the video
- Lack of feedback clarity - E.g. No ability to draw on the video
- Difficult project handover - No easy way to share with other editors. No single source of truth
This is where collaborative viewing platforms like Frame.io come in.
Using Frame.io
Video: What is Frame.io? (2 min)Frame.io is a purpose-built video review and collaboration software that lets you share, comment, and approve videos with your team and clients. Frame.io integrates with popular editing tools such as Adobe Premiere Pro and After Effects, so you can work seamlessly across different platforms.
Getting started
To review and comment on video projects in Frame.io you don't need an account, it will simply prompt you to put in your name and email address.
To upload and manage your projects in Frame.io, you need to create an account. If you have an Adobe CC Subscription, you can log in using that account.
Figure: frame.io login page Once you have logged in, you can create projects and invite collaborators. You can upload videos from your computer by dragging and dropping them onto the projects page or cloud storage, or import them directly from your editing software using the Frame.io extension. You can also organize your videos into folders and subfolders for easy access.
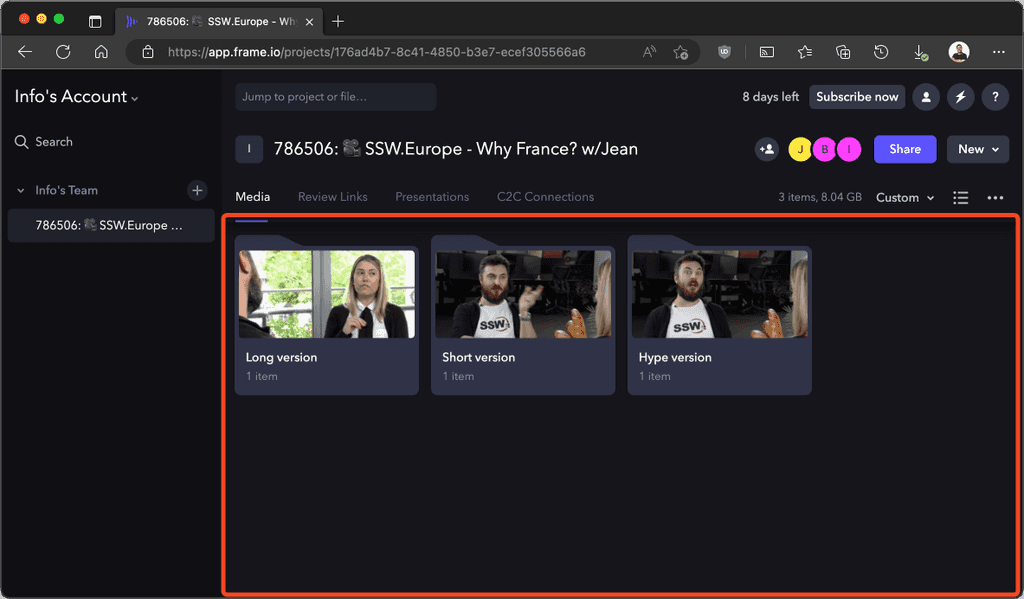
Figure: Projects page on frame.io Sharing video for feedback
To share a video for review, you can generate a shareable link that anyone can access without logging in. You can customize the link settings such as password protection, expiration date, download permission, watermarking, etc. To do this;
- Click and highlight the video you wish to share
- Click the 3 dots on the lower right-hand side of the selected thumbnail
Figure: Video thumbnail 3 dot menu - Navigate to Share | Share for Review

Figure: Share for review menu item - Share link - copy the link and send to the reviewer, or add them using the email field

Figure: Share link page Reviewing videos
To review a video, you can play it back through a browser on any device and leave feedback, pinpointed down to the second! You can use annotations, emojis, drawings, etc. to make your comments more specific and actionable. You can also reply to other comments or tag collaborators to notify them.
-
To make a comment, pause the video where you wish to give feedback, then in the comment field located below the video player type your feedback
Note: If you cancel your feedback, your feedback will be cleared.

Figure: Comment field box -
If you haven’t logged in yet, you will be prompted to enter your Name and Email
Note: If you cancel this prompt, your feedback will be cleared.

Figure: Email and display name dialog box -
In/Out points - To make a comment that covers a specific section, click and drag the ‘[‘ left or ‘]’ right to set your ‘in’ and ‘out’ points
Notes:
- To clear the playback range of the video press the escape key on the keyboard.
-
Playback of a section will loop in the playback range.
Figure: In and out point - Drawing on a video - to enhance your comment, try selecting the paintbrush tool located next to the send button, then use your mouse to draw on the video

Figure: Paint brush button 
Figure: Drawing on video example -
Edit your comment - on the sidebar, select the pencil icon to make edits to your previous comment
Note: Any unsaved changes will revert to the original comment.
Figure: Edit comment button - Video versions - all previous and current versions are bundled under the same link. To check your version, or swap to a different version, select the version dropdown at top of the page

Figure: Video versions button location 
Figure: Video versions menu Actioning feedback
Exporting feedback - to download all comments:
- Navigate to the comment sidebar and click on the download button

Figure: Download comments button - Navigate to 'download as file' and export comments as CSVs (for reference or imported markers to your choice of editing software)

Figure: Download comments as XXX menu items - Completing feedback - to mark a comment as done, click the circle on the top right of the highlighted comment to mark as complete
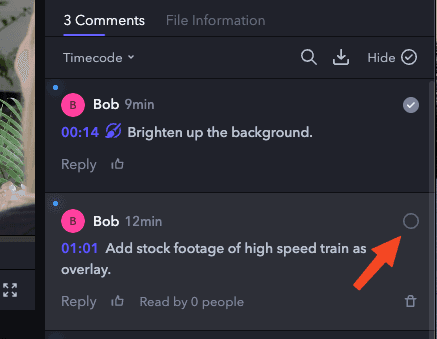
Figure: Mark comment as done button Why you shouldn't review videos on delivery platforms
See the comparison table using the top delivery platforms over Frame.io for reviewing:
Frame.io One Drive Vimeo YouTube YouTube Shorts Instagram TikTok Playback Controls ✅ ✅ ✅ ✅ ❌ ❌ ❌ Basic Timecode ✅ ✅ ✅ ✅ ❌ ❌ ❌ Advance Timecode with Frame Counter ✅ ❌ ❌ ❌ ❌ ❌ ❌ Unlisted Videos ✅ ✅ ✅ ✅ ✅ ❌ ❌ Versioning ✅ ✅ ✅ ❌ ❌ ❌ ❌ Timestamped comments ✅ ❌ ✅ ✅ ❌ ❌ ❌ Project File Management ✅ ✅ ❌ ❌ ❌ ❌ ❌ Downloadable ✅ ✅ ✅ Low Quality Low Quality ❌ ❌ Draw on Video ✅ ❌ ❌ ❌ ❌ ❌ ❌ Export Comments ✅ ❌ ❌ ❌ ❌ ❌ ❌ Available in China ✅ ❌ ❌ ❌ ❌ ❌ ❌ Frame.io is a powerful tool that simplifies video collaboration and feedback. It helps you reduce review cycles and speed up approvals while maintaining high-quality standards. Whether you are working solo or with a team of editors/producers/directors/client/etc., Frame.io will help you deliver amazing videos faster and easier.
The text swing in can be a great way to make a title gain attention, but if the angles are wrong, the unnatural nature of it will be jarring. The idea is to simulate gravity. The best tool to create this type of effect is Adobe After Effects.
- Each keyframe should be half the angle of the previous keyframe from 90 degrees
- Each keyframe should be half the distance on the timeline from the previous keyframe
Example
Video: Good example – A well designed 'swing-in' effect can bring your titles to life - See 00:07
There are a number of reasons you may want to subtitle your video. Sometimes, the audio recording is too low, and adding gain to the audio will introduce unwanted noise. In this instance, you want to add subtitles using your editing program.
Use the following:
To maximize reusability and minimize costs, it’s best to avoid including dates as text in graphics for promotional videos.
If there is some particular value/purpose in including dates there may be exceptions to this rule.
Adding texts to your videos can be very helpful to secure information in viewers minds. You must make sure the text is on the screen enough time for all readers to read it until the end. You don't want comments like "Leave more time for text, almost all of them I didn’t have time to read".
The questions is "How long is enough?"
As a starting point, a safe way to measure is to leave it on screen long enough to be read at least 2 times (Assuming slow readers read at 200 words per minute).
Depending on the complexity of the text, either way can be excessive or maybe too fast, but most times it will give you a good idea of how long you should keep a text on your video.
Another way to calculate durations is by using average reading speeds per word and adjust duration according to the number of words. A calculator is available at Omni Calculator. While appropriate for some types of productions, in general, this can become too time-consuming.
See some examples:
Figure: Good Example - Video Title duration is perfectly timed and can be read twice through. Not too short, not too long.
This rule is not relevant to closing credits due to the large amount of acknowledgements.
When you're making a cake the things that matter are the ingredients you use.
Likewise, when you’re making a video, the things that matter are the cuts you choose.
Jump Cut
A jump cut is a straight cut between the same piece of footage (which helps shorten the video).
For example, if you are doing a piece to camera (single presenter talking to the camera), you can cut out parts in between sentences – and leave it obvious - to quicken the pace of the video. This is a popular editing method used by YouTubers and is great for more casual style of videos.
Good example: SSW YouTube Shorts Video with Jump Cuts
It's best to conduct an internal and external test procedure for videos. This ensures that you meet your internal standards and follow the necessary rules that relate to video content creation.
You can also identify errors and inconsistencies that can be addressed for a second edit, before going live.
- Complete the video editing (Version 1) Produce your first edit of your video. Follow videos' post-production rules i.e. 'Do you use cutaways?', 'Do you add a Call to Action?'
- Upload your first edit to YouTube
-
Send 'Test Please' to your manager(s) as per Do you know how to request a "Test Please"?
- Feedback must be done within 48 hours
- If response isn’t submitted within designated time, the process moves to the next step
Note: To move ahead, you need two out of the three "test pass"
- Make changes to video from feedback
- Re-upload to YouTube
- Respond to each feedback with "Dones" and reasons for "Not Dones"
-
Send test please to your managers, any people on the video and one of the test groups
- 48 hours to test
- 6 people on the test
- Need 3 responses to move ahead
- If response isn’t submitted within designated time, the process moves to the next step
- Make changes to video from feedback
- Respond to each feedback with "Dones" and reasons for "Not Dones"
-
Send final test please – not for major changes (spelling mistakes, glaring faults etc.)
- If there is no response within 48 hours, we go live
Tip: (Optional) Create a post for the new video on your website (e.g. tv.ssw.com), embedding the YouTube upload.
To ensure your videos gain maximum exposure, you need to promote them in various ways. The following are the steps to do this.
-
Add to social Media accounts - Post the new video to all social media accounts including:
-
Email all staff - Email all the staff with the links to the posts you have made. You want to make it as easy as possible for them to be able to re-post the original messages. Use a tool like clicktotweet.com.
Example email:
Hi All,
A new interview is now live on SSW TV. You can see it at {{ URL }} Can you all promote the video in the following ways:
- Can you tweet {{ URL }}
- Optionally, comment, like and share the post on Facebook {{ URL }}
I appreciate the efforts from everyone :) Cheers,
-
Email the interviewee (if apply) - The person(s) featured or interviewed in the video should be encouraged to share and promote your video. If they have an audience that follows them on social media you should leverage it to your advantage. Ask them to:
- Email the video to their list
- Write a blog post on their blog
- Update their social media accounts with a link and description of the video
Email template:
Hi {{ NAME }},
Thank you for taking part in this video. You can find it here: {{ URL }} We have worked very hard on this video and are very proud of the final product. We hope you are also proud of it.
We are promoting the video through our blog and social media networks and would appreciate if you could do the same to get the word out there.
Here are some suggestions: 1. Write a blog post on it 2. Tweet it by clicking {{ URL }} 3. Sharing this Facebook Post {{ URL }} 4. Adding to LinkedIn 5. Emailing your marketing list with the interview (if you have one) 6. Emailing any friends and associates who could spread the word
Thanks for taking the time to do this interview and promote it.
-
Contact strategic partners - The best way to extend your reach and promote a video is through strategic partners. These are people, companies or websites which don’t compete with you but service the same audience. Examples of these types of partners are:
- Blogger in your industry
- Industry websites
- If you are an accountant, partner with a financial planner, business coach, insurance salesman or prestige car dealer
- Suppliers
- Industry experts
You should ask the partner to:
- Email the video to their list
- Write a blog post on their blog
- Update their social media accounts with a link and description of the video
You should have a list of these partners in a database with all their contact details to automate the process of promoting your videos.
-
AVCHD is a highly compressed ‘HD’ format used by many modern consumer and professional cameras.
Because of the limitation FAT32, AVCHD cameras record to their memory in 4GB chunks. These split files need to be combined using software into one file that is usable in editing programs, such as Adobe Premiere Pro (Premiere Pro will read the split files directly from the camera, however, if you try and manually combine all the files in the timeline you will have problems with the audio at the beginning and ends of each split clip).
We will go through the process of using Sony Content Management Utility software to correctly and safely convert and transfer the raw footage from your camera to your computer.
Transferring and converting the footage automatically
- Install the ‘Content Management Utility’ software. (http://www.sony-asia.com/support/download/401976)
- The utility works by creating a database of all files that are transferred to your computer. You have to select folders that the software will ‘register’ as its destination folder. Before launching the program, you need to create a destination folder.
_ Create a folder in your data drive called ‘CaptureDump’. This should be the default place you transfer all raw footage to (you will move the footage from here to your project folder as described in a later step).
_ Open ‘Content Management Utility’ * A dialogue will prompt you to navigate to your destination folder. Navigate to the ‘CaptureDump’ folder you created in step ‘1’ and select it. If you do not get this prompt, select the ‘Register Folders to View’ button on the top left of the window:
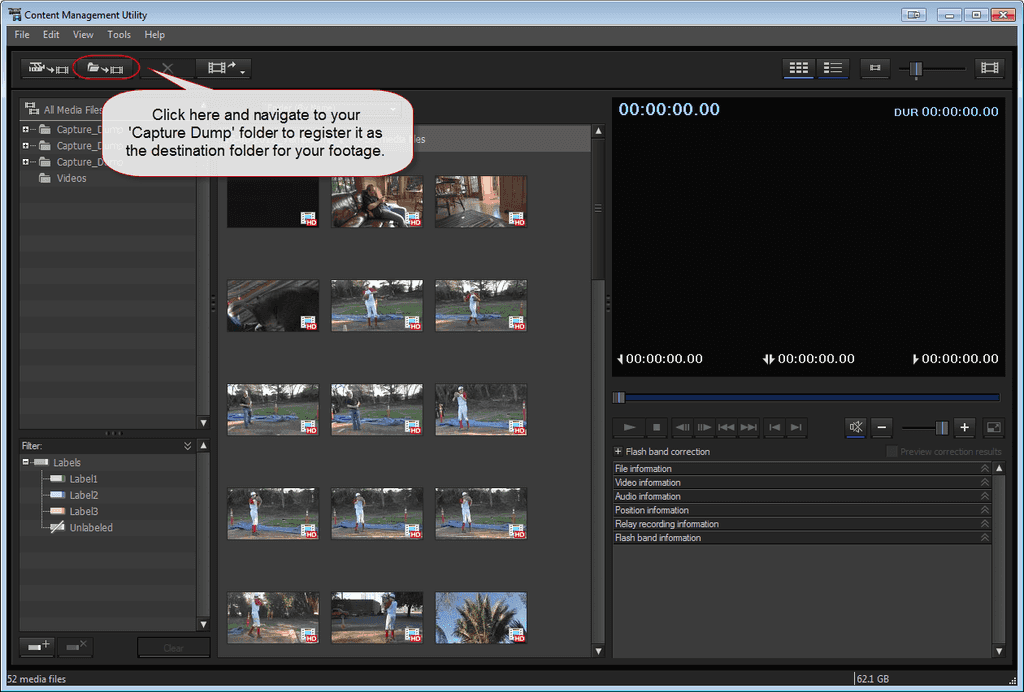
- Connect the camera to your computer, and using the LCD, press 'USB Connect
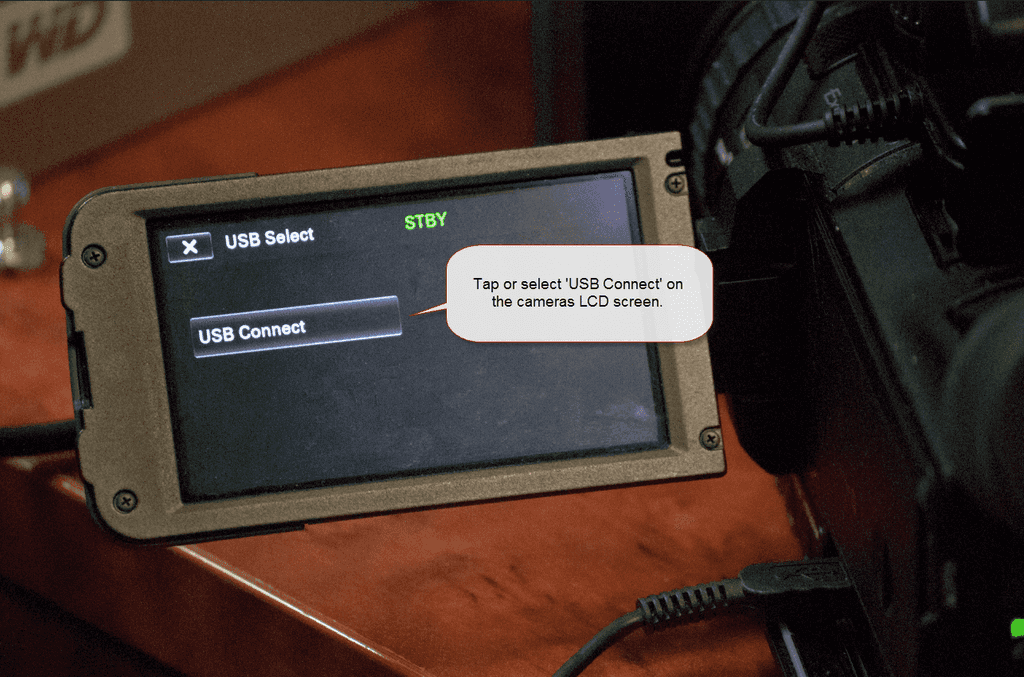
- Open the ‘Content Management Utility’. Click on the camera icon on the top left of the window to open a new transfer window:
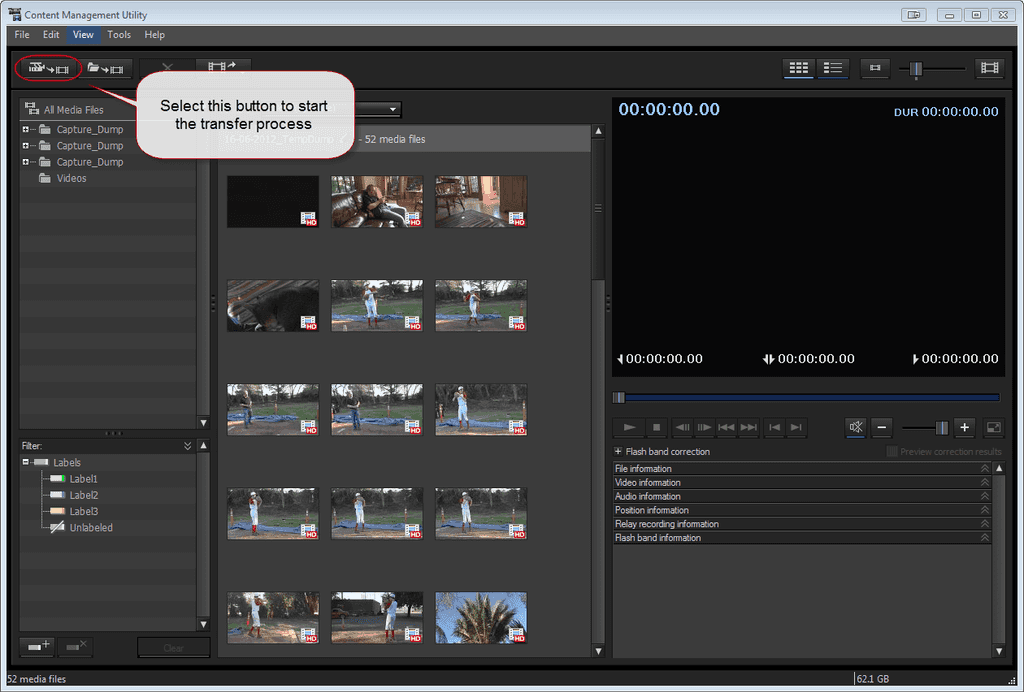
-
In the new import window:
- Select the camera in the left column (or select the folder icon if you’re transferring from a memory card). Video thumbnails will appear in the central part of the screen.
- Select the clips you would like to transfer to your computer.
- At the bottom of the window, click the ‘Change’ button and rename the folder to: ‘[date]_[Project-Name]’
- Finally, select the ‘Import’ button on the bottom right of the screen:
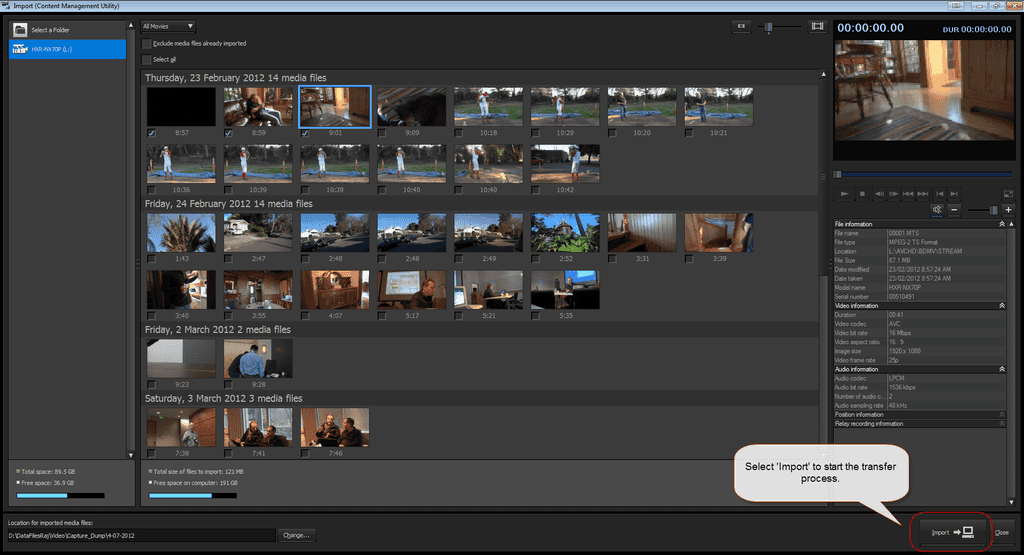
- After the import is complete, navigate to the folder using Explorer. Check each of your videos to make sure they play. You want to check for any corrupted videos or videos containing artefacts. Skip through the video so you can thoroughly check its content for issues. Tip: Use VLC media player as your default player for .mts and .mt2s files. (http://www.videolan.org/vlc/index.html)
- After you have checked all the videos, delete the clips from the camera directly (you cannot delete them via the software). Tip: Only do this if you are sure the transferred videos contain no issues.
- Move the footage from the Capture_Dump folder to their relevant project folders located on your hard drive.
Transferring and combining the footage manually
If you are unable to use the Content Management Utility for some reason - maybe because you are on site and don’t have access to it, and you need to transfer files off the camera to make room - there is a manual process to combining the files later.
- To find your recordings, navigate to G*:\AVCHD\BDMV\STREAM
- Note: Replace ‘*’ with the appropriate drive letter of your camera Follow the steps outlined here: http://avchdvideos.blogspot.com.au/p/joining-my-avchd-videos.html
When updating a version of a video (especially in a corporate environment), it's wise to let the rest of your team know where you're up to. It can detract from your amount of hits if you include the version details in the title, so it's best to find a subtle way to incorporate it into the video itself.

Figure: Good example - the text is small, barely visible and would only be noticeable if you're looking for it The best way to label the version is as follows:
- When a team member creates a new version, they should change the minor (i.e. the number after the decimal point).
- When the Product Owner affirms a new version, the major changes (i.e. the number before the decimal point).
There is a myriad of video formats and codecs that exist for all project types. It’s important for your project to use the correct format depending on what it is you are doing and what you want to achieve with your video.
Most, if not all, modern video cameras sold today record at 4k resolution. Also, modern compression types allow you to 'squeeze' the large amounts of data that would normally take up gigabytes of storage right down to something that can be streamed over the web, without too much loss of fidelity.
Because of the ease of recording and compressing down 4K video, it seems like a no brainer that videos should be produced in 4K rather than HD 1080p.
Where possible, do your camera work in 4K, and then when you edit your project do it in 1080p so you can use the extra resolution to 'fake zoom-in'. If the client specifically requests the highest possible video quality, stick to editing the project in 4K.
After your videos recorded and edited using your editor of choice, you need to choose an appropriate export setting. Assuming you're making the video for web streaming (e.g. YouTube), here are the best export settings:
Export Settings for Adobe Premiere Pro:
- Select H.264 as your format
-
In the Video tab, the Bitrate settings will be pre-selected depending on the resolution selected.
- For 1080p we recommend 5-10Mbps (smaller number smaller file size, less quality)
- For 4k we recommend 20-30Mbps
- In the Audio tab| Bitrate Settings | Bitrate [kbps] | 320kbps
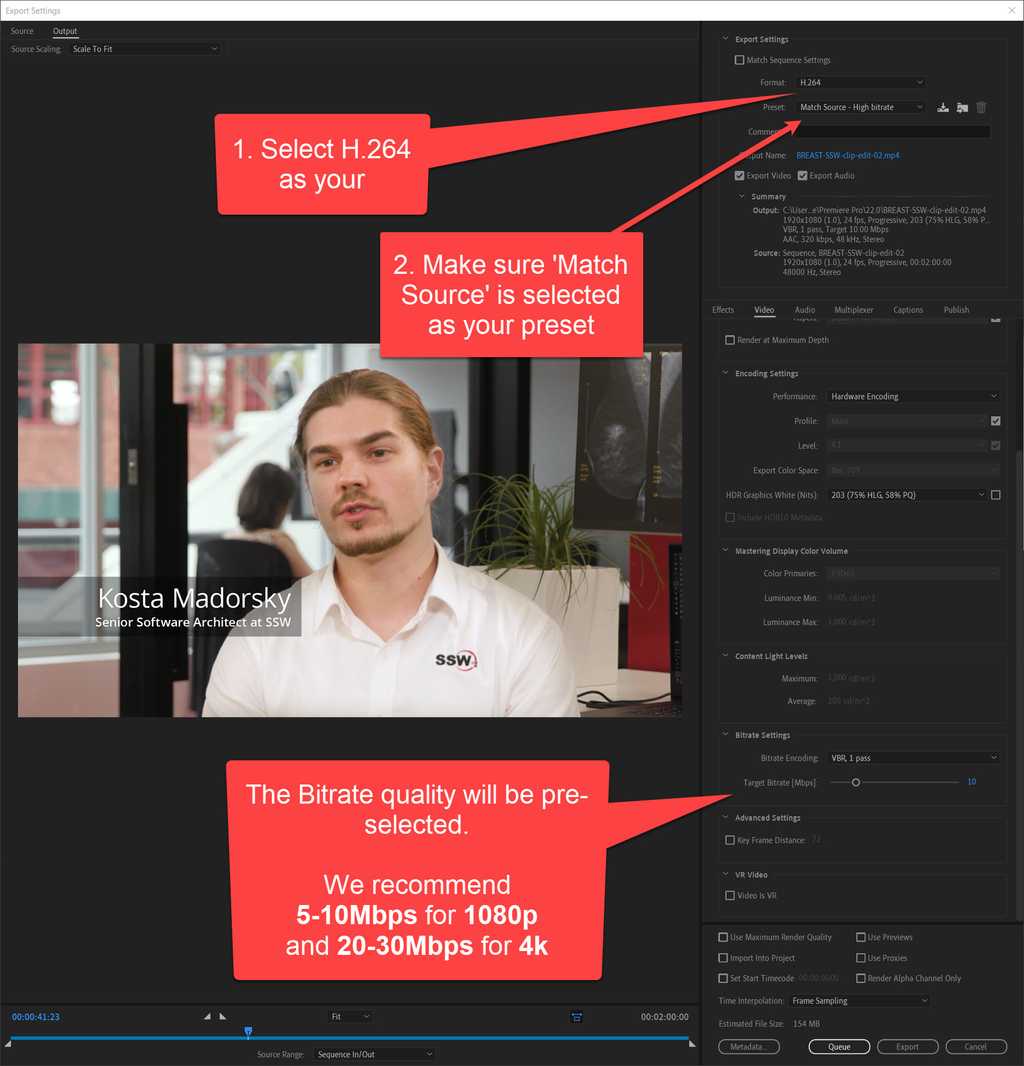
Figure: Video Export settings in Premiere Pro 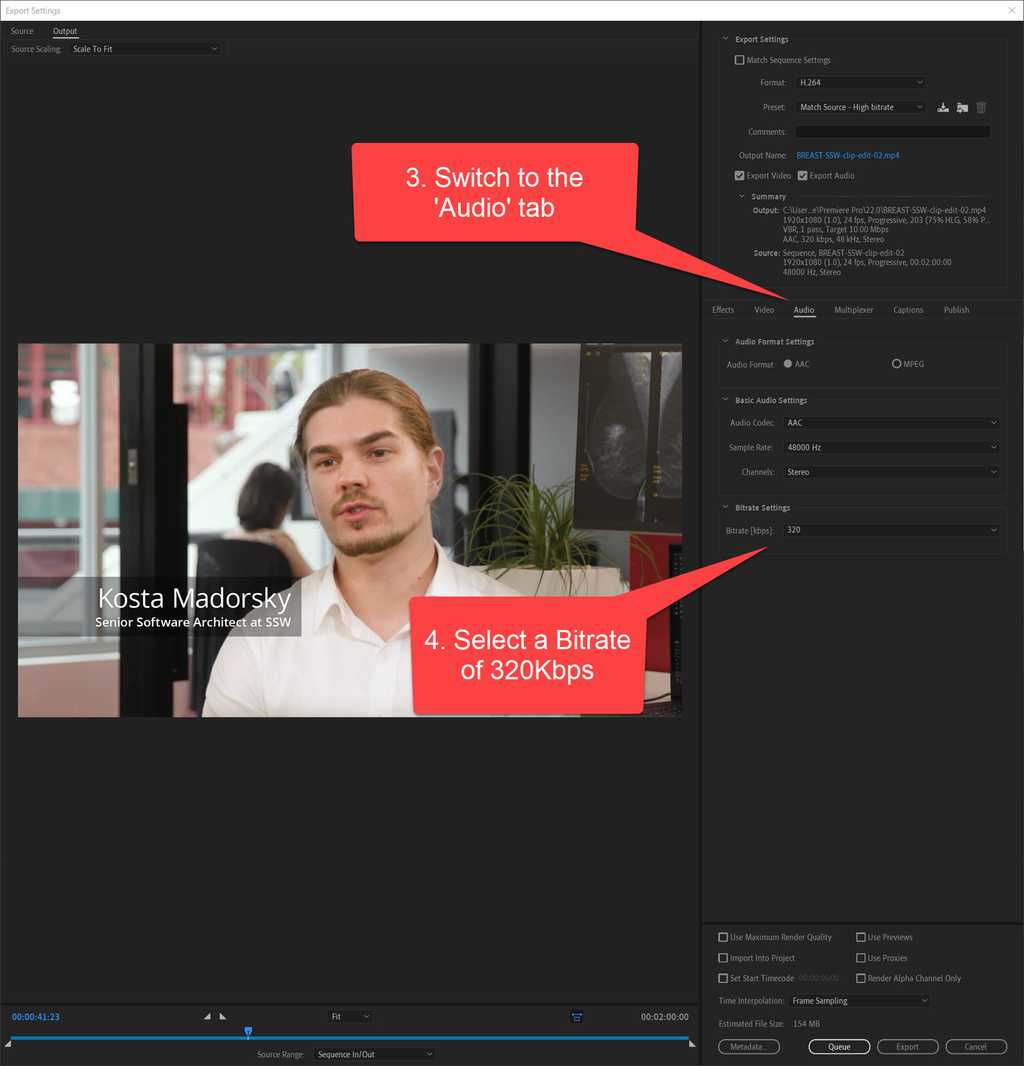
Figure: Audio Export settings in Premiere Pro Export Settings for Camtasia

Figure: Camtasia export settings Figuring out how your workflow operates is an essential part of the editing process. As such you should make sure to have an effective and consistent file/folder structure.
Video Project Organization
Things that go under each main folder:
-
YYYY-MM-DD-project-name
- Assets
- Contains all external files, and a copy of any files used from the server's 05-assets directory
- Edit
- Contains the active project files, e.g. Premire Pro .pproj files
- Exports
- Contains all edit exports & renders
- Footage
-
Contains all captured media, e.g. video, screen captures, & audio that was recorded for the project
- Use YYYY-MM-DD-description
- Contains multi-day or multi-camera shoots
- Graphics
- Contains After Effect project files, e.g. .aep files
Data Server Organization
It is also very important to keep your shared resources and servers organized.

Figure: An efficient way for a team to structure their server and common files/folders Things that go under each folder:
-
00-unsorted
- Contains legacy folders that need to be sorted and put in an appropriate location.
-
01-backlog
- Contains all backlog video items to be processed.
- The internal folder structure is YYYY-MM-DD-project-name
-
02-in-progress
- Contains all backlog video items currently in progress.
- Each user should have their own personal folder named [Firstname]InProgress
- Folders are moved to a user's InProgress folder from 01-backlog
-
03-processed
- Contains all video items that have been finished (archived).
- The internal folder structure is YYYY-MM-DD-project-name
-
04-masters
- Contains final exports from videos that can be showcased – a copy of the video file only, to be sorted in folders by year.
- The internal folder structure is YYYY | YYYY-MM-DD-project-name
-
05-assets
- Contains all the assets for video editing and graphics, including:
- graphics
- music
- sound-effects
- fonts
-
06-marketing
- Contains folders used by the marketing team, including the Photos folder
-
07-user-folders
- Contains user’s personal folders
-
08-programs
- Contains installation files for video production software, including:
- drivers
- plugins
-
09-documents
- Contains documents - to be synchronized to
VIDEO-Videos
- Contains documents - to be synchronized to
-
When you ask for changes to a video, it's tempting to just send the exported video and assume the editor can make quick fixes. However, without the original project files and media, the editor is stuck with a "flattened" version and can't properly tweak audio, video timing, or transitions without redoing work or risking quality loss.
All editing tools have their own way of saving source files. Some editing tools save multiple video files separately. For example:
- Clipchamp exports two distinct .mp4 files - one for the screen recording and another one for the webcam footage
- Other tools, like Camtasia, use specific source files: The .trec file contains the recorded media assets (like screen recording, webcam, mic audio, and system audio), and the .tscproj file (optional) contains the project edits, timeline layout, and references to media files (including .trec files) that references all the media assets
Sharing these complete project files or all related media ensures your editor can work efficiently and maintain professional quality.
So you have just finished that sweet video edit and are now ready to receive feedback from the team or client. You just sent the link to the video with a "test please" and the struggle begins with issues like:
- Feedback and video are in 2 different places - So you have to jump back and forth between feedback notes and video
- No single source of feedback - Feedback is given by word of mouth, multiple email threads, group chat, comments, and/or handwritten notes
- Overlapping or conflicting feedback from different people
- No version control - Versions not linked automatically
- No timecodes - You need to manually document timecodes
- Limited video accessibility - During a Teams call only one person can interact with the video
- Lack of feedback clarity - E.g. No ability to draw on the video
- Difficult project handover - No easy way to share with other editors. No single source of truth
This is where collaborative viewing platforms like Frame.io come in.
Using Frame.io
Video: What is Frame.io? (2 min)Frame.io is a purpose-built video review and collaboration software that lets you share, comment, and approve videos with your team and clients. Frame.io integrates with popular editing tools such as Adobe Premiere Pro and After Effects, so you can work seamlessly across different platforms.
Getting started
To review and comment on video projects in Frame.io you don't need an account, it will simply prompt you to put in your name and email address.
To upload and manage your projects in Frame.io, you need to create an account. If you have an Adobe CC Subscription, you can log in using that account.

Figure: frame.io login page Once you have logged in, you can create projects and invite collaborators. You can upload videos from your computer by dragging and dropping them onto the projects page or cloud storage, or import them directly from your editing software using the Frame.io extension. You can also organize your videos into folders and subfolders for easy access.

Figure: Projects page on frame.io Sharing video for feedback
To share a video for review, you can generate a shareable link that anyone can access without logging in. You can customize the link settings such as password protection, expiration date, download permission, watermarking, etc. To do this;
- Click and highlight the video you wish to share
- Click the 3 dots on the lower right-hand side of the selected thumbnail

Figure: Video thumbnail 3 dot menu - Navigate to Share | Share for Review

Figure: Share for review menu item - Share link - copy the link and send to the reviewer, or add them using the email field

Figure: Share link page Reviewing videos
To review a video, you can play it back through a browser on any device and leave feedback, pinpointed down to the second! You can use annotations, emojis, drawings, etc. to make your comments more specific and actionable. You can also reply to other comments or tag collaborators to notify them.
-
To make a comment, pause the video where you wish to give feedback, then in the comment field located below the video player type your feedback
Note: If you cancel your feedback, your feedback will be cleared.

Figure: Comment field box -
If you haven’t logged in yet, you will be prompted to enter your Name and Email
Note: If you cancel this prompt, your feedback will be cleared.

Figure: Email and display name dialog box -
In/Out points - To make a comment that covers a specific section, click and drag the ‘[‘ left or ‘]’ right to set your ‘in’ and ‘out’ points
Notes:
- To clear the playback range of the video press the escape key on the keyboard.
-
Playback of a section will loop in the playback range.

Figure: In and out point - Drawing on a video - to enhance your comment, try selecting the paintbrush tool located next to the send button, then use your mouse to draw on the video

Figure: Paint brush button 
Figure: Drawing on video example -
Edit your comment - on the sidebar, select the pencil icon to make edits to your previous comment
Note: Any unsaved changes will revert to the original comment.

Figure: Edit comment button - Video versions - all previous and current versions are bundled under the same link. To check your version, or swap to a different version, select the version dropdown at top of the page

Figure: Video versions button location 
Figure: Video versions menu Actioning feedback
Exporting feedback - to download all comments:
- Navigate to the comment sidebar and click on the download button

Figure: Download comments button - Navigate to 'download as file' and export comments as CSVs (for reference or imported markers to your choice of editing software)

Figure: Download comments as XXX menu items - Completing feedback - to mark a comment as done, click the circle on the top right of the highlighted comment to mark as complete

Figure: Mark comment as done button Why you shouldn't review videos on delivery platforms
See the comparison table using the top delivery platforms over Frame.io for reviewing:
Frame.io One Drive Vimeo YouTube YouTube Shorts Instagram TikTok Playback Controls ✅ ✅ ✅ ✅ ❌ ❌ ❌ Basic Timecode ✅ ✅ ✅ ✅ ❌ ❌ ❌ Advance Timecode with Frame Counter ✅ ❌ ❌ ❌ ❌ ❌ ❌ Unlisted Videos ✅ ✅ ✅ ✅ ✅ ❌ ❌ Versioning ✅ ✅ ✅ ❌ ❌ ❌ ❌ Timestamped comments ✅ ❌ ✅ ✅ ❌ ❌ ❌ Project File Management ✅ ✅ ❌ ❌ ❌ ❌ ❌ Downloadable ✅ ✅ ✅ Low Quality Low Quality ❌ ❌ Draw on Video ✅ ❌ ❌ ❌ ❌ ❌ ❌ Export Comments ✅ ❌ ❌ ❌ ❌ ❌ ❌ Available in China ✅ ❌ ❌ ❌ ❌ ❌ ❌ Frame.io is a powerful tool that simplifies video collaboration and feedback. It helps you reduce review cycles and speed up approvals while maintaining high-quality standards. Whether you are working solo or with a team of editors/producers/directors/client/etc., Frame.io will help you deliver amazing videos faster and easier.
Creating a comprehensive summary and recording of your Sprint Meeting is a great way to communicate changes in a product to the community and stakeholders — especially for those unable to attend.
Learn more on what happens at Sprint Retrospective, Sprint Review, and Sprint Planning meetings.
Why record a summary of the Sprint Meeting?
- Clarity: Provides a clear, accessible update for all stakeholders, including those not present
- Documentation: Serves as a historical record of decisions and discussions, valuable for future Sprints and project continuity
- Engagement: Ensures that all stakeholders, regardless of their availability to attend, have access to the same information, promoting inclusiveness and alignment
- Community: Allows the community at large to see what is happening on a product and provide feedback
To keep stakeholders informed beyond the Sprint Review, you should record a Monthly Stakeholder Video to share key progress, blockers, and upcoming priorities.
Prepare for the Sprint Meeting recording
Before you start recording, ensure you have the right people ready for key roles:
- Have someone ready to scribe: Designate someone to take detailed notes during the meeting. This person will capture key decisions, action items, and important discussion points that may not be fully covered in the video summary
- Have someone ready to YakShave: Designate someone to handle secondary recordings during the meeting. While the main presenter is recording the Sprint summary, this person can start separate recordings (YakShaves) to create tasks or work items as needed
Having these roles clearly defined beforehand ensures a smoother recording process and better documentation of your Sprint Meeting.
Avoid long pauses
During the meeting, don’t pause ask, “Does anyone have any questions?” — this often leads to awkward silence and slows down the meeting.
Instead, remind the team before to use the “Raise Hand” feature in Microsoft Teams if they have something to say. This keeps the meeting moving and ensures everyone gets a chance to contribute without unnecessary delays.
Record the Sprint Meeting summary
The Sprint Meeting summary should be what it is: a summary. So keep it concise by focusing on the main goals and decisions that were discussed during the Sprint Meeting.
Here's a suggested runsheet for what to cover in the video:
- Before the recording, inform participants that the session is being recorded and ask them if there's nothing sensitive in the Sprint Retrospective
- Start the recording by showing the Product website
- Run through Sprint Review Email - which should include the Sprint Retrospective Tip: The summary should be focused on the Dones and any special highlights. In the email template, bold the most important points so they stand out. These highlighted items should be called out in the summary
- Run through Sprint Planning Email
- Finish the recording on the Product YouTube Channel, and mention that the current recording will be uploaded there
See useful tips on how to make great videos.
Note: Everyone should be free to speak candidly in a Sprint Retrospective, and you don’t want the fact that there will be a recorded summary to make people not speak up. The recorded retro should only include the main good and bad points... it gives some window into the team, but not everything.
Tip: To make the video more entertaining, get more than one person to talk (e.g. ask someone to talk about a PBI that they worked on). Also, when you have a chance, try to include a YakShave during the recording.
Share the Sprint Meeting summary recording
If you've never uploaded a video to YouTube, you can follow this tutorial
Note: Don't forget to check that you're uploading to the right channel. Ideally have a channel for each product (e.g. SSW Website, SSW TimePro, etc.).
You will fill the title, description, and thumbnail fields with clear, helpful content to improve visibility and engagement.
Tip: Sometimes you may want to trim some parts of the video (i.e. Long silence at start or end). Videos can be trimmed straight on YouTube Editor.
Video title
It is important to have an accurate title that makes it clear what Scrum Sprint you are making a video for. The best way is to follow a consistent format across each video.At SSW, we follow this format:
{{ TEAM NAME }} - Sprint {{ OLD NUMBER }} Review + Retro and Sprint {{ NEW NUMBER }} Planning - {{ DATE }}
Video description
You should also include a description about the contents for ease of navigation. E.g. YouTube allows you to add timecode chapter markers by adding it in the description.
Join us for {{ TEAM NAME }}'s Sprint {{ OLD NUMBER }} Review + Retro and Sprint {{ NEW NUMBER }} Planning
{{ MIN }}:{{ SEC }} Intro
{{ MIN }}:{{ SEC }} Sprint Review
{{ MIN }}:{{ SEC }} Sprint Retro
{{ MIN }}:{{ SEC }} Sprint Planning
{{ MIN }}:{{ SEC }} Outro🔗 Link: {{ PRODUCT WEBSITE URL }}
Video thumbnail
The thumbnail should show the Sprint iteration, the Team's name and the date when the meeting occured. This often comes from the start screen of a Teams recording.
For a more visual appealing thumbnail, you can use a PowerPoint slide that are updated every Sprint. E.g.: SSW.Website Thumbnail.
Below is a good example of how a Sprint Summary video should look like on YouTube.
Don't let the time you spent creating the perfect video go to waste — make sure people actually watch it! For those required to view the video, send them the following task:
- Watch the video: {{ YOUTUBE URL }}
- Leave a like
- Rate it out of 10
- Leave a brief comment on YouTube
✅ Good example of a Sprint Meeting recording
Here is an example of a Sprint Meeting recording from the Tina CMS Team.
Video: TinaCMS - Sprint 23 Review and Sprint 24 Forecast (10 min)By adopting these practices, teams can ensure that the outcomes of Sprint Meetings are effectively communicated and documented, supporting project success and stakeholder satisfaction.
In a world of constant distractions, getting your audience's attention to watch your video content can be difficult.One great method is to start your video with a tiny snippet that will 'tease' the audience, which is called the Golden Moment (aka Featured highlight, hype teaser, or hook).
What should a Golden Moment look like?
The Golden Moment is a clip at the start of your video (e.g. before any titles or introductions) that will interest and excite viewers, while also giving them an idea of the video's main content.As this clip is the first thing an audience will see, it is important to get it right to make a good impression.
Golden Moment essentials
- Short - 25 seconds max
- Concise - to the point with no no waffling or run-on statements
- Mistake-free - errors in the start look unprofessional and turn people away
- Represents the video's purpose - it sets the audience's expectation for what the rest of the video will be about, and why they should be interested
- High Energy - it will set the tone for the rest of the video, so start with a bang!
Video: Good example - The first 14 seconds are the Golden Moment
Notes:
- Avoid using Golden Moments if your video is shorter than 2 minutes
- Avoid using a Golden Moment from the very first minute of the video. If you use take a clip from the beginning of the video it will sound repetitive to the viewer
Panning for gold
As the name would suggest, finding moments that happen organically in the video can be challenging, and it can take some time to uncover the perfect clip.Some videos won't have anything suitable, and in this case it is better to have no moment than to have a poor Golden Moment.The best way to ensure there is always a Golden Moment is to plan for it.
Creating your moment
When recording your video, a little bit of forward thinking will go a long way.Make sure you include a sentence that covers all of the Golden Moment essentials listed above.
It is best if you can incorporate it into your main content, but if your main content doesn't have anything suitable then your Golden Moment can be recorded afterwards. In this situation, try to replicate the initial recording conditions so it matches the rest of your video (e.g. same lighting, clothing, position and background).
You can use this custom GPT to help brainstorm a script for the hook: Video Hook Generator
Timestamps are simple captions added to the description of a video. You can add the timestamps for each section (or chapter) in a video. This is especially useful in training sessions, presentations, or any long length video. The user can even use the YouTube slider at the bottom to easily navigate through these video sections.
Note: You can go extra and add Chapter Markers (table of contents) on the video screen. This is done in video editing tools.
Steps to do this:
- Go to YouTube in your browser
- Play the video through the timeline until you reach the moment you want a link to
- Make a note of the time
- Type in the timestamp (E.g. 04:41) on the video description. This also works on comments
- Save and YouTube will automatically add a link to that exact time of the video
A digital on-screen graphic (or DOG) is a watermark logo image that broadcasters place in the corner of the screen area to create a brand identity for their program or broadcast.
Having a DOG is essential for a video to create instant professional brand recognition. It creates consistent branding that is visible no matter when or where the broadcast is played or replayed.
A video is often embedded in external pages and having the DOG asserts ownership of the broadcast and maintains a point of contact for the producer of the video.
You can also use a DOG to create interest and audience anticipation of future broadcasts.
A good DOG must:
- Be instantly recognizable
- Not obstruct the content
- Be in a semi-transparent format - usually 50 % transparent white
- Remain consistently placed throughout the broadcast
A lot of your audience will not always be looking at your video. A sweet sound can make users look at the video.
Watch on YouTube: Cory Booker: Why Trump should try being nice on Twitter (at around 1:05 you will hear the sound when a text appears on the screen)
Audio is one of the most important things to get right in a video as many viewers will tune out if the sound is not good, because if you can't hear someone properly it makes it more difficult to understand them.
Background Noise
Having sounds in the background during a recording can be very distracting, and sometimes irritating to a viewer, e.g. construction, traffic, someone in the kitchen banging pots and pans.
For sounds that are constant and consistent (e.g. air conditioners, fans, heaters), editing software can often remove a lot of this noise, but digitally reducing the noise can make your voice sound "thin" or tinny.
Try these tips to minimize unwanted noise:
- Timing – schedule your recording during a quiet part of the day (e.g. avoid meal-times and breaks)
-
Block out & dampen sounds – reduce the amount of noise by physically obstructing it:
- Close all doors and windows - a sealed space will reduce a large amount of noise
- Create a barrier – put obstacles in between your microphone and the unwanted noise (e.g. use a wall divider, or stack some boxes to make a wall)
- Use Carpet/Rugs – soft materials will cut down on echo and ambient noise
- Mic distance – putting your microphone closer to your audio source will make your desired audio louder, and unwanted noise will be less noticeable
- Mic isolation - if you have an external mic like a gooseneck, try to isolate it from your presenation surface. Placing a mic on a table can pick up noise from keyboard strokes and tapping sounds from movement. A wireless lapel mic is better for recording cleaner audio during a presentation. Attaching an articulating arm to the table can help prevent movement sounds and provides a solution to good mic distance.
Silent Spaces – Record “Room Tone”
Room Tone is the ambient noise in a room when no sound is being produced, like a room’s audio fingerprint.The sound is shaped by many things, including the room’s size, shape, and objects, as well as noise created from appliances, e.g. refrigerators.
If you record room tone that has no dialogue or noises, it can be used to improve the audio quality of a video by filling spaces between editing cuts in the dialogue, and it also gives time for graphics to fade in and out.
- When you start recording, wait 30 seconds before you begin
- When you finish your presentation, stay in your position for an extra 30 seconds
- Smile! Don't forget you are still on camera
Microphone types
There are several types of microphones, and each has a distinctive shape and a specific way to be used.
- Dynamic - Stage These are robust, cheap, and durable microphones, and recognisable at any live event or gig. These use a movable induction coil suspended in the field of a magnet, which is resistant to loud sources, e.g. drumkits and guitar amplifiers. For recording vocals, the best position for a dynamic mic is 5-10 cm away from your mouth, with the tip pointed towards your mouth.
- Dynamic - Lapel / Lavalier
These have an induction coil like the stage mics, but are very small omnidirectional mics. They can be fixed in a headset, or have a long cable and a clip so it can be easily moved. For recording vocals, the best position for a lapel mic is over the sternum. - Large Diaphragm Condenser - Studio Condenser mics have a thin flat membrane, or diaphragm, that moves in reaction to sound pressure. This makes them more sensitive, which can produce a more pleasant sound, but also makes them much more delicate. These mics are most receptive when sound reaches the flat surface of the large diaphragm. For recording vocals, the best position for a large diaphragm condenser mic is to have the flat side of the diaphragm pointed towards you, e.g. on a Blue Yeti this is indicated by the "Blue" logo.
- Small Diaphragm Condenser - Shotgun These condenser mics have a much smaller diaphragm, so are more robust that the large diaphragm mics, but are still very sensitive. The most common type is known as a "shotgun", known for the long barrel that it is mounted in, which are directional. For recording vocals, the best position for a mall diaphragm condenser mic, or shotgun mic, is to point the tip of the barrel towards the source.

Figure: How to position your microphone based on type. Microphone Patterns
Recording Patterns are a way to refer to the most sensitive parts of a microphone – the areas where the most sound will be picked up.Some high-end microphones will have options for Recording Patterns, including:
- Stereo - uses a left and right channel, so sounds will feel like it coming from a specific location. Good for music.
- Omnidirectional - picks up sound equally from all around the mic. Best for recording multiple speakers.
- Cardioid - picks up sounds directly in front of the microphone. Best for recording a single speaker.
- Bi-Directional - picks up sounds directly in front and behind the microphone. Best for recording in between two speakers.
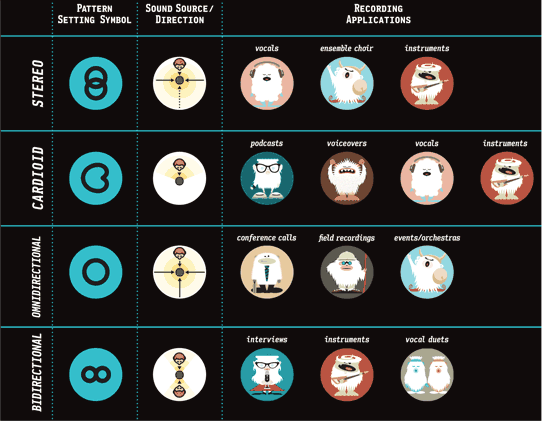
Figure: Recording Pattern symbols and their visual representations. Record Locally
When recording a Microsoft Teams or a Zoom call (e.g. an interview) the software will automatically compress the sound, reducing the quality.So that your final video has the best sound quality:
-
Check your default recording device is set to the microphone you want to record with:
- Right-click the sound icon in the taskbar and select "Sounds". (You can also access the panel through by searching "Change system sounds" in the start menu)
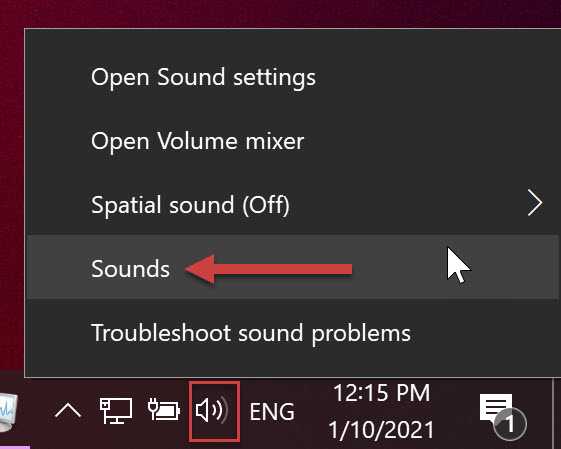
Figure: Opening the System Sounds panel through the Windows taskbar. - Select the "Recording" tab, and check that your desired microphone is set to default device.

Figure: Your default mic is indicated with a green check mark ✅ - Record the audio locally (e.g. you can use Windows' Voice Recorder app)
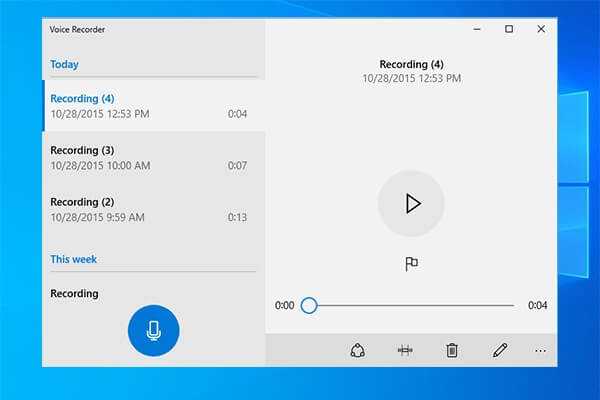
Figure: Voice Recorder, Window’s default audio recording app - To access the recording, you can right-click on the file in Voice Recorder and select "Open file location". The default location for Voice Recorder files is in your user Documents folder, e.g. C:\Users\YourAccount\Documents\Sound recordings
This higher quality audio should be used in post-production. E.g. When editing in Adobe Premiere Pro.
Figure: Good example – Brian Tyler Cohen and Adam Schiff – The setup is likely Zoom and a good mic
Finding the right song or music for your video is exciting, but you should never use any copyrighted work without permission. This is because copyright is designed to protect musicians and creators, so using unlicensed music negatively affects artists.
In addition to this, if you have unlicensed or copyrighted music or songs on your YouTube videos they might be removed from the site or and revenue will instead be distributed to the artist. To avoid this, use licensed or royalty-free music.
Royalty-Free Music
There are many options available for purchasing high-quality music that you can use in both commercial or personal videos.
Some of the top music libraries are:
Audio Network
Audio Network is the best option for editing because it provides a very large range of very high quality music, and even offers variations on instrumentation and durations. The user interface is good, and customer service is great too, with an Account Manager available to assist. This library is used by major production companies and broadcasters around the world (UK based).
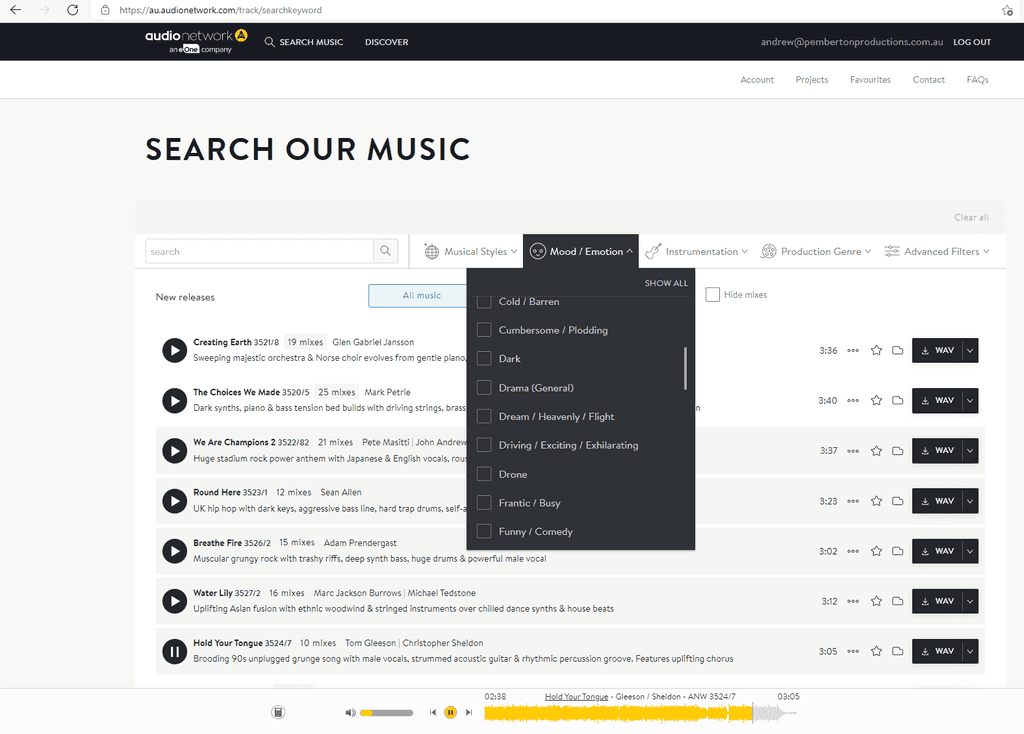
Figure: Good example - Scanning Audionetwork song descriptions can be faster than listening to each song - you can listen and jump forward along the waveform to quickly get the gist of it, then find the perfect powerful crescendo to finish off your video Artlist
Artlist have a regularly updated library with new songs, and is a very cost-effective solution. While the library of music is more limited than Audio Network, they also provide a subscription to sound effects which is very useful. The style sounds more like professional music created by bands and artists but is still designed for corporate, making it a solid choice as a music library.

Figure: Good example - Artlist - for a low annual subscription cost you get unlimited access to really awesome quality music. Audio Jungle
Audio Jungle is great for finding sound effects and Foley sounds. You can also find many great full-length songs that suit corporate video. The music style is typically geared toward a "corporate" market (e.g. online ads and marketing videos), so there is not as much range in selections as you would find in some of the bigger libraries.
You need to capture a presenters’ laptop, and they’re using PowerPoint. You decide to use a screen capture software like Camtasia or ScreenFlow.
While this may be ok in some scenarios, there are many situations where software capture is not an ideal way to capture screens, instead, you should consider a hardware solution.
Using software like Camtasia or Screenflow, you can't guarantee you'll capture the actual output of the laptop.
Another issue is how long it will take you to process the screen recording for editing later; you will need to convert the screen recording from its native format to something like h.264 mp4, which can take a while.
Using a hardware solution, you are able to capture whatever the output of the laptop is, so it doesn’t matter if the presenter changes from extended to duplicated, you will always capture the image being sent to the projector.
Another benefit of using hardware capture is a direct recording of an editable format, for example, a h.264 MP4 file that can be used in your video editor of choice.
Audience shots are great except when you don’t have a full house. In this case you should move people to be next to each other.

Figure: Bad example – The audience shot shows the bad numbers. It would be better to not use this view 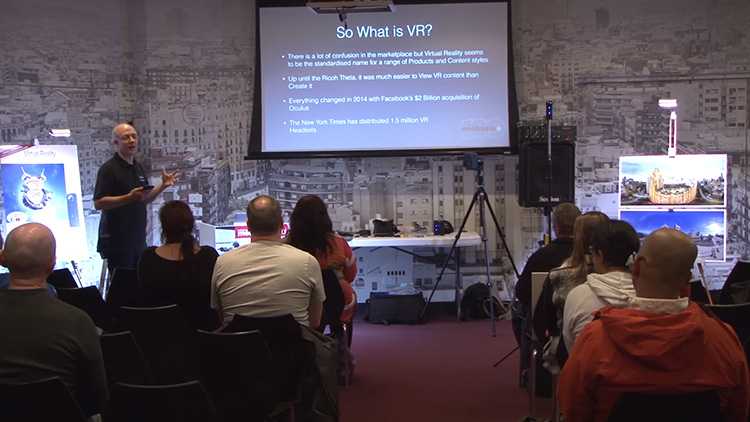
Figure: Bad example – The audience shot shows the bad numbers. You want to use this wide shot, but you need to make sure the attendees not in the shot are moved so their head is visible 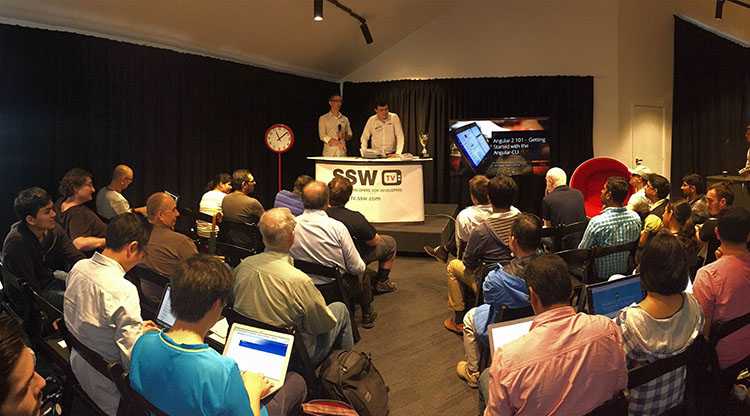
Figure: Good example – A shot from the SSW Chapel where the audience has been moved so they are in shot Tip: To ensure you get the best shot possible, fill seating from the front back. It's a good idea to use VIP signs and place them on the back row to prevent people sitting there initially. These can be moved later when all seats are filled at the front.
Figure: Using a VIP sign on the back row to prevent people sitting there initially It is important to back up your work regularly to a separate location to prevent any loss of data. Ideally, back-ups are saved to a server or cloud-based file storage for ease of access.
When building projects, ensure that files and folders are labeled clearly and consistently. For example, use different folders for different file types - footage, images, exports, projects, etc. This ensures that another team member (or your future self) can easily find all the assets associated with the project. File names and structure should be consistent – both among team members and over time.
A good file structure should also include storing finished projects separately from the working files. In a team environment, this system can also incorporate file ownership with different users.
File names are also very important - they are the principal identifier of a file. They need to include information about the content and context of the file.
Always use version numbers when saving – don’t use the word ‘final’. It is much easier to follow the progression of a project with numbers, both to find the latest version or to revert back to a previous one if needed.
Trying to manage your large library of digital files can be pretty difficult using just Windows File Explorer or Mac's Finder as you are limited to folder structure and file names, which can lead to lost and abandoned assets due to ridged search functionality. When trying to preview your assets, your operating system may also lack support for previewing proprietary formats (E.g. Fujifilm's .RAF or Nikon's .NEF). A good Digital Asset Manager (DAM) like Adobe Bridge solves this.
While there are several digital asset managers on the market, each with its strengths and weaknesses, for the majority of small teams, independent creatives and the budget-conscious, Adobe Bridge is more than enough to handle the task.
Why do you need a stock library?
When video editing, you might need a certain shot that was not captured on production due to oversite or budget constrictions. That is why editors turn to stock footage libraries like the following:
- filmsupply.com
- storyblocks.com
- artlist.io
- stock.adobe.com
- motionarray.com
- elements.envato.com
- pixabay.com
- pexels.com
While stock footage sites are great for getting high-quality footage for your project, they lack the personal touch of your company or brand. That is why it is important to build your own internal stock library. While this does add extra effort to each project you shoot to build your library, the benefits of doing so include:
- Branding awareness - Having footage that includes your logos
- Culture - Showing off the people that work with you
- Ownership - Copyright ownership of the footage
How to get started with creating your stock library
- You should open a new timeline and drop all the B-Roll clips that you have collected into that timeline.
- Then cut out the unusable footage from the head and tail of each clip.
- Break up footage if needed, into smaller clips or different takes.
- Make colour corrections if needed.
- Name each clip with a name that references where the footage is from, what the shot type is, and a unique identifying number.
- Finally export each clip individually to your stock library.
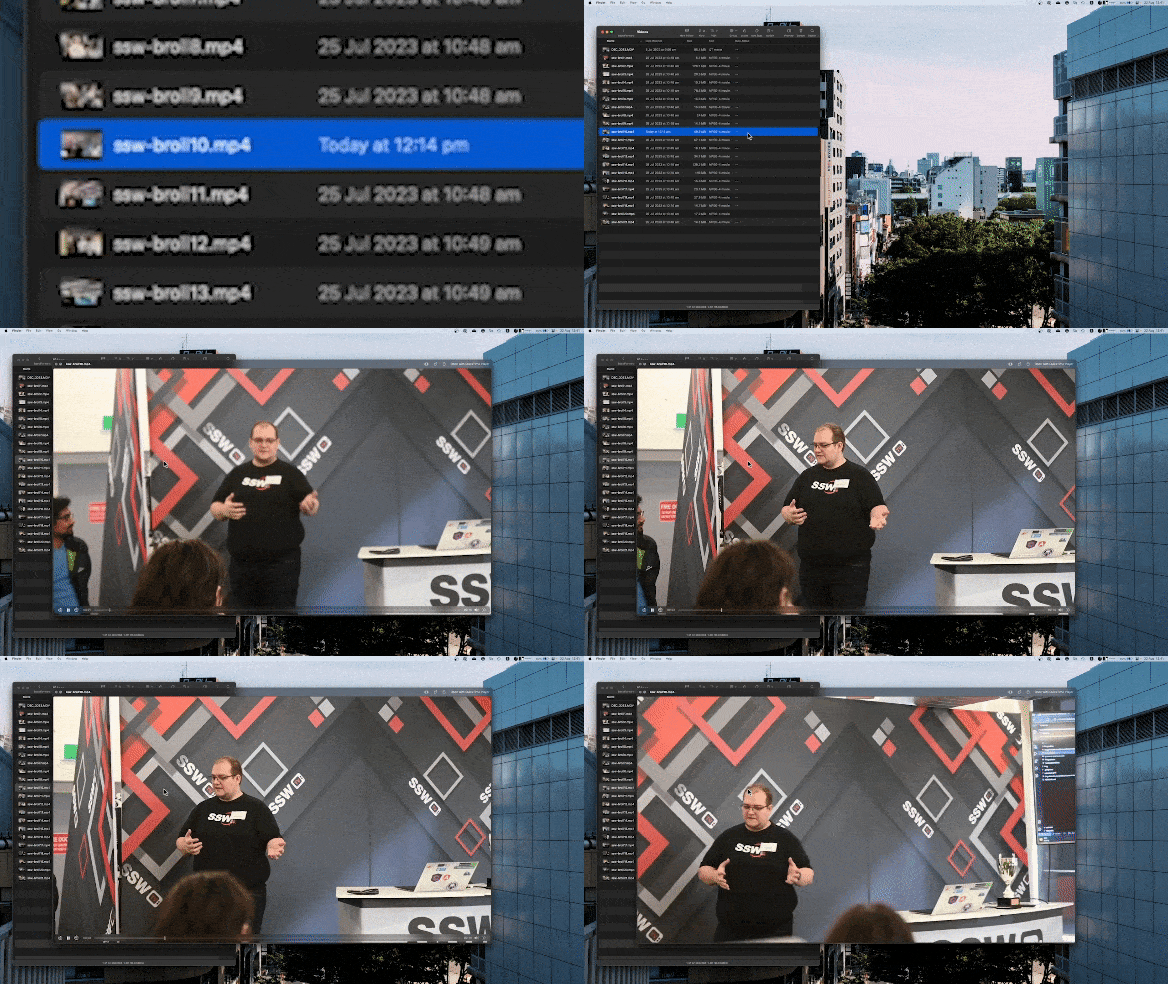
Figure: Bad example - Untreated clip with unhelpful file name E.g. "ssw-Broll" 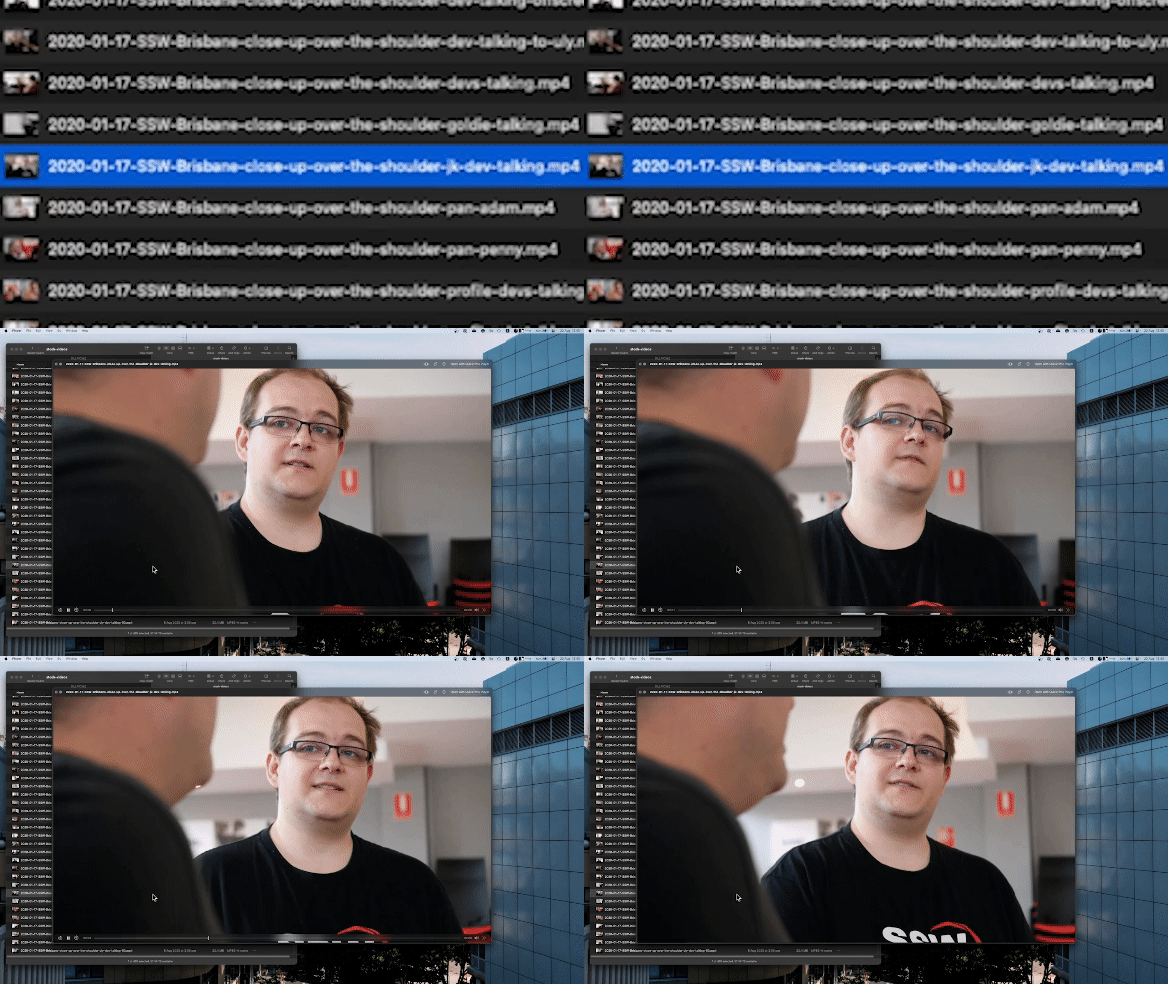
Figure: Good example - Treated clip lip with usable section and searchable file name E.g. "2020-01-17-SSW-Brisbane-close-up-over-the-shoulder-jk-dev-talking" From there you can use a digital asset manager like Adobe Bridge to add further metadata information to help with navigating your personal stock footage library.
What is Adobe Bridge?
Adobe Bridge is a creative digital asset manager that lets you preview, organize, edit, and publish multiple creative assets (including Adobe Photoshop, InDesign, Illustrator, After Effects, and Dimension files) with thumbnails and rich previews. Edit metadata. Add keywords, labels, and ratings to assets. Organize assets using collections, and find assets using powerful filters and advanced metadata search features.
Organize your media files
By creating a well-structured folder hierarchy and sticking to a standard naming convention, we can make sure media assets won't get accidentally deleted or go missing.Consider organizing videos based on projects, clients, or types of footage (E.g., interviews, B-roll, aerial shots).
Utilize metadata
Leverage the power of metadata with tags and or keywords and enhance searchability. In Adobe Bridge you can provide additional information about your media asset. Add relevant details such as project name, shoot location, keywords, and descriptions to your file, doing so will make it significantly easier to search for specific videos and streamline your workflow.
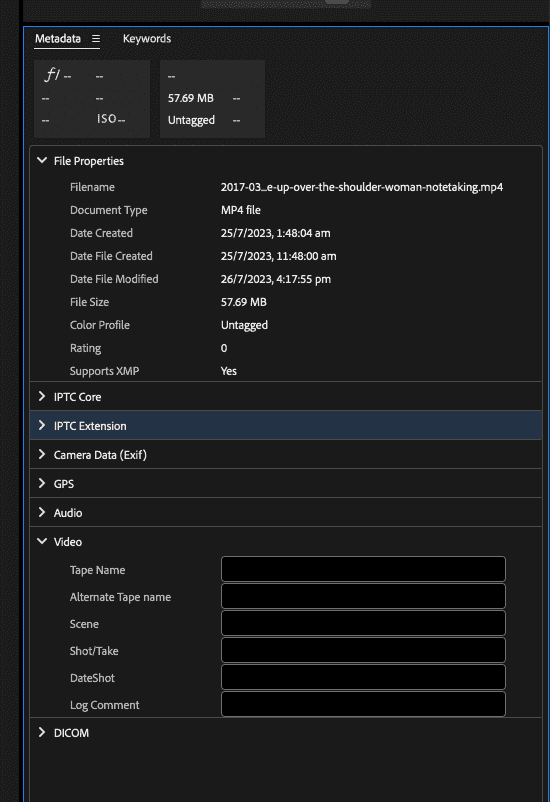
Figure: Adobe Bridge metadata tab 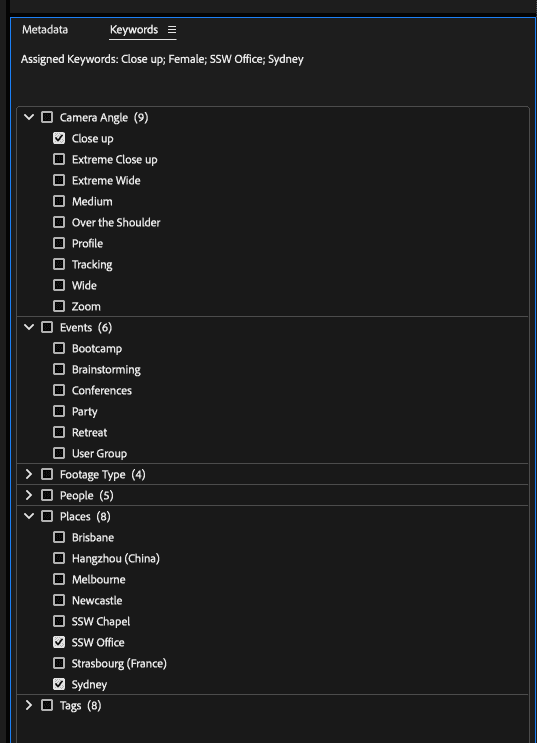
Figure: Adobe Bridge keyword list tab Importing and Exporting Keywords for team collaboration
Although Adobe Bridge is made without multi-user support. With a workaround, It is still possible to use this program in a small team, this is made possible due to the ability for keywords to be written onto each file directly. So as long as your team uses a shared keywords list, searching your media library should be simple.You can do this by importing and exporting keywords .XML file for your team to use.
-
First Navigate to the Keywords tab and right-click the tab to open the dropdown menu.
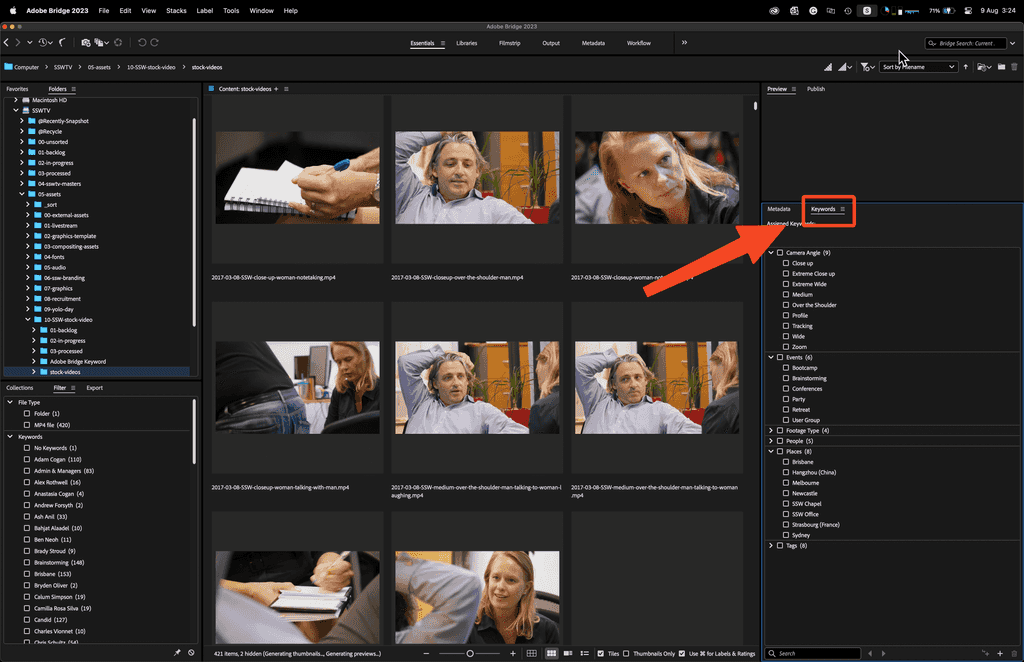
Figure: Adobe Bridge Keywords tab location -
Next, click on export to export your current keyword list.

Figure: Export keywords list - Save this file with a version number to a shared folder accessible to everyone in your team.
-
To import an existing keyword list, navigate and click on import from the same list. Then select the .XML file you want to import.
Figure: Import keywords list
Sometimes you have multiple versions of a video as you improve it. Normally you would zz’d the title of old versions.
But if you need to delete a video, then it is important to take a copy of its data - views and comments can be simply emailed to the Product Owner prior to deletion.
Are you a video producer looking to take your content to the next level? By utilizing ChatGPT, you can save time and produce high-quality videos that engage your audience and generate traffic.
Here are some painful things video producer's go through when creating content:
- Writer's block - Thinking of new video ideas can difficult
- Chapter markers - Making chapter markers is particularly time consuming for longer form videos
- Title and description - It can be overwhelming to try and think of the best title and description for your video
With the help of ChatGPT, you can create compelling video scripts, optimize your SEO, and streamline your workflow. Say goodbye to disorganized content and hello to the power of AI-assisted video production.
You can get AI-generated ideas for your video concepts, generate effective titles and descriptions, and even create a script template for future videos.
Don't let the admin side of video production hold you back - spend more time making the actual video with the below prompts:
1. Video concept + outline
"
As an SSW TV video producer, create a project outline for a video script. (Goal: Organize content, Constraint: Use bullet points)
Concept: {{ insert your concept }}
Write it back to me using these subheadings:1. What is the Concept? (30 words or less):
{{ Answer }}
- What is the Goal?
{{ Answer }}
or if it is a CTF, pick from these:
Educating others
Gathering opinions
Aligning us (about solving the problem consistently)3. Who is your audience and what do you want them to do immediately after this video?
{{ Answer }}
· To developers - beginner
· To developers - advanced
· Through developers to business decision makers
· other
4. What are 5 options for the working video title?
{{ Answer }}5. What are the key messages? (List 2-3)
{{ Answer }}"
2. Video title and description
"Video title + description: As a SSW TV video producer, create:
An SEO effective title (give 5 options)
Description (500 character limit)
Hashtags (give 30 max)
Chapter Markers (chapter markers based on the important sections of content. Put the time stamp first and for the beginning of the section of the content. Do not give more than {{ xx }}.
My Goal is to get lots of views
Use the below transcription for a YouTube video:{{ transcript }}"
3. Chapter markers
"User Let's think step by step First, I am going to give you a video transcript. Second, you are going to read the transcript as if it were an essay Third, you will identify the main chapters of the essay. Fourth, you will identify the most fitting title for each chapter. Fifth, you will list the chapter markers that you've made, with accurate timestamps, in the format: '00:00 - {{ chapter title }}' Sixth, do not give a summary, only give the chapter markers
{{ transcript }}"
4. Thumbnail creation
"As a SSW TV video producer, what is a good thumbnail for this video content type. (Goal: Improve click-through rate, Constraint: Use proper design guidelines)
{{ insert title and description }}"5. Blog post
"As a SSW TV content creator, write a blog post about a video project. (Goal: Generate traffic, Constraint: Use proper SEO guidelines)
{{ insert video transcript }}"6. Planning video content
"As a SSW TV content manager, create a yearly content calendar for a video projects. Research and pitch new video ideas.(Goal: Plan ahead, Constraint: Use proper scheduling tools)"
7. Script templates
"As a SSW TV video producer, create a script template for future videos based on the below transcript. (Goal: Streamline workflow, Constraint: Use proper formatting guidelines)
{{ insert video transcript }}"In the world of video production, capturing pristine footage is not always feasible. Environmental factors, equipment limitations, and shooting conditions can introduce unwanted digital grain (aka "noise") and imperfections into your videos. Fortunately, there are ways to rescue your footage and elevate its quality to new heights, using denoising and enhancement tools.One of the best tools for this is Neat Video, a plug-in that works with most NLEs (non-linear editors), including Adobe Premiere Pro & After Effects, Final Cut, and Davinci Resolve.
Neat Video
Neat Video is a professional-grade noise reduction solution that effectively reduces various types of visual noise, including grain, sensor noise, compression artifacts, and random flicker, among others.By employing advanced algorithms and artificial intelligence, Neat Video analyzes your video frames to identify and suppress noise, resulting in significantly cleaner and more visually appealing footage.
When to Use Noise Reduction
- Low-light footage: When the light conditions are too low for your camera's sensor, this will make the sensor need to work harder to get an image, which often results in grainy footage.
Note: This can sometimes be avoided when filming by turning up your lights, adding more lights, or opening your aperture.

Figure: Good example - Noise reduction applied to low light footage - High ISO Footage: If your camera is set to a high ISO setting is used often leads to grainy videos. Neat Video excels in reducing this noise, allowing you to salvage otherwise unusable footage and restore clarity and detail.
Note: Try to avoid this when filming by keeping your ISO settings low.
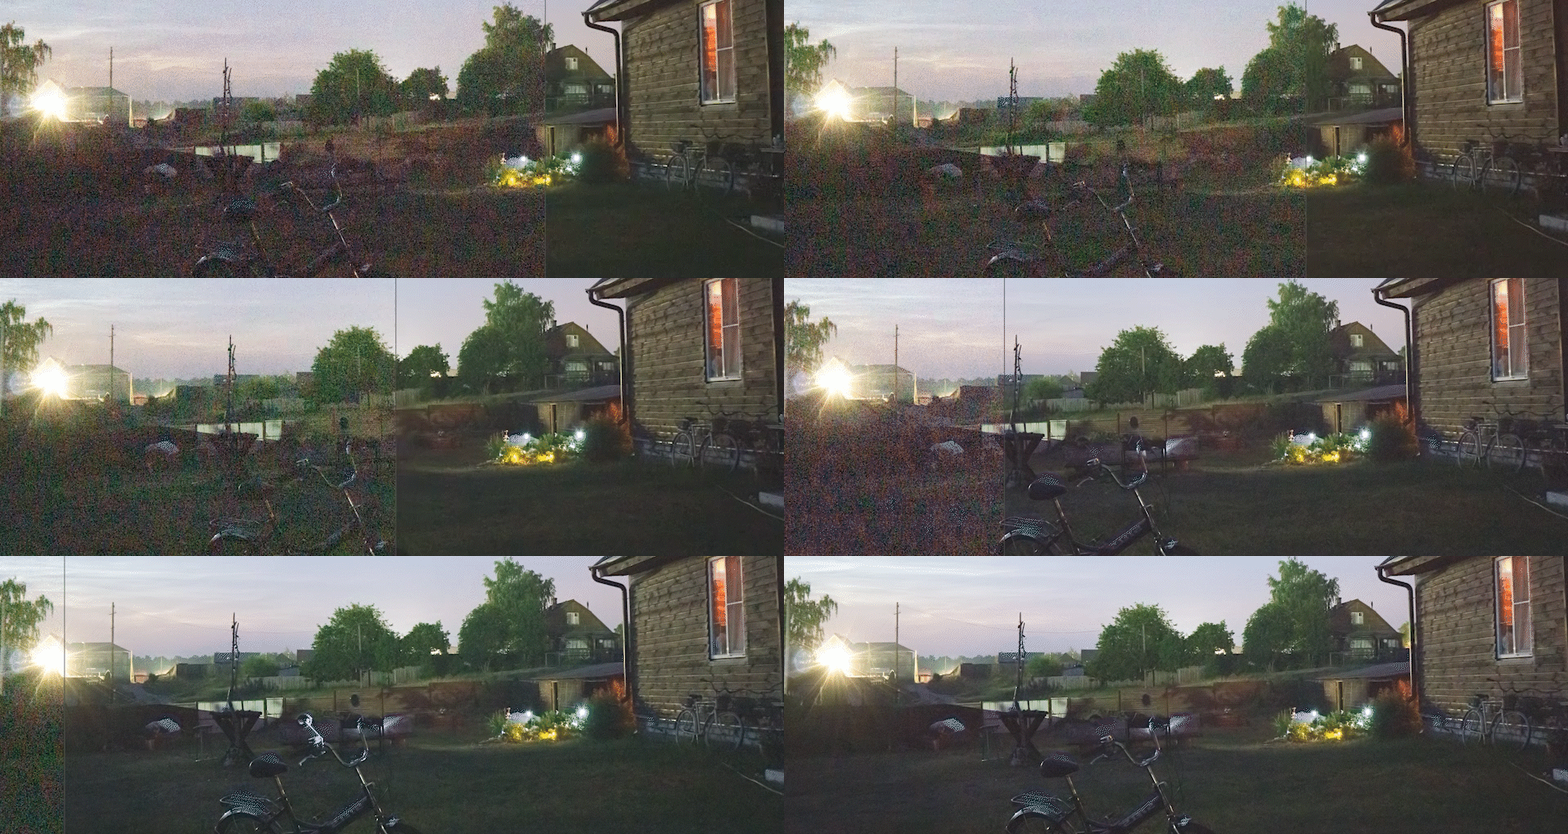
Figure: Good example - Noise reduction applied to high ISO footage - Flicker: when a camera's framerate clashes with a light's frequency, it can cause a flickering effect. This can be quite distracting and can ruin otherwise beautiful shots.
Note: You can try to avoid this while shooting by matching your camera's framerate to the Hertz frequency of the light. (e.g. American lights run on 60Hz, so shoot at 60fps. Australian lights run at 50Hz, so shoot at 50fps)
Figure: Good example - Removing flickering caused by a light's power frequency - Dirty Sensor or lens, and Restoration of Vintage Footage: When working with damaged, older or vintage footage, noise, scratches, dust, and artefacts may be prevalent. Neat Video can be a valuable tool in cleaning up the footage without removing its nostalgic charm.
Figure: Good example - Removing dust and film grain - Compression artefacts: Footage shot at low resolution, or on a low quality camera, may have blocky or pixelated video compression that can reduce the quality.
When wouldn't you use Noise Reduction?
As Noise Reduction tools need to analyze your footage with AI and intelligent algorithms, it adds a large amount of computing to your workflow.This can slow down your editing process considerably, so the best thing to do is try to avoid needing it in the first place by always aiming to record in a well-lit space with professional-grade equipment and correct camera settings.In short, if you don't need it, don't use it!
- Minimal Noise Levels: If your video has minimal or negligible noise, applying Neat Video might not yield significant improvements. In such cases, using the plug-in may be unnecessary, saving you processing time and resources.
Tips to get the most out of your Noise Reduction
- Use flat colors to build your noise reduction: Neat Video can detect noise and grain more effectively on a flat or plain surface (e.g. something that is all one color and shade). When building the noise reduction profile, use a frame in the video that has a large, uniform surface.
Note: Film something flat - If you are filming in conditions that you know will need denoising, either before or after you get the shot, point your camera to an object that has a large, uniform surface (e.g. a wall, table, etc.) - Pre-render your videos: As noise reduction can take a lot of processing, you can save a lot of CPU & GPU power by rendering out a denoised video of your source footage, then using your denoise version of the video to edit with.
- Low-light footage: When the light conditions are too low for your camera's sensor, this will make the sensor need to work harder to get an image, which often results in grainy footage.
When you are presenting, you should always do a tech check before you start. This will ensure that you are ready to go and that you don't have any technical issues during your presentation. Ideally, this happens the day before and on the day of the event. At a minimum, do one on the day of the event.
When you are ready to do the tech check, call the AV team and ask them to walk you through what to check.
Some common things to check are:
- Microphones - Audience can hear the presenter
- Microphones - If there are multiple presenters, they should practise handing over to the next presenter smoothly
- Speakers - Audience can hear the computer audio
- Displays - Audience can see the presenters screen
- Recording/Stream - Do a test recording or check the stream is working
- Cameras
- Lighting
Video: Drone Shots of the SSW Offices - France, Sydney, Newcastle, Melbourne, Brisbane and Hangzhou
Drone footage of Sydney and Newcastle captured by:William Fardell (https://www.greentreemedia.net/)
When creating video content, it's crucial to start by setting up the world and the location where your content is taking place. This initial impression can significantly impact how your audience engages with your video.
One effective way to achieve this is through the use of drone footage.
Why establishing the world matters
- Professionalism - Incorporating drone footage signals a commitment to high-quality production, which can leave a lasting positive impression on your audience
- Visual impact - Drone shots can showcase epic landscapes and unique perspectives, captivating viewers and making your content visually engaging
- Spatial awareness - By showing the environment from above, drone footage helps viewers understand the geographical context of the video's location
Video: No establishing shots. The video starts abruptly without establishing the setting, leaving viewers confused about where the content is taking placeVideo: Establishing shots using a drone 0:20 - 0:32. The video begins (after the hook) with stunning drone footage of the scenic location, setting the stage for the content and immersing the audience in the world of the videoRecording your screen is a great way to demo a change for a client, show how reproduce a bug or sharing something cool you've been working on.
There are many ways to record your screen. Here are some popular options:
Remote recordings
- Zoom
-
- Perfect if you are alreay on a call see
- StreamYard (advanced - good for live streaming)
Simple recordings
- Loom (only 25 videos free)
- Snagit
-
Clipchamp Recommended - Used at SSW, great start for "Done Videos"
- Direct upload to Clipchamp
Advanced recordings
Tip #1: If you are recording the steps to reproduce a bug, it might be better to use Chrome Recorder instead.
Tip #2: Zoom, and Microsoft Teams are cloud-based services, so consider whether an option such as Snagit, Loom or Clipchamp that records locally is more appropriate. If you record with Zoom, post-production editing will be required
Tip #3: Sometimes, all you need is a GIF to demonstrate something. For this, you can record one with a tool like Gifox (MacOS only).
Tip #4: If you're on a call with someone and you want their audio to come into the video as well, make sure you "share system audio".
Tools like ZoomIt from the Sysinternals suite let you enlarge, pan, and draw while recording the screen so viewers never lose track of what matters. They are quick to set up, work with any recorder, and help you avoid redoing takes because people missed a cursor movement.
Getting started with ZoomIt
Follow these steps before you hit record:
- Install ZoomIt from Microsoft Sysinternals and pin it
- Set shortcuts for zooming, drawing, and clearing the screen in the "Options" dialog, then practice the flow before your session
- Use the tool to spotlight the key fields, buttons, or hotkeys you reference, especially when you are producing a Done Video
- Finish each segment by clearing annotations so the next step starts clean
Using this tool helps you keeping the audience engaged, reduces editing, and makes your recording align with the clarity expected in a video recording.
Video: Zoomit FREE Tool Levels Up Tutorials - Live screen annotations (4 min)What about Mac users
If you record on macOS, try Brilliant to zoom, annotate, and script actions while capturing the screen. It delivers the same clarity benefits as ZoomIt and adds automation to speed up repeat recordings.
See Homebrew install command:
brew install --cask brilliantEditing multi-camera interviews using traditional methods can be a painstakingly slow and labor-intensive process. Editors often spend hours syncing and cutting footage from different camera angles, which can lead to inefficiencies and delayed project delivery.
Why use Autopod?
Autopod offers a robust solution for streamlining the editing of multi-camera interviews. By automating much of the synchronization and cutting process, it allows editors to focus on refining the content rather than getting bogged down in technical details.
Benefits of Autopod
- Time-Saving: Autopod significantly reduces the time required to edit multi-camera interviews by automatically syncing and cutting between different angles
- Efficiency: The automation of repetitive tasks allows editors to concentrate on creative aspects, improving the overall quality of the final product
- Consistency: Autopod ensures a consistent editing style throughout the project, maintaining professional standards across all interviews
How to implement Autopod in your workflow
Step-by-step guide
- Install AutoPod: Download, install and subscribe to AutoPod
- Import footage: Begin by importing all camera angles and audio tracks into your editing software
- Sync footage: Use Autopod to automatically sync the different camera angles based on audio waveforms. Each video angle needs separate audio track to sync and make cuts properly
- Initial cuts: Allow Autopod to make initial cuts, switching between angles based on speaker activity and other predefined rules
- Review and refine: Review the automated edits and make any necessary adjustments to ensure the flow and pacing meet your standards
- Export: Once satisfied with the edits, export the final video for delivery
AutoPod in action
Using AutoPod to cut multi-camera footage for an interview with multiple speakers.
Figure: Good example - Autopod efficiently handles synchronization and primary cuts, allowing the editor to focus on refining the content
By integrating Autopod into your editing workflow, you can save significant time and enhance the efficiency and quality of your multi-camera interview projects. This tool is a game-changer for editors looking to streamline their processes and deliver high-quality videos promptly.
